User Profile Module User Guide
Overview
The User Profile Module provides a detailed view of employee information in the system. The profile page displays personal, contact, and employment information that is crucial for HR and administrative management.
Overview of the Profile Page
The Profile Page is the central hub for viewing and managing the personal information of an employee. This includes details such as name, contact details, employment type, nationality, and more.
Components of the User Profile Page
Below is an explanation of the UI components available within the User Profile section.
Key UI Components
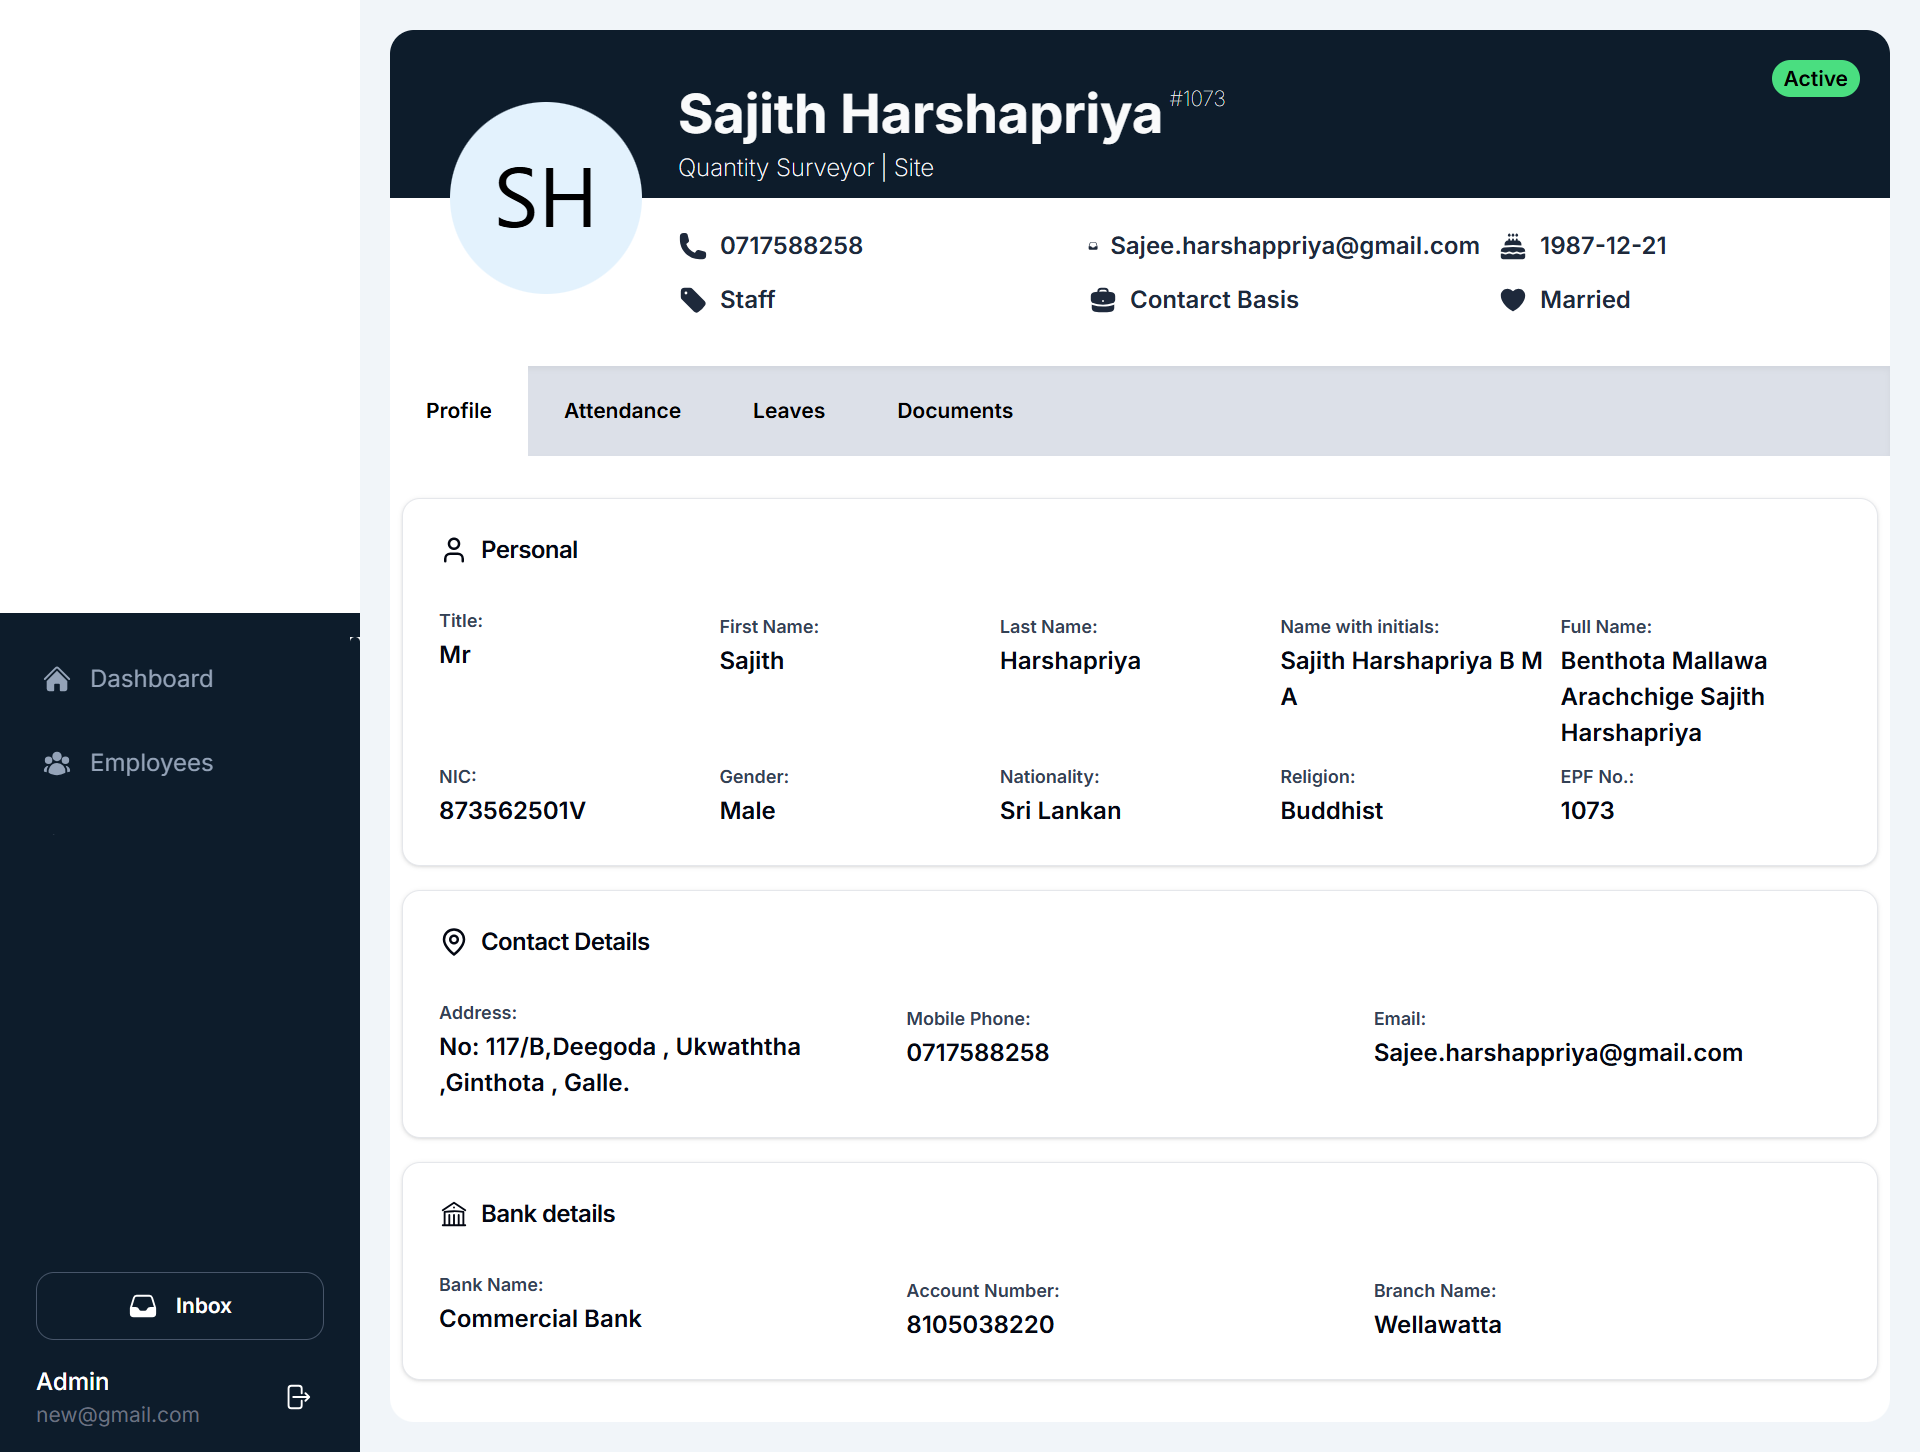
Navigation Sidebar: The sidebar is located on the left-hand side of the page, providing quick navigation to other modules like Dashboard, Employees, Recruiting, Payroll, Reports, Master Details, and Event Calendar. Profile Section: This is the section you are currently viewing.
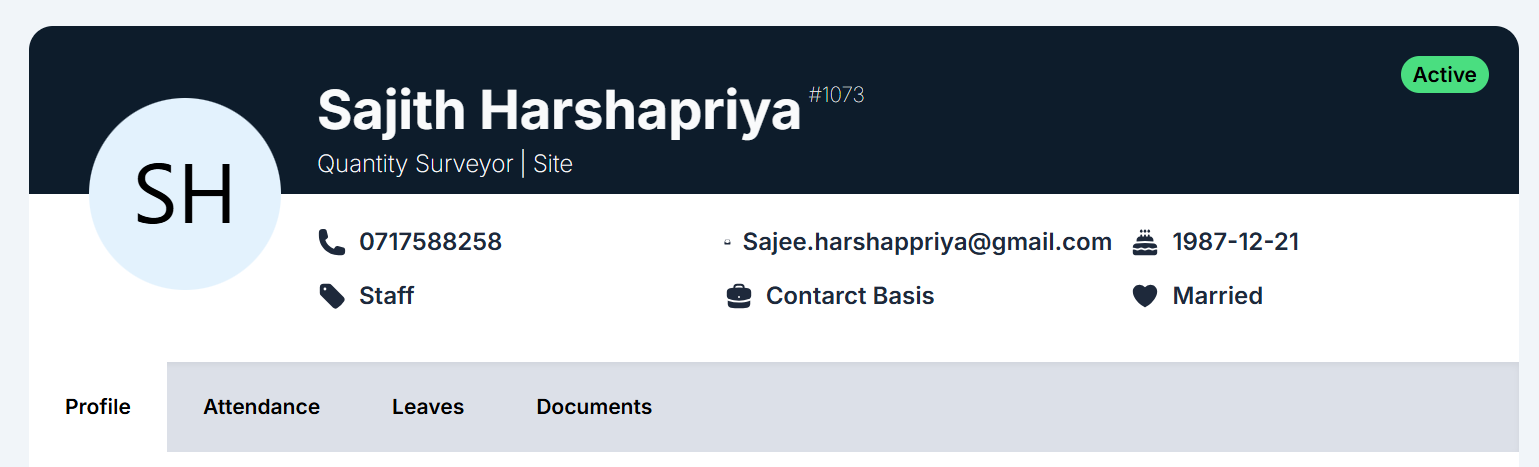
Profile Header:
- Employee Name & Position: Displays the employee's full name, role, and workplace
- Employee Status: Indicates whether the employee is Active or Inactive
- Employment Type: Displays whether the employee is on a Contract Basis, Permanent, or other employment types
- Phone Number & Email: Provides the employee's primary contact details
Tabs for Detailed Information:
- Profile: Shows the employee's personal information such as name, nationality, gender, religion, etc.
- Attendance: Displays attendance records, including check-in times, work hours, etc.
- Leaves: Displays the number of leave days taken, pending leave requests, and leave balances
- Documents: Allows the viewing of documents related to the employee.(e.g., ID proofs, contracts).
Employment Information
- Role/Position: The employee's job role or designation(e.g., Quantity Surveyor | Site).
- Employment Type: Indicates the nature of employment (e.g., Contract Basis, Permanent, etc.)
- Status: Whether the employee is currently Active or Inactive
- Joining Date: The date when the employee joined the organization
- Contract Basis: If the employee is on a contract, this will show.
Personal Information
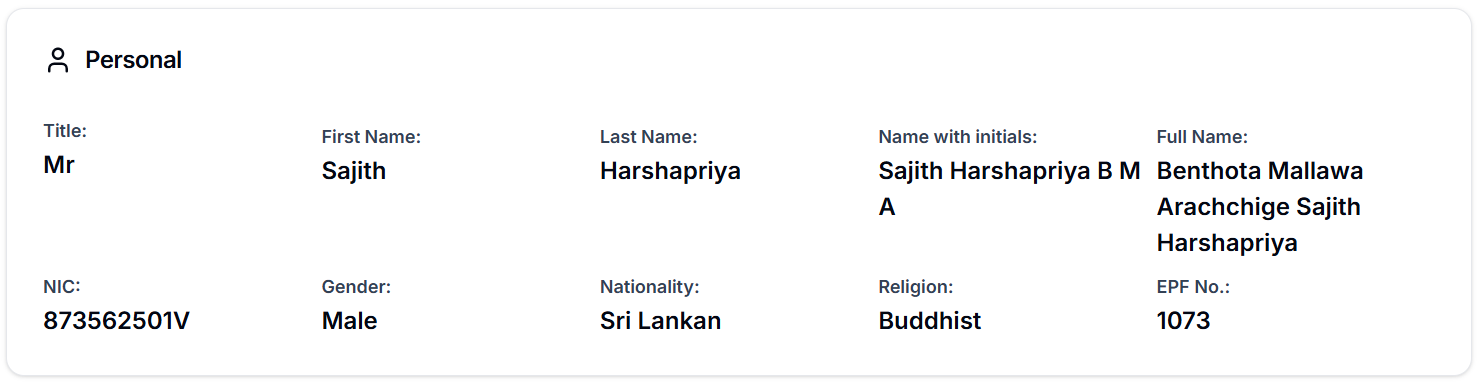
- Title: The employee's prefix (Mr., Mrs., etc.)
- First Name: The employee's first name
- Last Name: The employee's last name
- Full Name: The complete name of the employee
- NIC: National Identity Card number
- Gender: The gender of the employee
- Date of Birth: The employee's birthdate
- Nationality: The nationality of the employee(e.g., Sri Lankan, Indian).
- Religion: The employee's religion(e.g., Buddhist, Christian).
- EPF No.: The Employee Provident Fund (EPF) number, used for tracking contributions.
Contact Information

- Address: The residential address of the employee
- Mobile Phone: The employee's mobile number
- Email: The email address used for correspondence with the employee.
Bank Details

- Bank Name: The name of the employee's bank(e.g., Commercial Bank).
- Account Number: The employee's bank account number
- Branch Name: The branch where the employee holds an account
Managing the Profile View
- Employee Overview: This page provides a snapshot of an employee's personal, contact, and professional details
- Tabs Navigation:
- Attendance Tab: Click to view the attendance records for the selected period
- Leaves Tab: Navigate here to see leave records such as pending and approved leave
- Documents Tab: You can view the documents uploaded for the employee, such as identity proof, bank details, etc.
- While the Profile section does not allow for direct editing or deleting information, it is an essential area for viewing employee details and updating information in other sections.
User Guide: Profile - Attendance Module
The Attendance Module allows users to monitor and track the attendance records of employees. This section is part of the user profile and provides details about the employee's daily attendance, including time in, time out, work hours, overtime (OT), and any remarks related to attendance.
User Interface Overview
The Attendance Module is accessed from the Profile Section of the employee's details page. The interface is designed to provide a detailed view of the employee's attendance on a monthly basis.
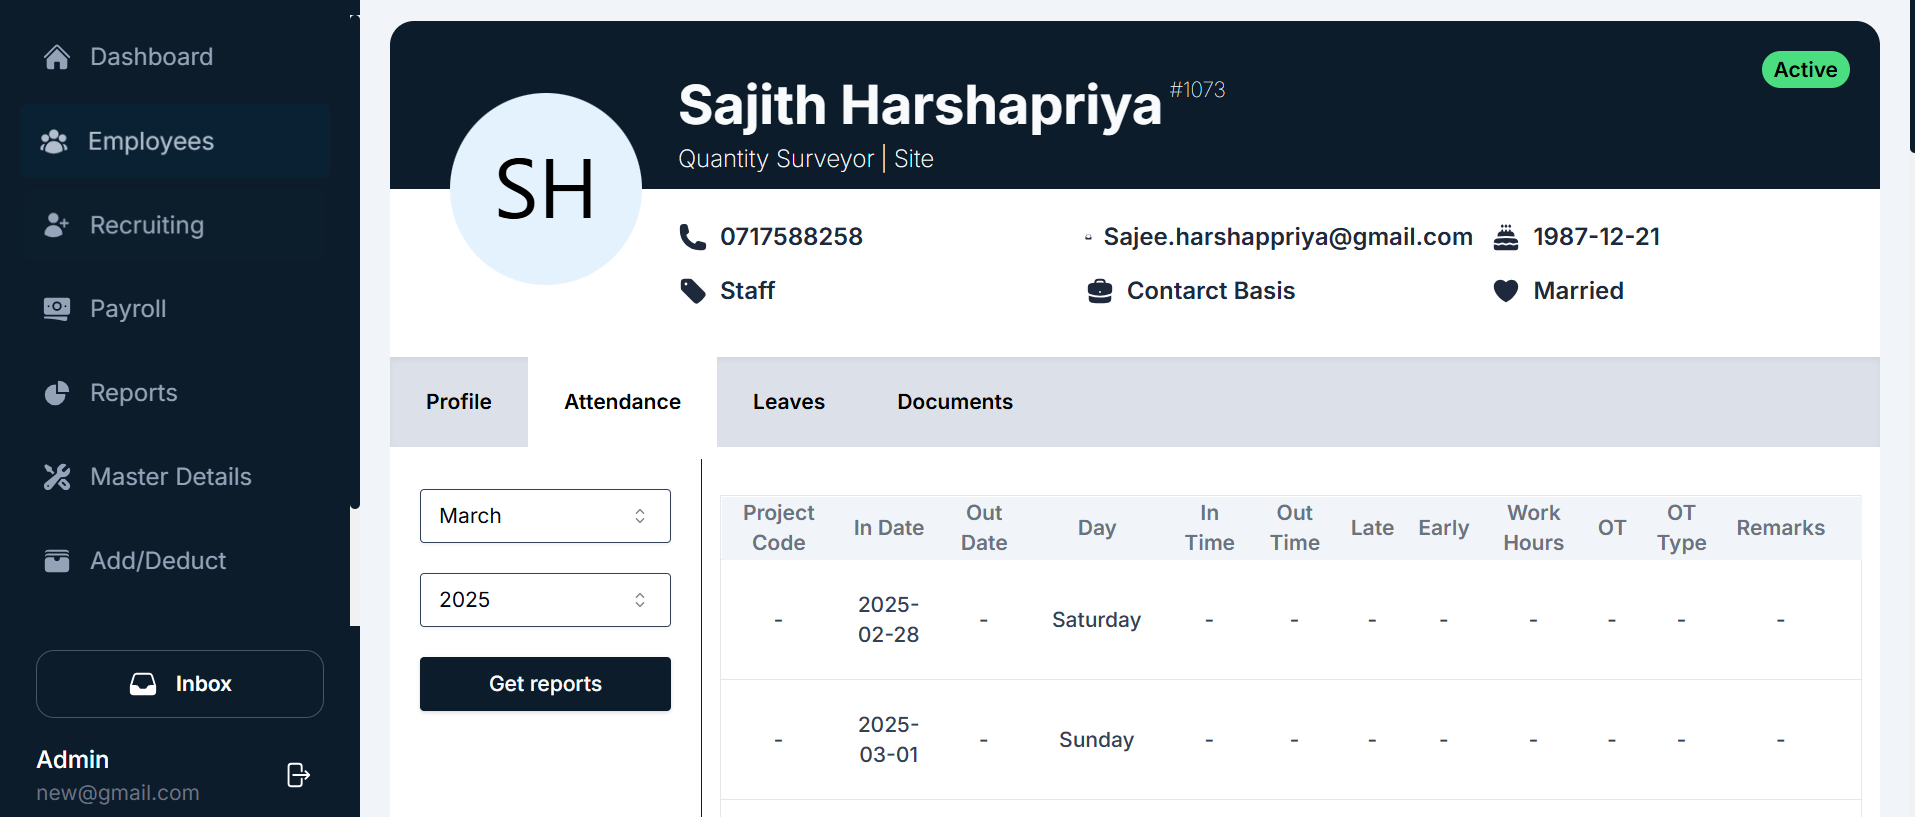
Key Components of the Attendance Interface
Header Section: Displays the employee's name, position, employee ID, contact details, and employment type
Attendance Table: Contains the following columns:
- Date Column: Displays the date for each workday in the selected month
Month & Year Selector: Allows users to select the specific month and year for viewing attendance records
Generate Reports Button: Allows users to generate attendance reports for the selected month
Using the Attendance Module
- Viewing Employee Attendance Records: Navigate to the Profile section and click on the Attendance tab
- Changing the Month/Year: Select the month and year and click the Get reports button to reload attendance records
- Generating Reports: After selecting the month/year, click Get reports to generate the desired report
Attendance Record Fields
- Project Code: Indicates the project code for the employee, if applicable.
- In Date: Shows the start date of attendance for the day
- Out Date: Shows the end date of attendance for the day
- Day: The day of the week (e.g., Monday, Tuesday, etc.).
- In Time: The time the employee clocks in for work.
- Out Time: The time the employee clocks out after completing the workday.
- Late: If the employee clocks in after the designated start time, this will indicate "Yes" or "No".
- Early: If the employee leaves work before the scheduled time, it will indicate "Yes" or "No".
- Work Hours: Total work hours for the day, calculated based on the In Time and Out Time.
- OT Type: If overtime was worked, this will specify the type of overtime.
- Remarks: Any additional notes related to the employee’s attendance for that day.
Summary
- Attendance Tracking: The Attendance module provides a comprehensive view of employee attendance, helping HR track work hours, lateness, early departures, and overtime.
- User-Friendly Navigation: Employees' attendance can be tracked for any given month with easy-to-navigate controls and reports.
- Reporting Capabilities: Attendance data can be exported or reported to higher management for detailed analysis.
User Guide: Leave Module in Profile
The Leave Module within the Profile section allows employees to manage and track their leave requests, including pending leaves, approved leaves, and applying for new leaves. Below is the detailed guide on how to use the Leave Module effectively.
User Interface Overview
The Leave section is divided into several key components to provide a clear overview of the employee’s leave status and allow for new leave applications.

Components of the Leave Interface
- Remaining Leaves: Displays the total number of remaining leaves the employee has for the year. It also shows the number of short leaves and the total number of leave days taken.
- Pending Leaves (2025): A table that displays any pending leave requests for the specified year. Initially, it shows "No results" if no leave applications are pending.
- Approved Leaves (2025): A table showing approved leave applications for the year. This section will populate once the leave applications are approved.
- Apply for Leave Button: A button provided below the remaining leaves section to initiate the leave application process. Clicking this button opens a popup where the employee can enter details for their leave request.
Steps to Apply for Leave
- Navigate to the Leave Section: Go to the Profile page in the HR system and click on the Leaves tab.
- Check Remaining Leave Balance: Review your remaining leave balance at the top of the section. It shows the total remaining leaves and whether any short leaves are available.
- Click "Apply for Leave": To apply for leave, click the Apply For Leave button.
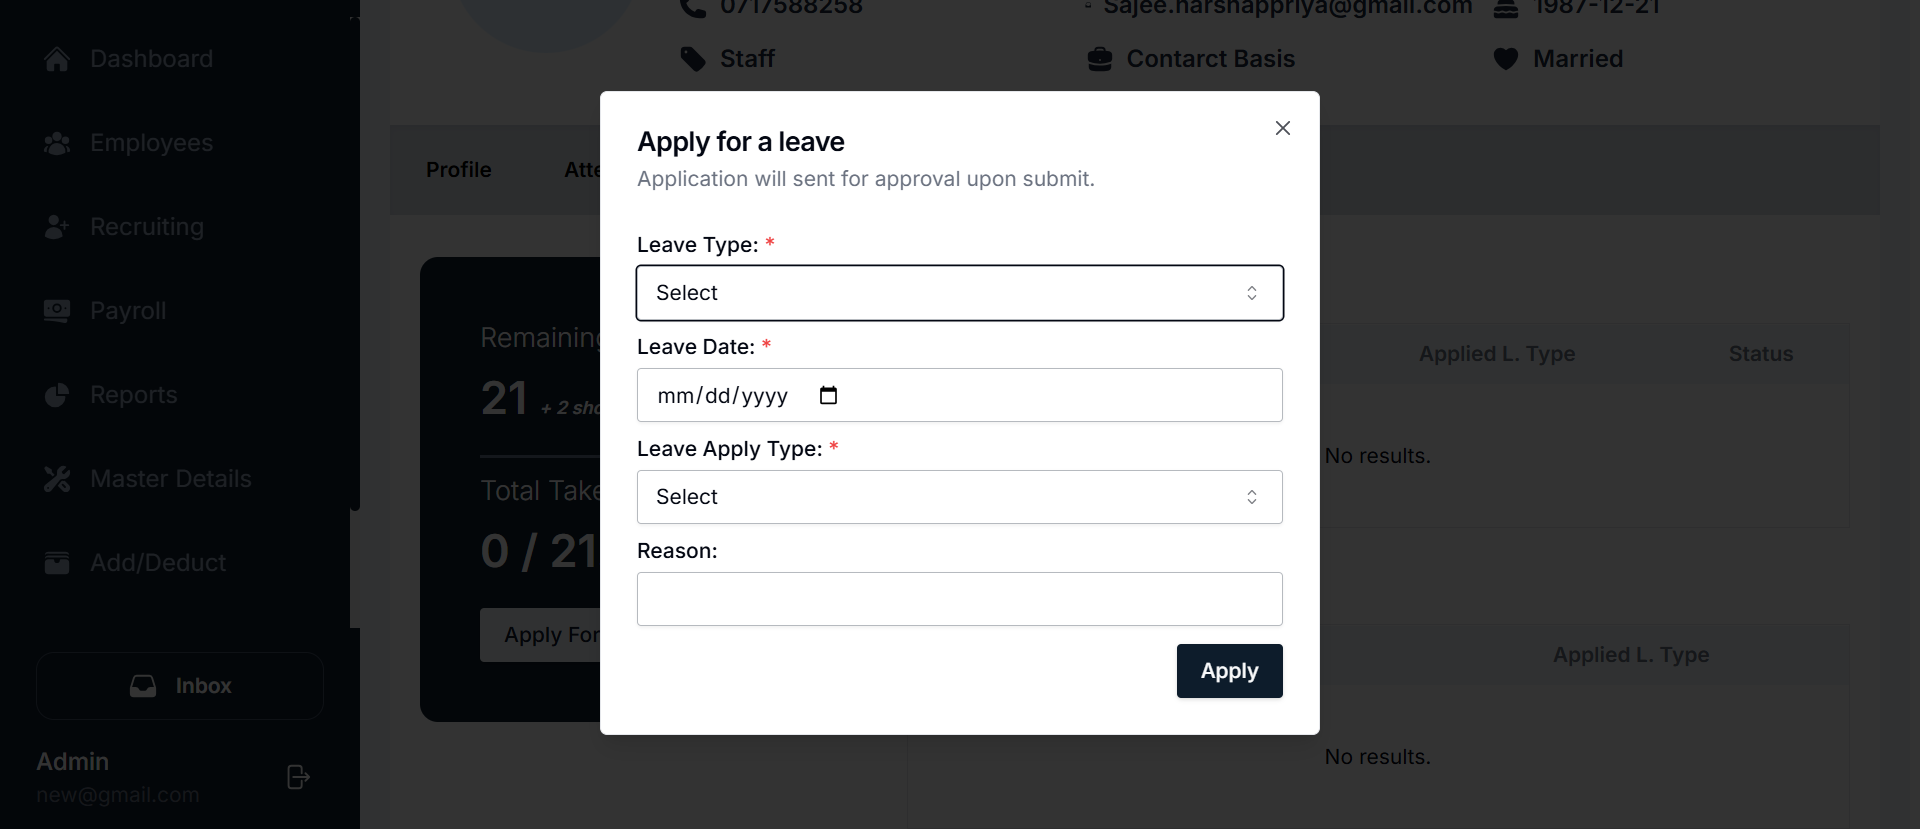
- Fill in Leave Application Form: A popup form will appear where you must enter the following information:
- Leave Type: Select the type of leave you wish to apply for (e.g., Sick Leave, Annual Leave).
- Leave Date: Choose the date for which you are requesting leave. The date format will be MM/DD/YYYY.
- Leave Apply Type: Select whether the leave type is Short Leave, Full Day Leave, or Other.
- Reason: Provide the reason for your leave request. (This section may be optional depending on the organization’s policies.)
- Submit the Leave Application: After filling in the required details, click the Apply button to submit the application. The leave request will be sent for approval.
- Leave Status: Once submitted, the status of your leave request will show up as "Pending" in the Pending Leaves (2025) table. Once the leave is approved, it will be displayed under Approved Leaves (2025).
Managing Leave Requests
- Pending Leave Requests: If your leave application is still under review or awaiting approval, it will be displayed in the Pending Leaves section.
- Approved Leave Requests: When a leave request is approved, it will move to the Approved Leaves section, indicating that the leave has been granted.
Leave Details Table
- Project Code: (if applicable) This column shows the project code related to the leave request.
- In Date: The date on which the leave is to start.
- Out Date: The date on which the leave ends.
- Day: The day of the week the leave is being taken.
- In Time & Out Time: The exact start and end time of the leave, if applicable.
- Late & Early: Tracks whether the employee was late or early before or after the leave period.
- Work Hours: The total hours worked during the leave period, if applicable.
- OT Type: If overtime (OT) is applied during the leave period.
- Remarks: This section allows for any notes or additional comments related to the leave request.
Summary
- Remaining Leaves: Displays the current leave balance.
- Pending Leaves: Shows any leave applications that are yet to be approved.
- Approved Leaves: Displays all approved leave applications.
- Apply for Leave: Button to initiate a leave request form.
- Leave Application Form: Includes fields for selecting leave type, leave dates, reason, etc.
- Leave Status: Reflects whether the leave is pending or approved.
By following these steps, employees can easily apply for and track their leaves, making the leave management process more efficient for both employees and HR administrators.
User Guide: Documents Module in Profile
The Documents Module within the Profile section allows employees to preview and access their stored documents. This guide provides a detailed overview of the module, how to use it, and how users can view their documents.
User Interface Overview
The Documents Module is part of the Profile section and is designed to help employees view and access their important documents, such as identification proofs, contracts, certifications, or other relevant files.

Components of the Documents Interface
Navigation Sidebar: Users can access the Documents Module by navigating to Profile from the sidebar and clicking the Documents tab.
Your Documents Section: This section displays all uploaded documents related to the user. If no documents are uploaded, the section will display "0 items".
Document List: If documents are uploaded, they will appear in a list format showing details such as:
- Document Name
- Upload Date
- Document Type
- Preview Option
How to Use the Documents Module
Viewing Uploaded Documents
- Navigate to the Profile module: from the sidebar
- Click on the Documents tab: To open the Documents section.
- If documents are available: they will be listed in the "Your Documents" section
- Click on a document name or preview button: (if available) to open and view the document.
Downloading a Document (If download functionality is available)
- Navigate to the Documents Module: from the sidebar
- Click on the document you want to download: To open it in a new window or tab.
- Download the document: You may have the option to download it if available.
Managing Documents
- Only previewing is allowed: Users cannot delete or update documents.
- Updating a document: If you need to update a document, contact the HR department or system administrator for assistance.
- Ensure documents are up to date: Make sure required documents are accessible.
- Use the preview feature: To verify your documents without downloading them.
Summary
- The Documents Module: Allows users to preview uploaded documents.
- No option to delete or update: From this module.
- Easy access to important files: For verification and reference.
- Contact HR or administrator: For updates or changes needed to documents.
By following these steps, employees can effectively use the Documents Module to view and verify their stored documents.