Recruiting Module - User Guide
Recruiting Module Overview
The Recruiting Module is designed to help HR teams manage job openings, applications, and candidate selection effectively. It consists of two main sections:
- Job Openings
- Candidates
This guide will focus on Job Openings, including creating, updating, and viewing job openings.
Job Openings Subcategory
The Recruiting Module helps HR teams manage job openings and candidate applications efficiently. This guide focuses on the Job Openings subcategory, detailing how to create, update, and view job postings.
User Interface Overview
The interface is divided into different sections to provide an easy navigation experience.
Left Navigation Panel
- Dashboard – Overview of the system.
- Employees – Manage employee records.
- Recruiting (Main Module):
- Job Openings (Currently active section)
- Candidates (Manage applications from candidates)
- Payroll, Reports, Master Details, Add/Deduct, Event Calendar, Profile, Inbox – Other functional modules.
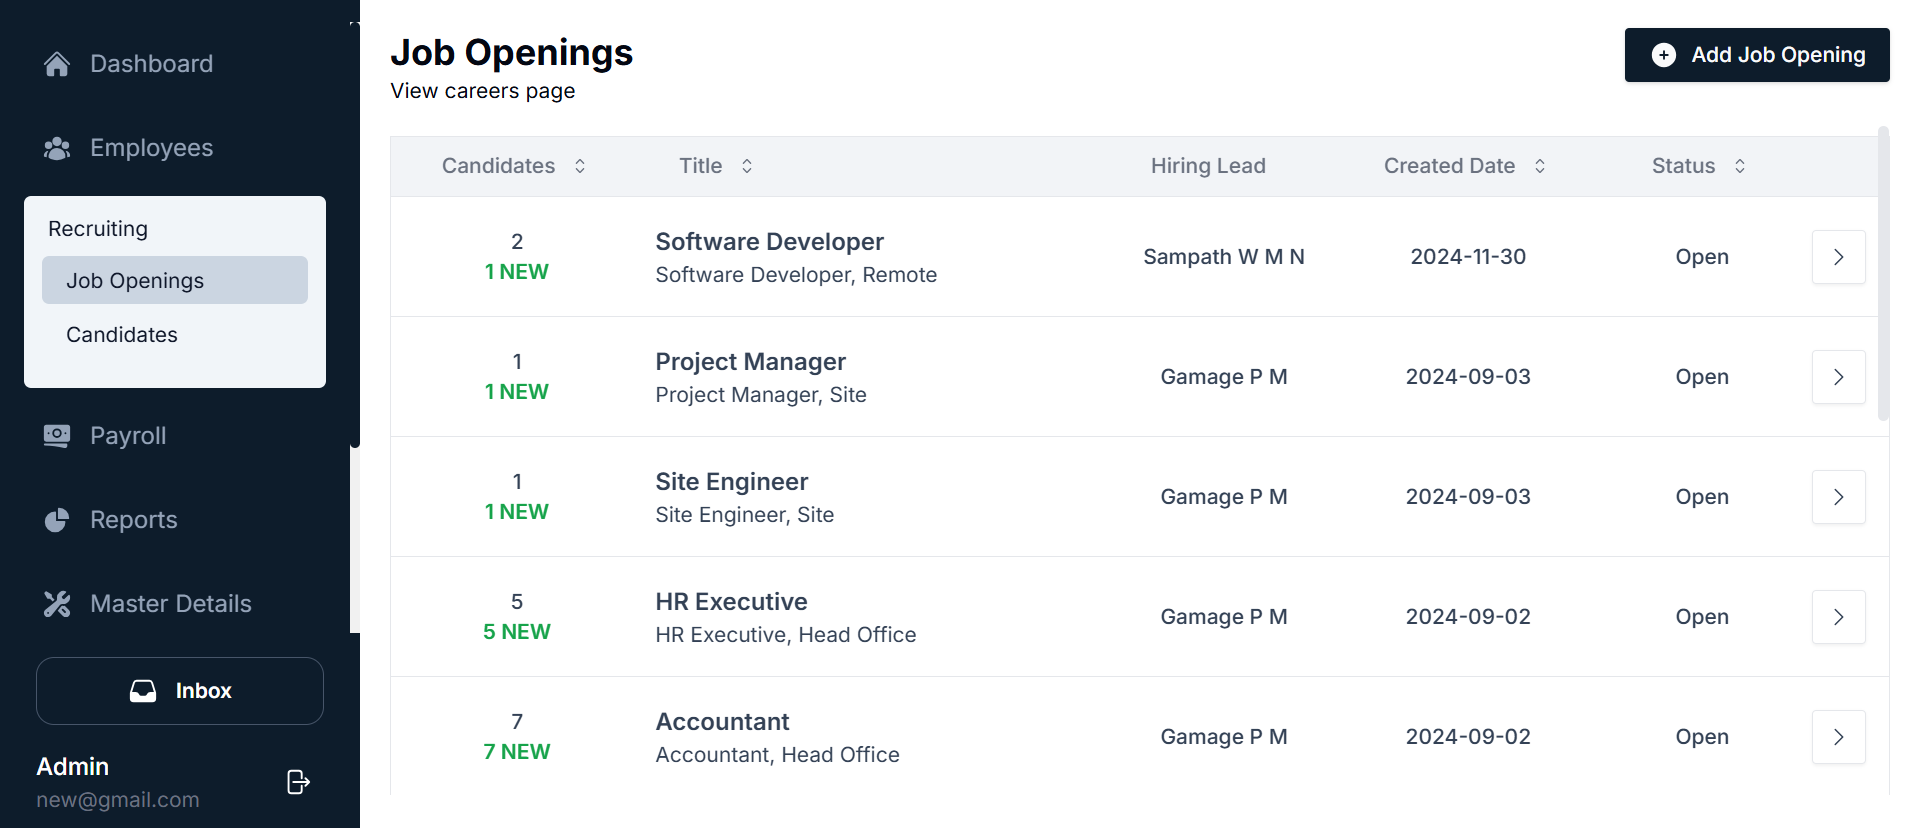
Job Openings List View
Upon accessing Job Openings, users are presented with a structured table containing:
- Candidates – Displays the number of applicants, with "NEW" highlighting fresh applications.
- Job Title – The name of the job position, e.g., Software Developer, HR Executive.
- Hiring Lead – The person managing the recruitment process for that position.
- Created Date – The date when the job posting was created.
- Status – The current job status (e.g., Open, Closed).
- Action Button (Arrow Icon →) – Clicking this directs users to the Update Job Opening Page.
Top Navigation for Job Openings
- "Add Job Opening" Button – Allows the user to create a new job posting.
- "View Careers Page" – Redirects to the company's external job listing site (if integrated).
Adding a New Job Opening

Navigating to the Add Job Page
- Click on the "Add Job Opening" button at the top-right.
- A New Job Opening Form will appear.
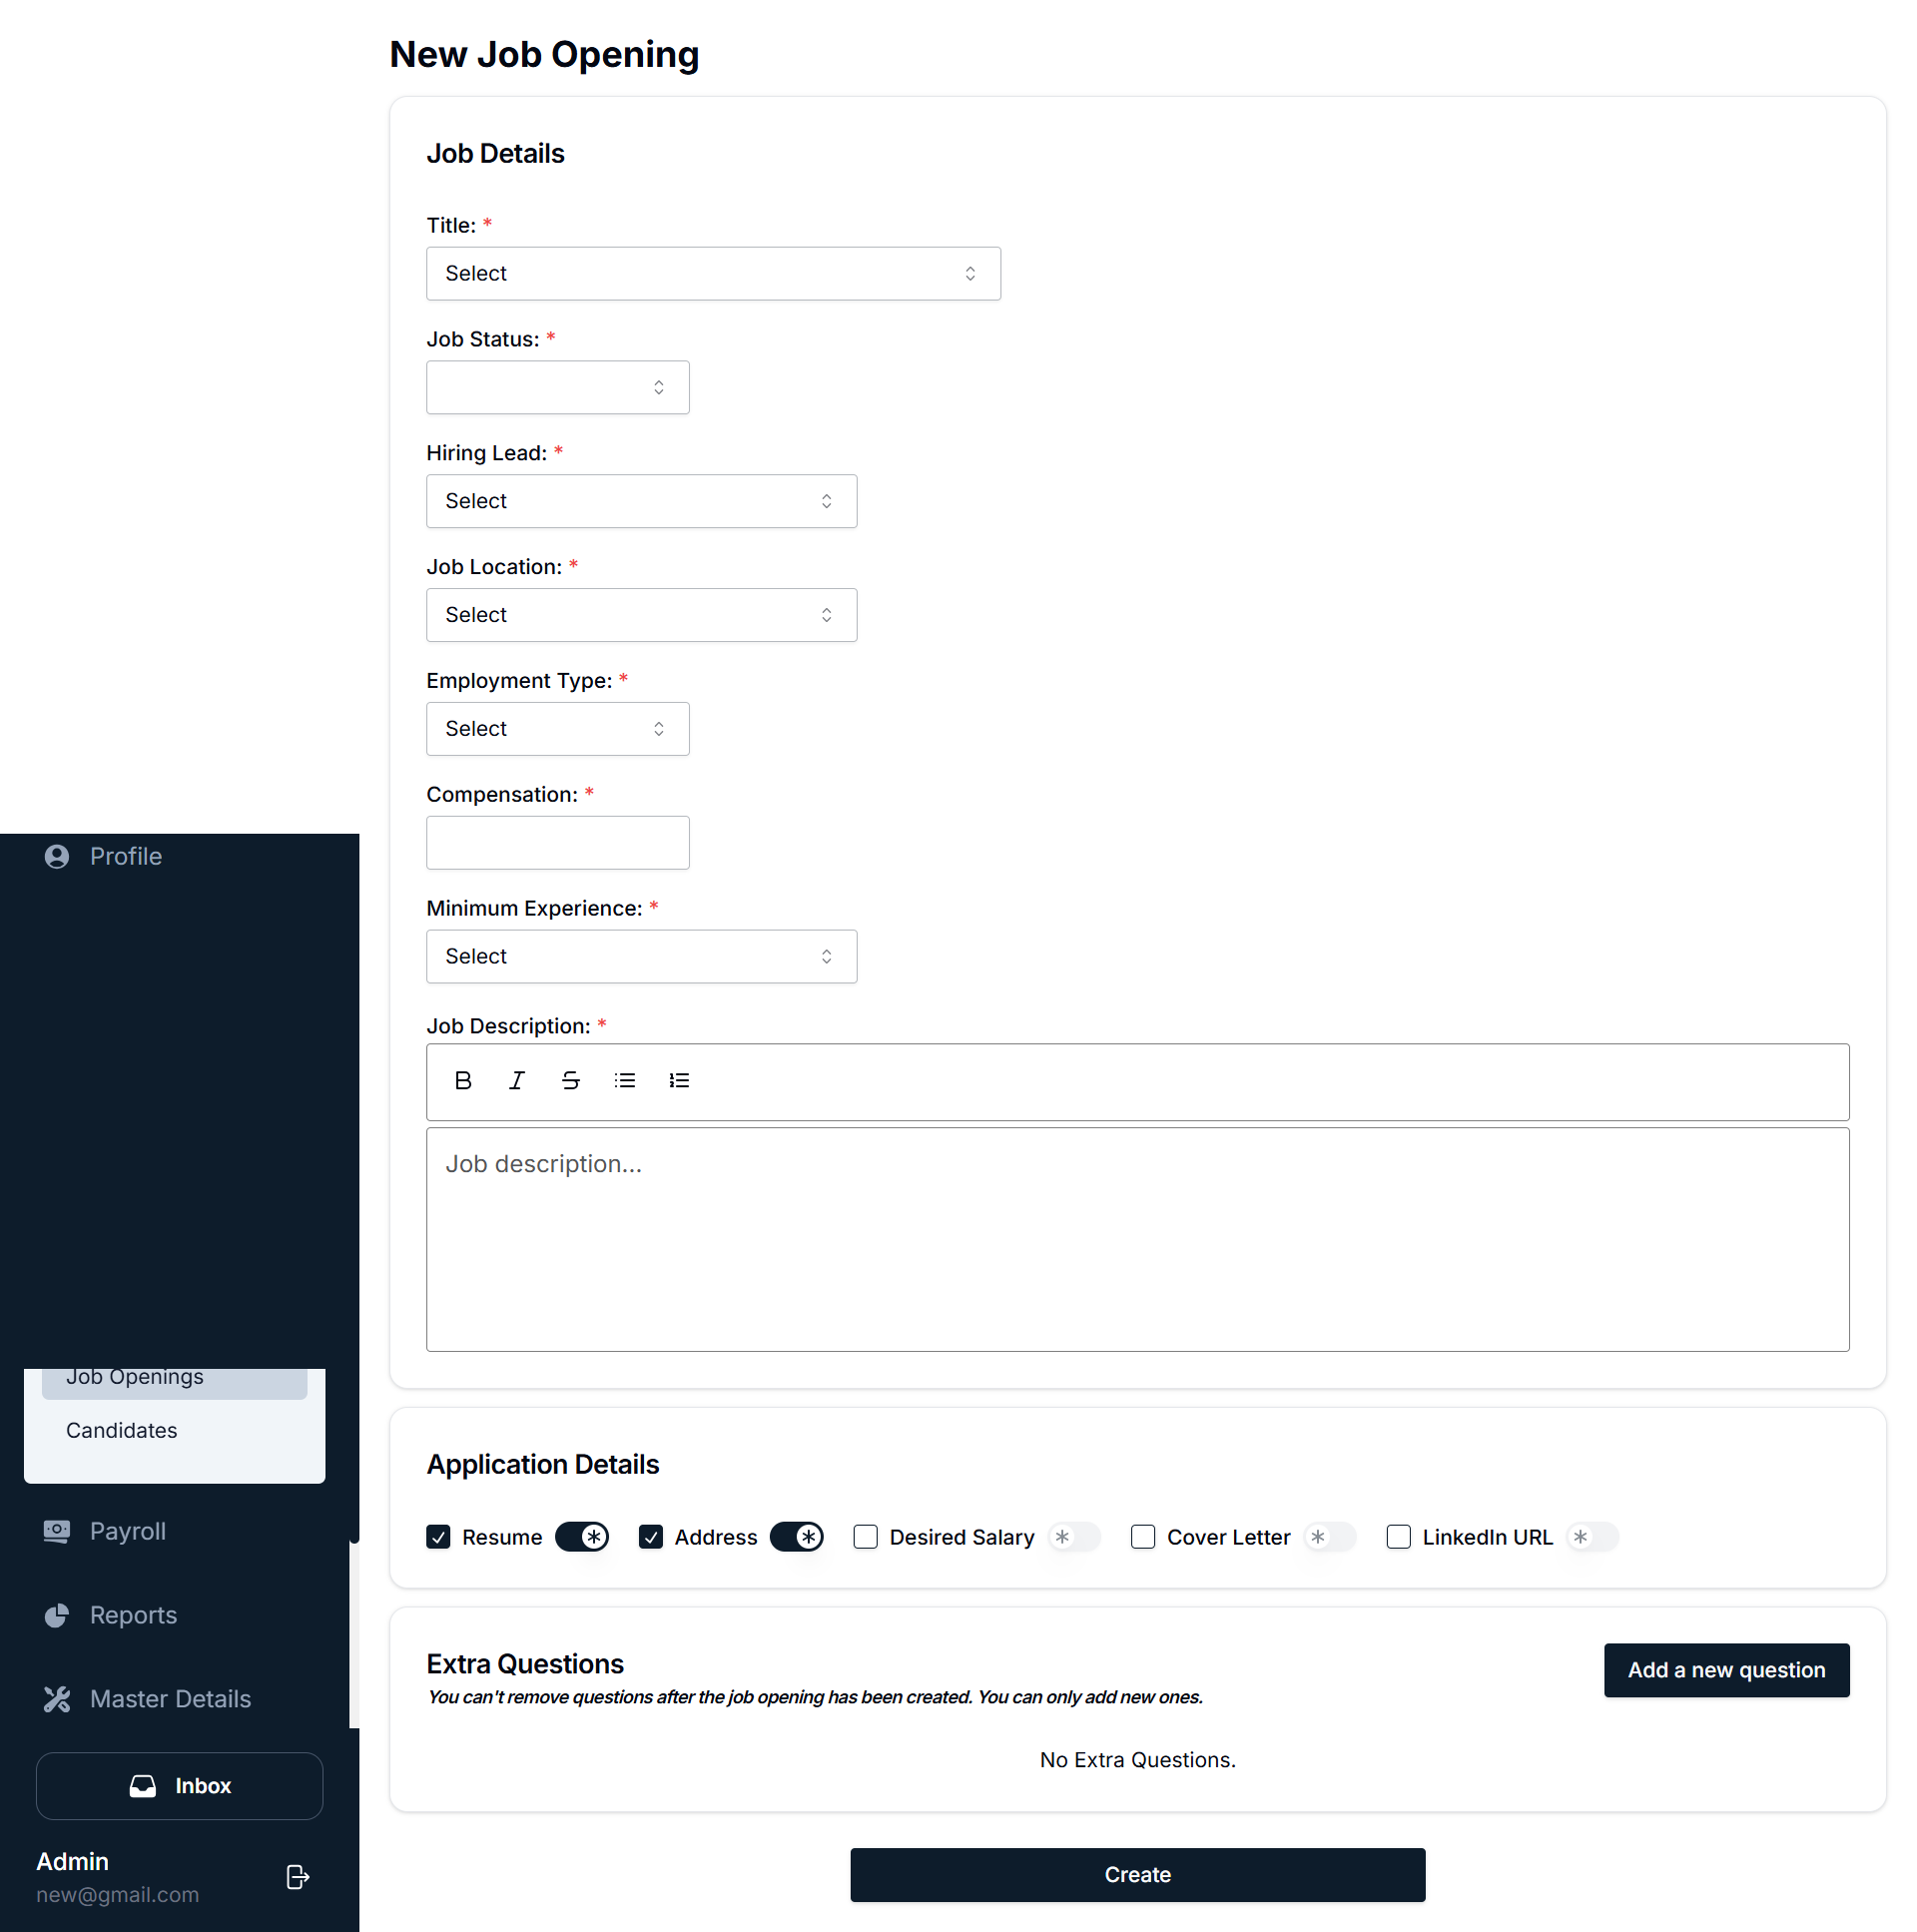
Job Creation Form User Interface
The form consists of multiple sections.
Job Details Section
- Title – Select the job title from a predefined list.
- Job Status – Choose between Open and Closed.
- Hiring Lead – Select the HR or team leader responsible for hiring.
- Job Location – Specify if the position is remote, onsite, or hybrid.
- Employment Type – Choose between full-time, part-time, contract, etc.
- Compensation – Enter salary details.
- Minimum Experience – Select the required experience level (e.g., Entry-Level, Experienced).
- Job Description – Use the rich text editor to write an in-depth job description.
Application Details Section
- Resume Requirement – Choose if candidates must submit a resume.
- Address & Cover Letter – Specify if these fields are mandatory.
- Desired Salary & LinkedIn URL – Optional candidate input fields.
Extra Questions Section
- Users can add custom questions for applicants, such as:
- "How many years of experience do you have?"
- "What programming languages are you proficient in?"
- Note: Once a job is created, existing questions cannot be deleted. Only new ones can be added.
Posting the Job
- Once all fields are completed, click "Create" to publish the job.
Updating a Job Opening

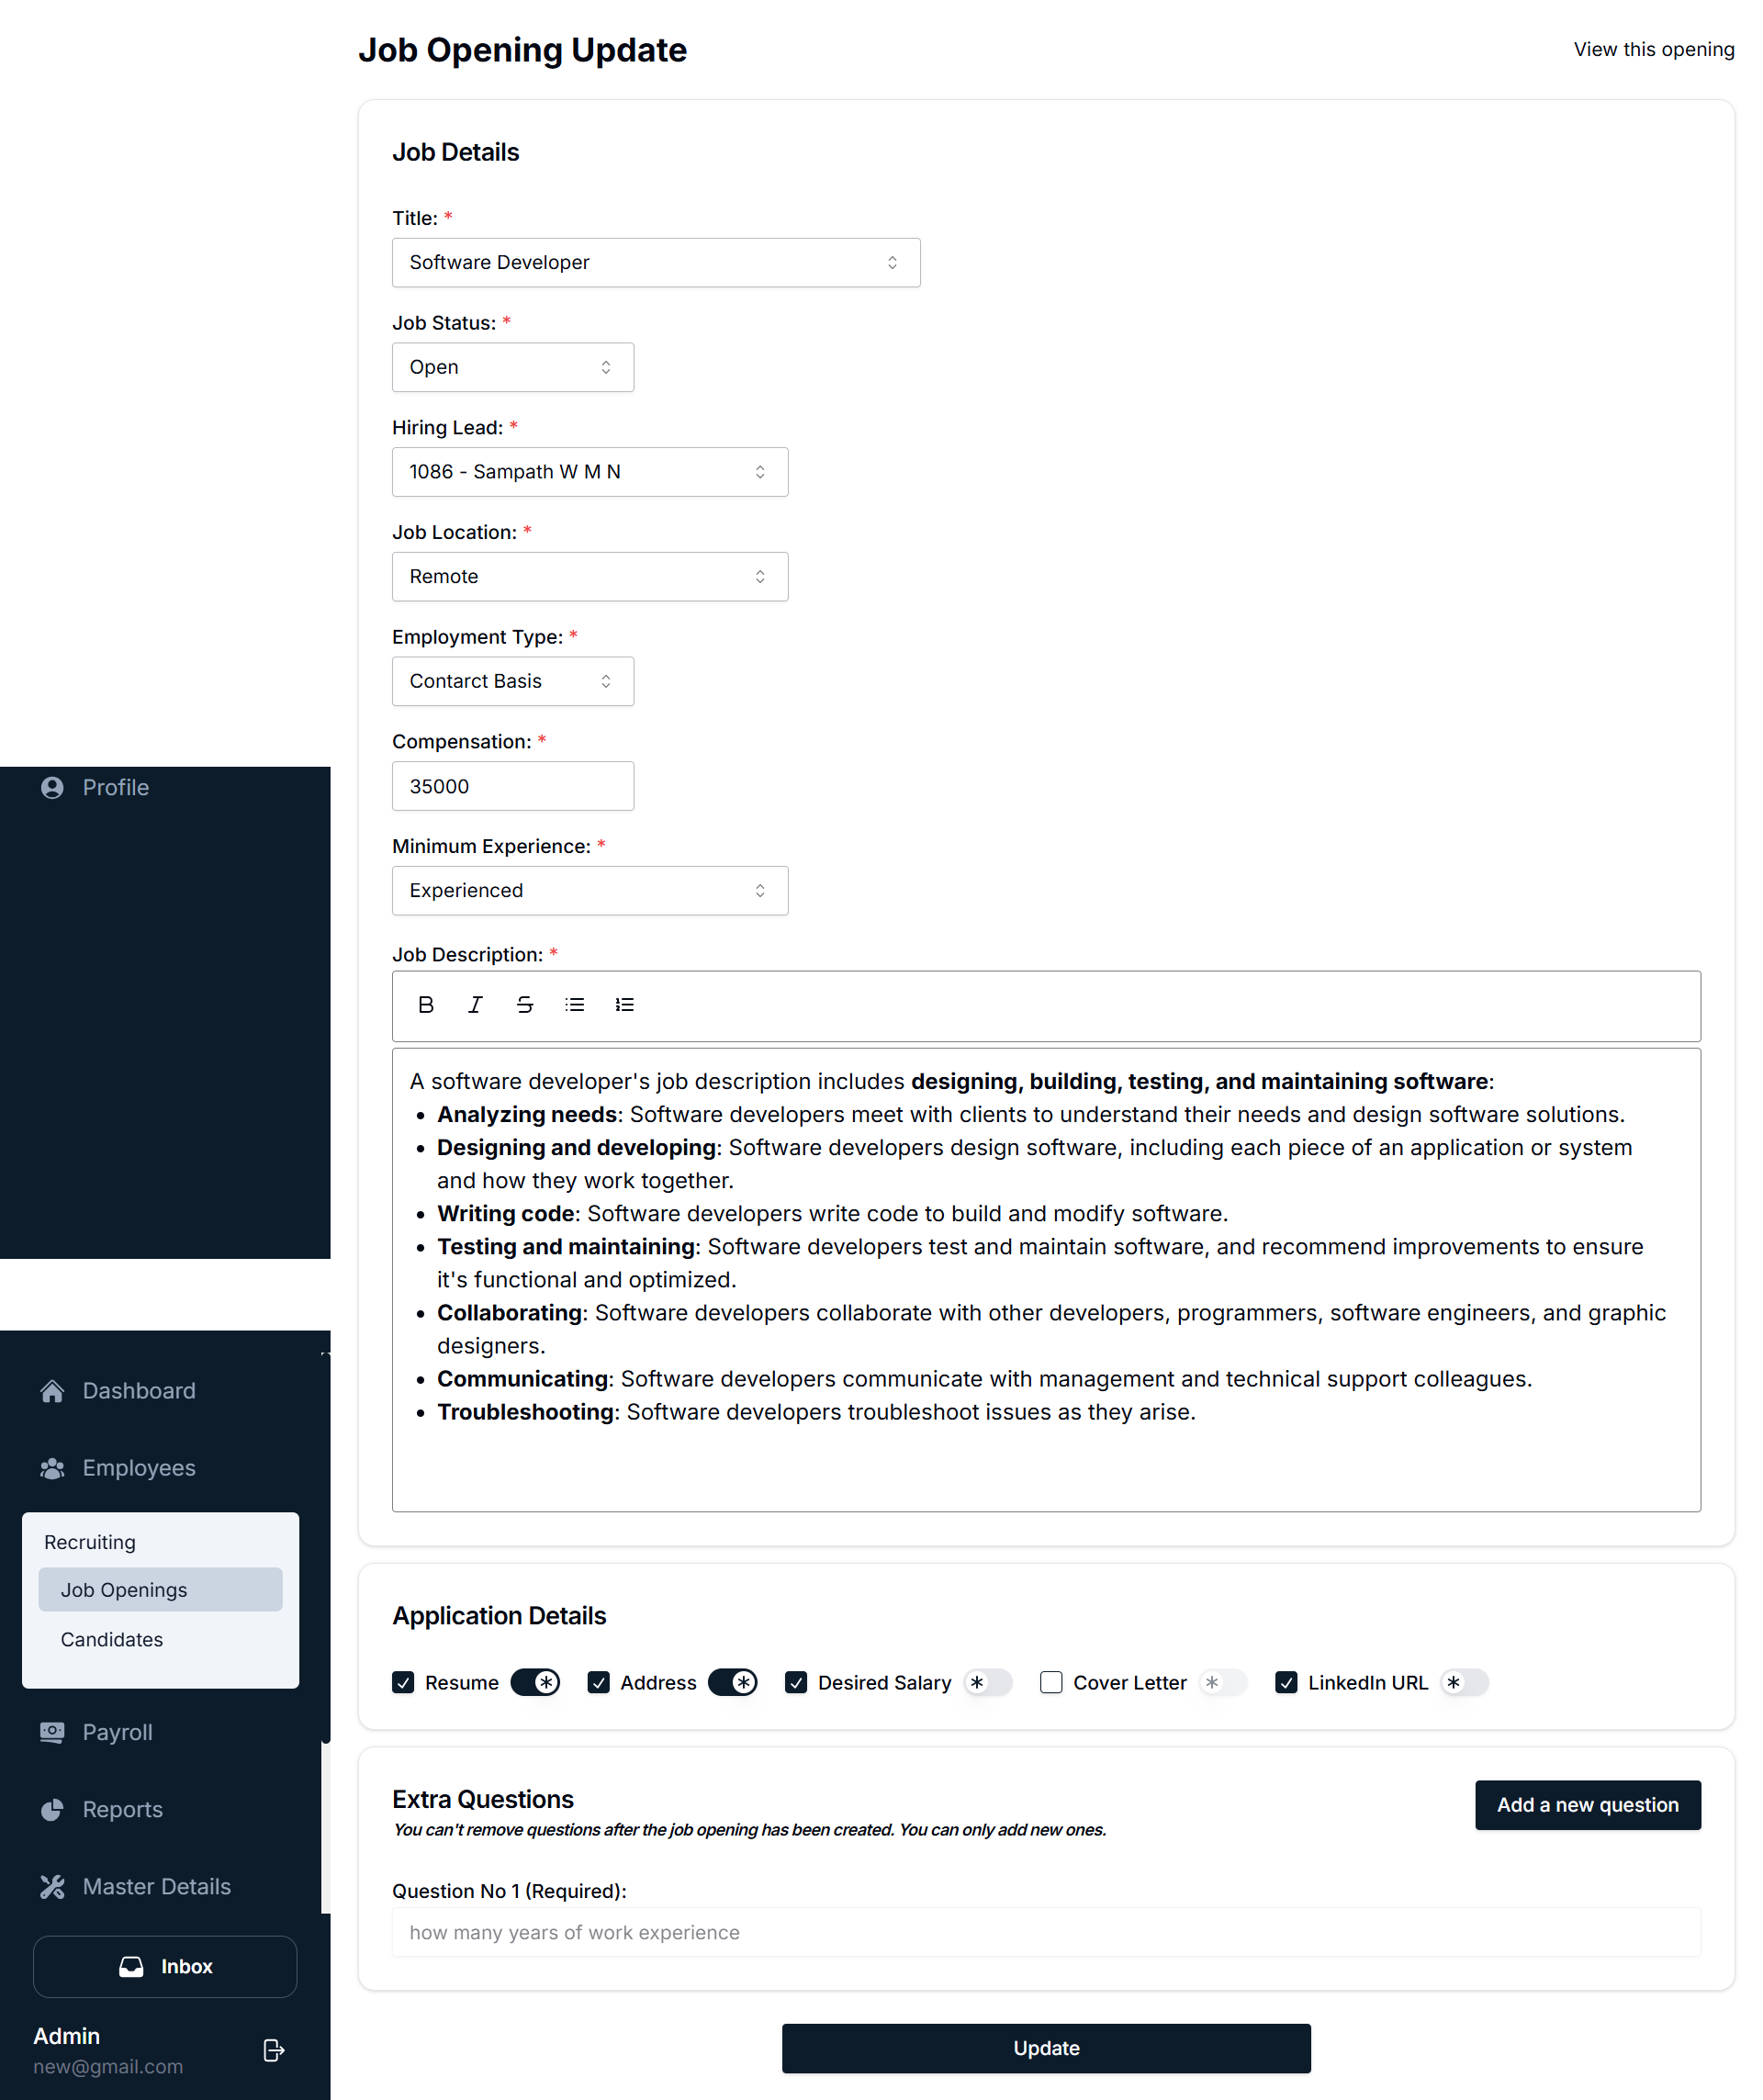
Navigating to the Update Page
- Locate the job in the Job Openings List View.
- Click the Arrow Icon (→) next to the job.
- This opens the Job Opening Update Page.
Update Job Opening Form
- Users can edit:
- Job title
- Status (Open/Closed)
- Job description
- Compensation details
- Experience level
- Users cannot remove previously added questions but can add new ones.
Saving Changes
- Click "Update" to save modifications.
Viewing a Job Opening (Public View)

Navigating to the Public View
- On the Job Opening Update Page, locate the "View this opening" button on the right side.
- Click the button to open the public job posting page.
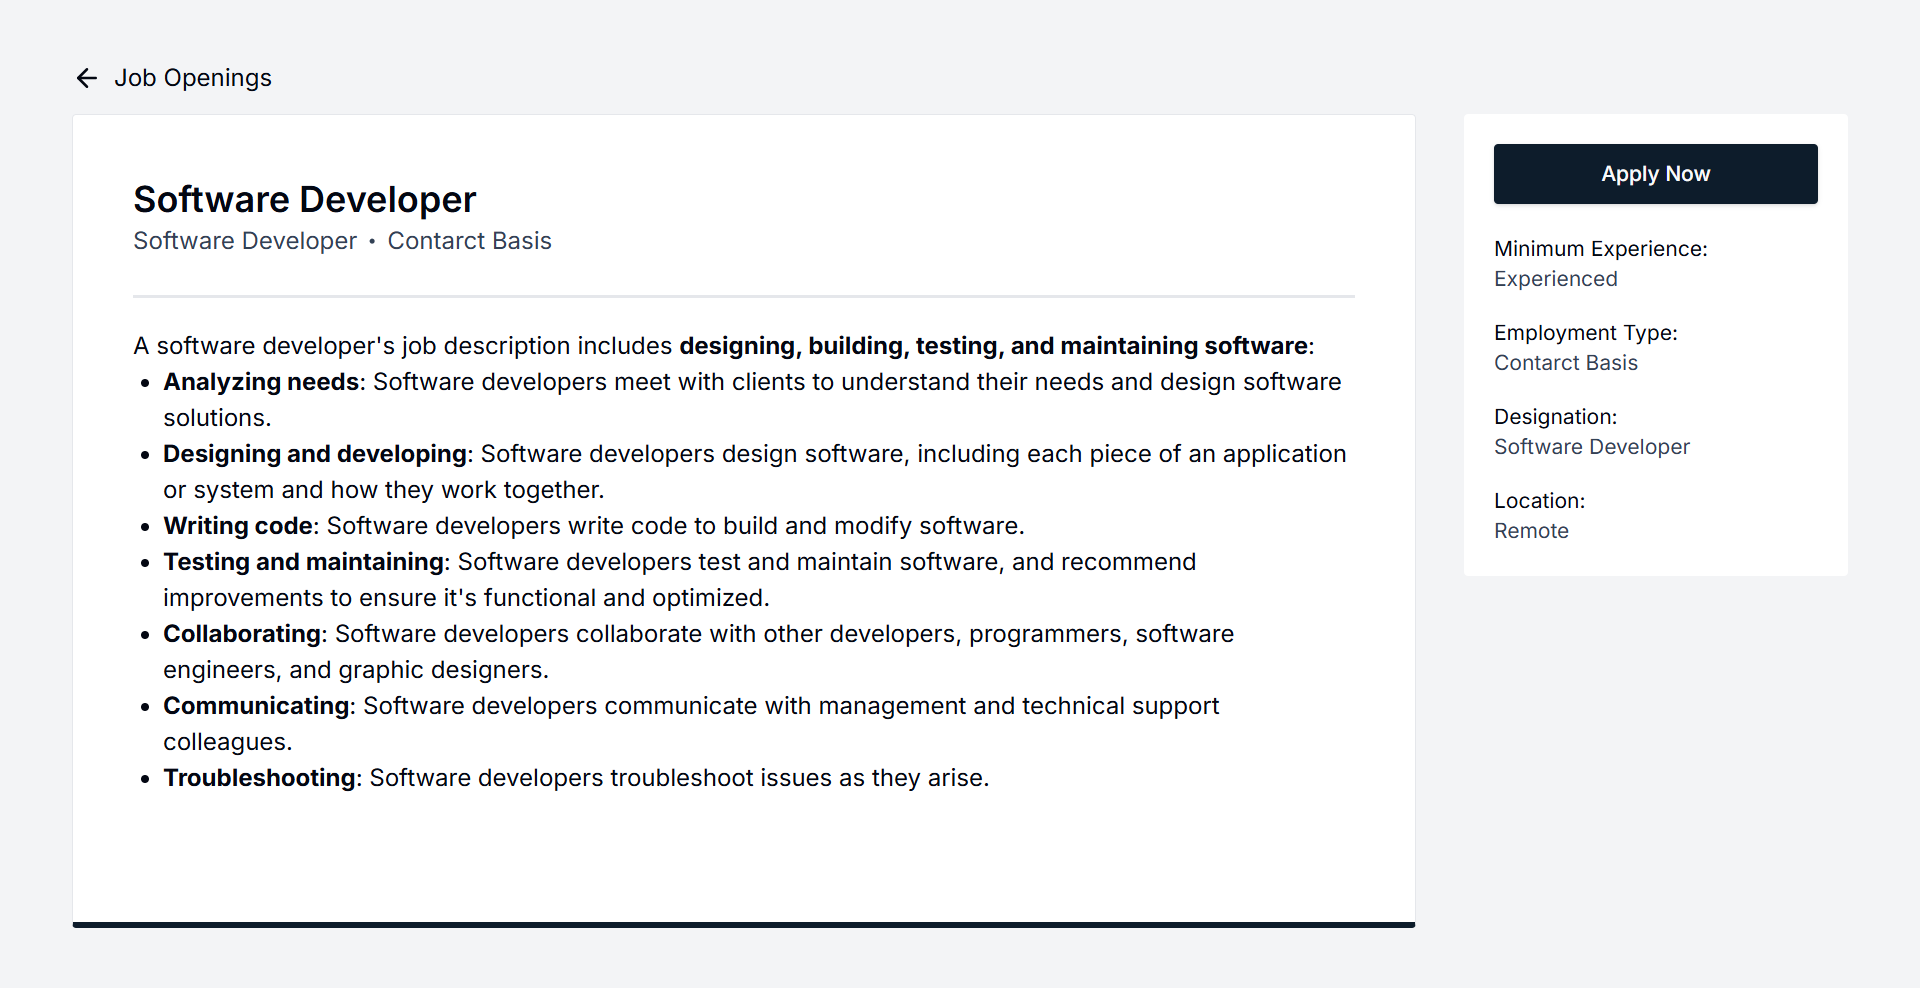
Public Job Posting View
- Job Title & Category – Displays the position title and category.
- Job Description – Full details of the position.
- Job Requirements – Experience level, employment type, and location.
- Apply Now Button – Allows candidates to submit their applications.
Managing Job Openings Efficiently
- Posting New Jobs – HR can create job openings as needed.
- Updating Job Openings – Modify job details whenever required.
- Viewing Job Openings – Check how the job appears to applicants.
- Tracking Applications – Monitor the number of new and total candidates.
Summary of Actions
- Add New Job: Click Add Job Opening → Fill out the form → Click Create
- Update Job: Click Arrow Icon (→) → Modify details → Click Update
- View Job Posting: Click View this opening on the update page
- Monitor Applications: Check Candidates column in the Job Openings list
Conclusion
This guide outlines the full process of managing job openings in the Recruiting Module. The system provides a structured and user-friendly experience for HR professionals to post, update, and track job listings efficiently.
Candidates Submodule User Guide
The Candidates Submodule is designed to help recruiters manage job applicants and streamline the hiring process. It allows easy tracking of candidates' statuses, reviewing their profiles, and taking actions like commenting, rating, and offering jobs.
Main Interface Overview
Location: Located under the Recruiting Module, the Candidates section allows recruiters to manage all applicants.
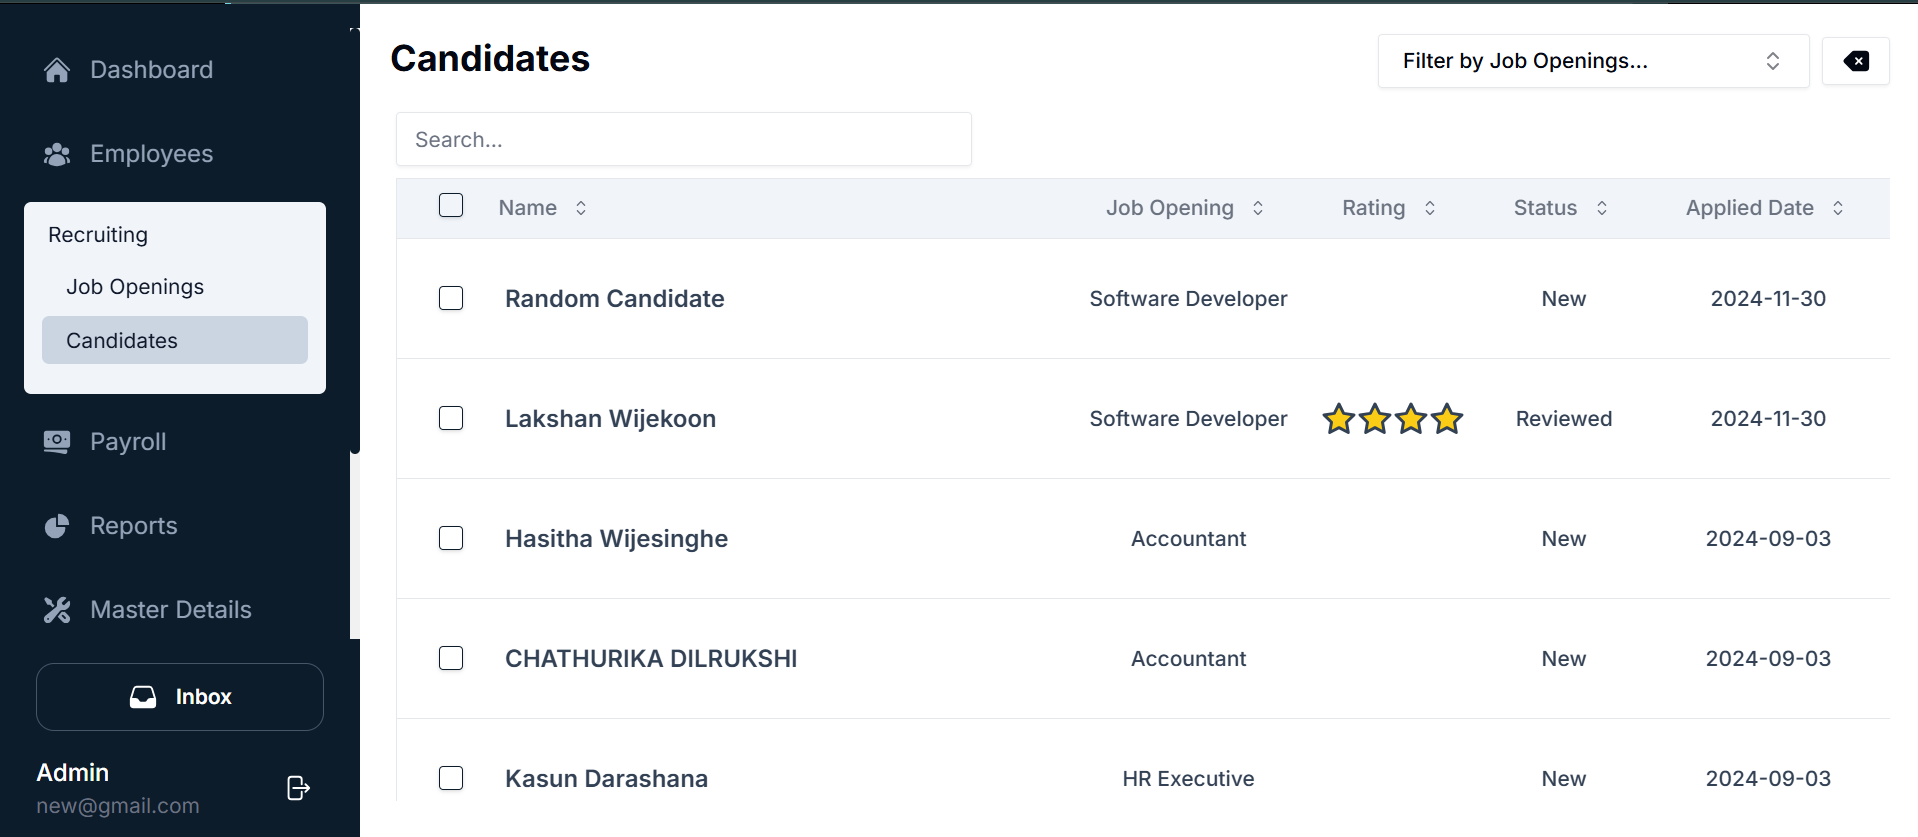
Components
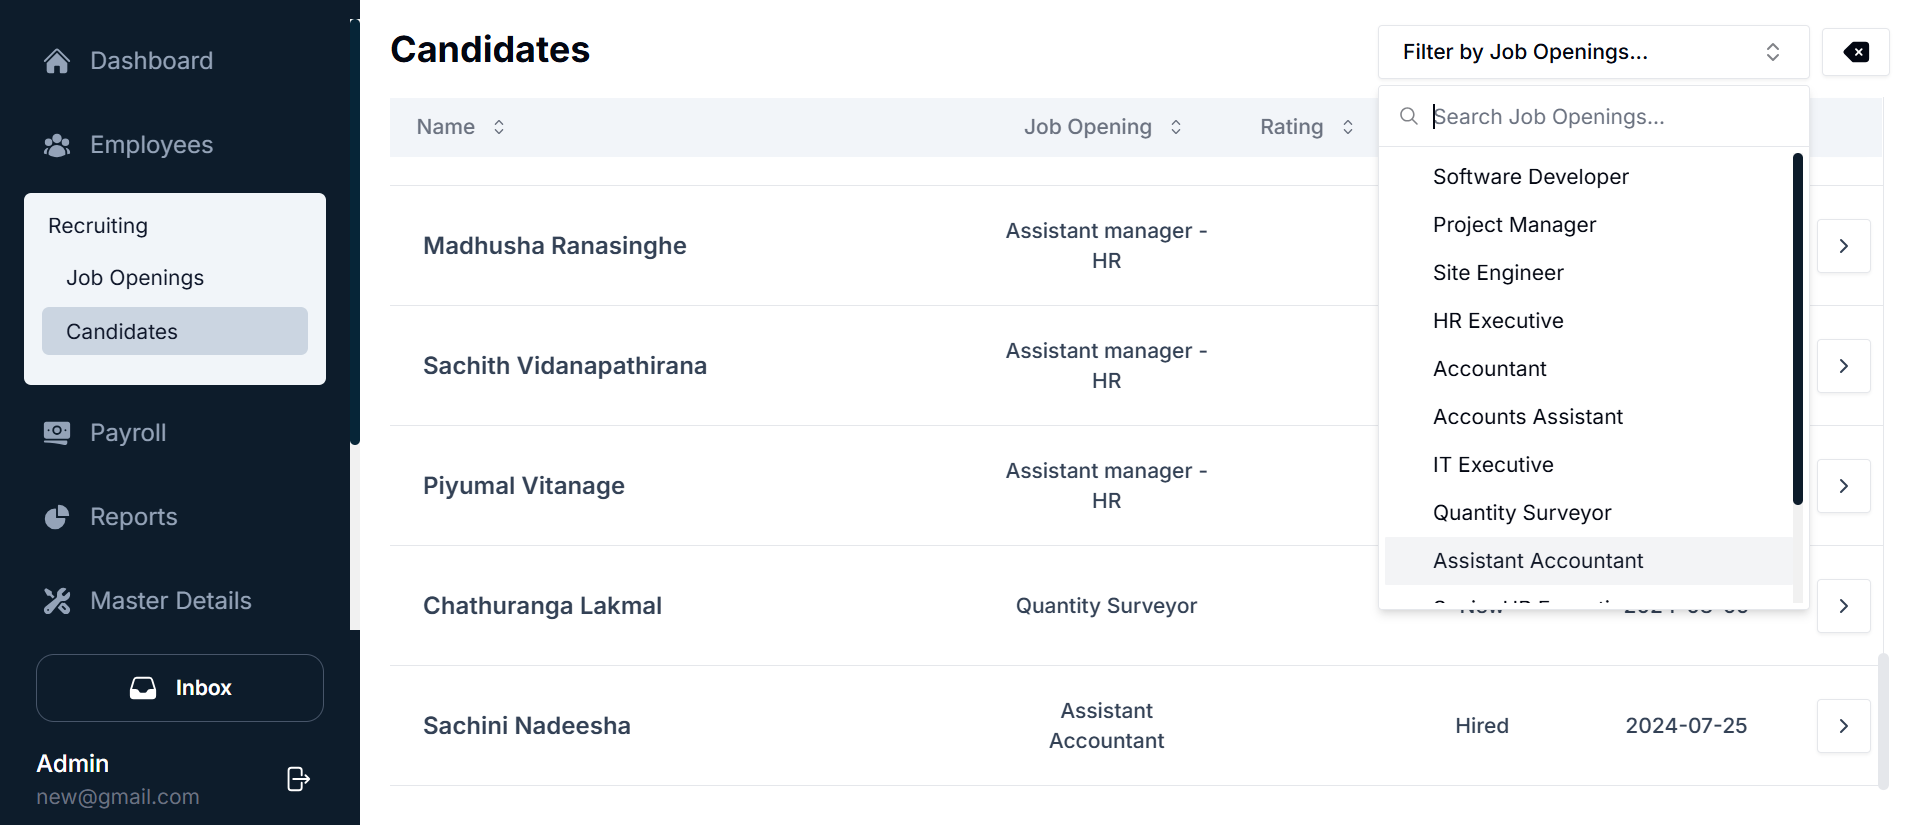
- Search Bar: At the top of the candidates' list, the search bar allows recruiters to search for a specific candidate by name or other criteria.
- Filter by Job Openings Dropdown:
- This dropdown enables the user to filter candidates by the job opening they applied for, such as Software Developer, HR Executive, etc.
- Search within the dropdown: If there are many job openings, you can search by job title to make the filtering faster.
- Candidates Table:
- Name: The name of the candidate.
- Job Opening: The job role the candidate applied for.
- Rating: The rating assigned to the candidate (can be starred from 1 to 5).
- Status: The current status of the candidate (e.g., New, Reviewed, Hired, etc.).
- Applied Date: The date when the candidate applied for the job.
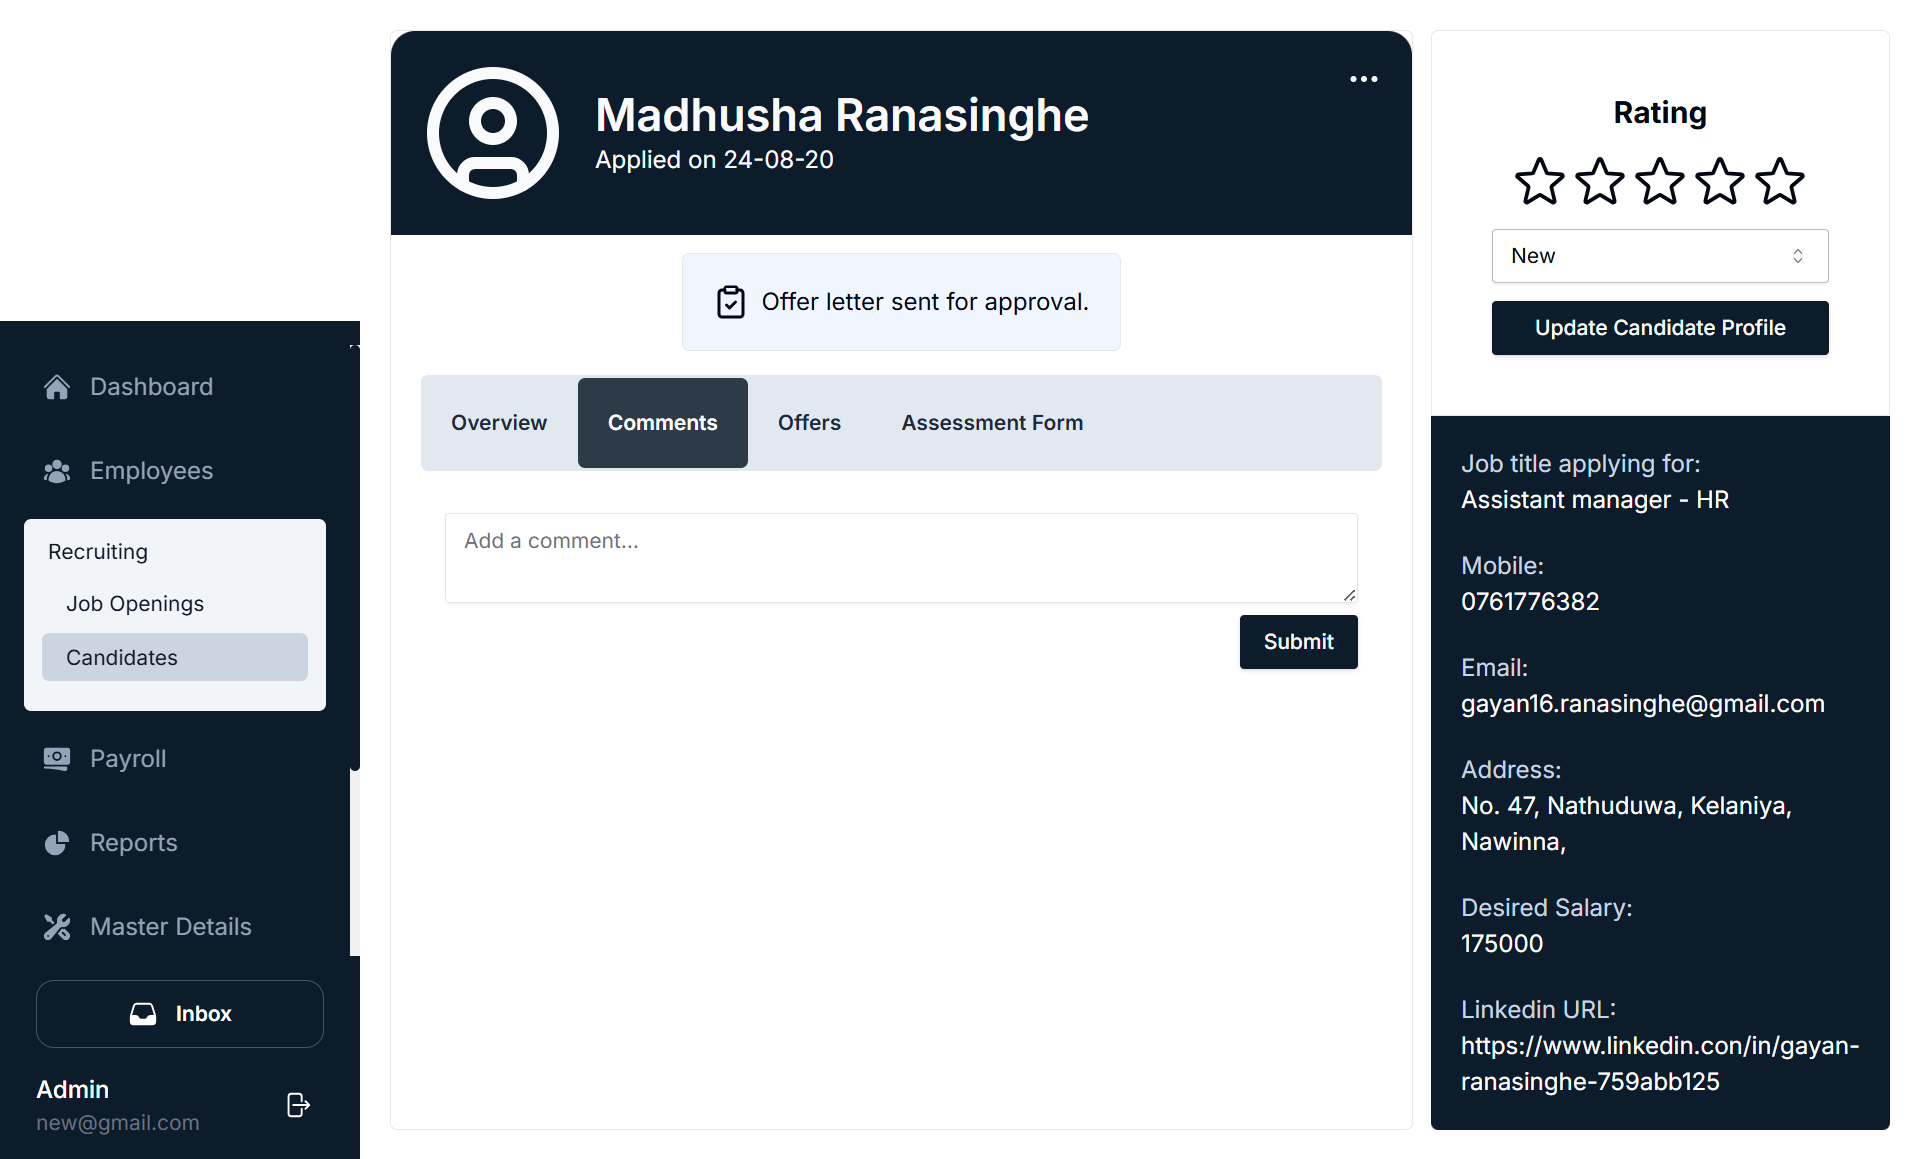
Detailed Candidate Profile
When you click the arrow icon next to a candidate's name, the system redirects you to the candidate's detailed profile page, where you can see more information and take specific actions.
Sections in the Candidate Profile
- Overview Tab:
- Displays basic candidate information, such as:
- Job Title: Position the candidate applied for.
- Application Status: Rating, job opening, and application status.
- Personal Info: Contact information like mobile number, email, LinkedIn URL, etc.
- Displays basic candidate information, such as:
- Rating Section: You can rate the candidate on a scale of 1 to 5 stars. The rating system is useful for tracking the candidate's performance in interviews or during the screening process.
- Job Title & Status: The job title (position applied for) and status (such as "New" or "Reviewed") of the candidate are displayed here.
Tabs in Candidate Profile
- Overview Tab: This tab shows the essential details of the candidate, such as:
- Personal Information
- Job Position Applied For
- Rating
- Application Status
- Comments Tab:
- Here, you can add internal comments about the candidate.
- These comments might include feedback from interviews, qualifications, or anything the recruiter feels is important to note.
- After writing a comment, you can click Submit to add it to the candidate's profile.
- Offers Tab:
- This tab shows the history of offer letters sent to the candidate.
- If no offer has been made, you'll see a message like "Offer letters history is empty."
- Create Offer Letter button: If an offer needs to be sent, click this button to generate the offer letter.
- Assessment Form Tab:
- This tab allows you to schedule an interview first before filling out the assessment form.
- The system will prompt you with a message: "Schedule an interview first to fill the assessment form."
Create Offer Letter
This section allows recruiters to send official job offer letters to candidates.

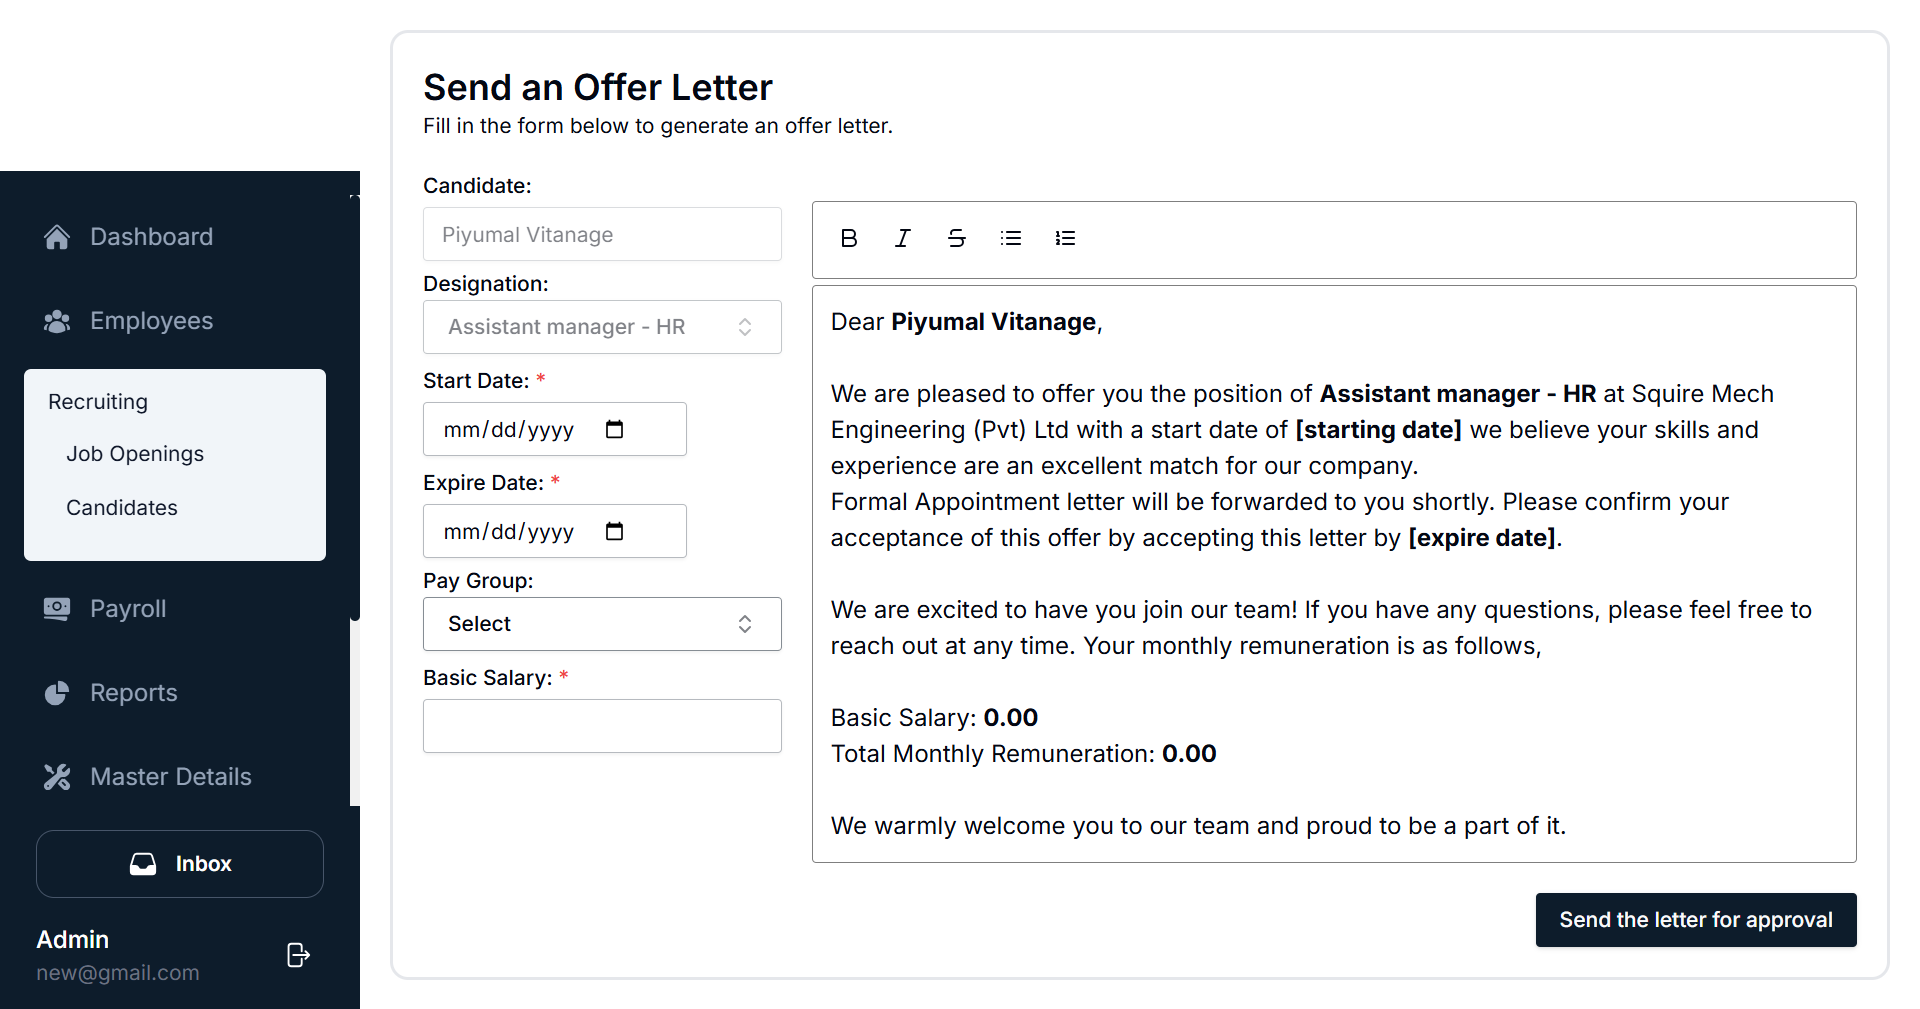
Steps to Create an Offer Letter:
- Click the "Create Offer Letter" Button: Located in the candidate's profile, click this button to open the offer letter generation form.
- Offer Letter Form:
- Candidate Name: Automatically filled in with the candidate's name.
- Designation: Select the position the candidate is being offered.
- Start Date & Expiry Date: Set the candidate's start date and the offer expiration date.
- Salary & Pay Group: Set the salary and pay group.
- The form auto-generates a formal offer letter.
- Send for Approval: Once all details are entered, you can send the letter for approval.
Rating Candidates
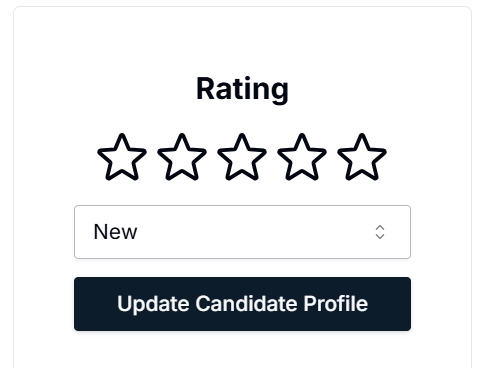
Recruiters can assign a rating to each candidate based on their qualifications, skills, interview performance, etc.
The rating system uses a 5-star scale (1 to 5 stars). This helps in easily categorizing candidates based on their skills and qualifications.
Application Details
Displays additional application details:
- Mobile Number
- Email Address
- Desired Salary
- LinkedIn URL (if provided)
- Job title applying for
Candidate Status Updates
Status: The status of the candidate can be updated from the following options:
- New
- Reviewed
- Hired
- Rejected
Filtering and Sorting
- Filter by Job Opening: This dropdown helps you filter candidates based on the job role they applied for (e.g., Software Developer, Accountant, HR Executive, etc.).
- Sorting: You can sort candidates by the following attributes:
- Name
- Job Opening
- Rating
- Status
- Applied Date
Conclusion
The Candidates Submodule within the Recruiting Module is essential for efficiently managing applicants throughout the hiring process. By using this submodule, recruiters can easily track applications, rate candidates, and streamline the process of offering and onboarding new talent.
By following the steps outlined in this guide, you will be able to fully utilize the features of the Candidates Submodule to effectively recruit, review, and manage job applicants.