Event Calendar Module User Guide
Overview of the Event Calendar Module
The Event Calendar Module in the HRIS system enables administrators to manage events, including working days, holidays, and overtime (OT) schedules. This guide provides step-by-step instructions on how to navigate the calendar, add and edit events, manage OT, and apply events to specific projects. The module also includes a comprehensive UI to help users efficiently track and manage events.
User Interface Overview
Key Components of the Event Calendar UI
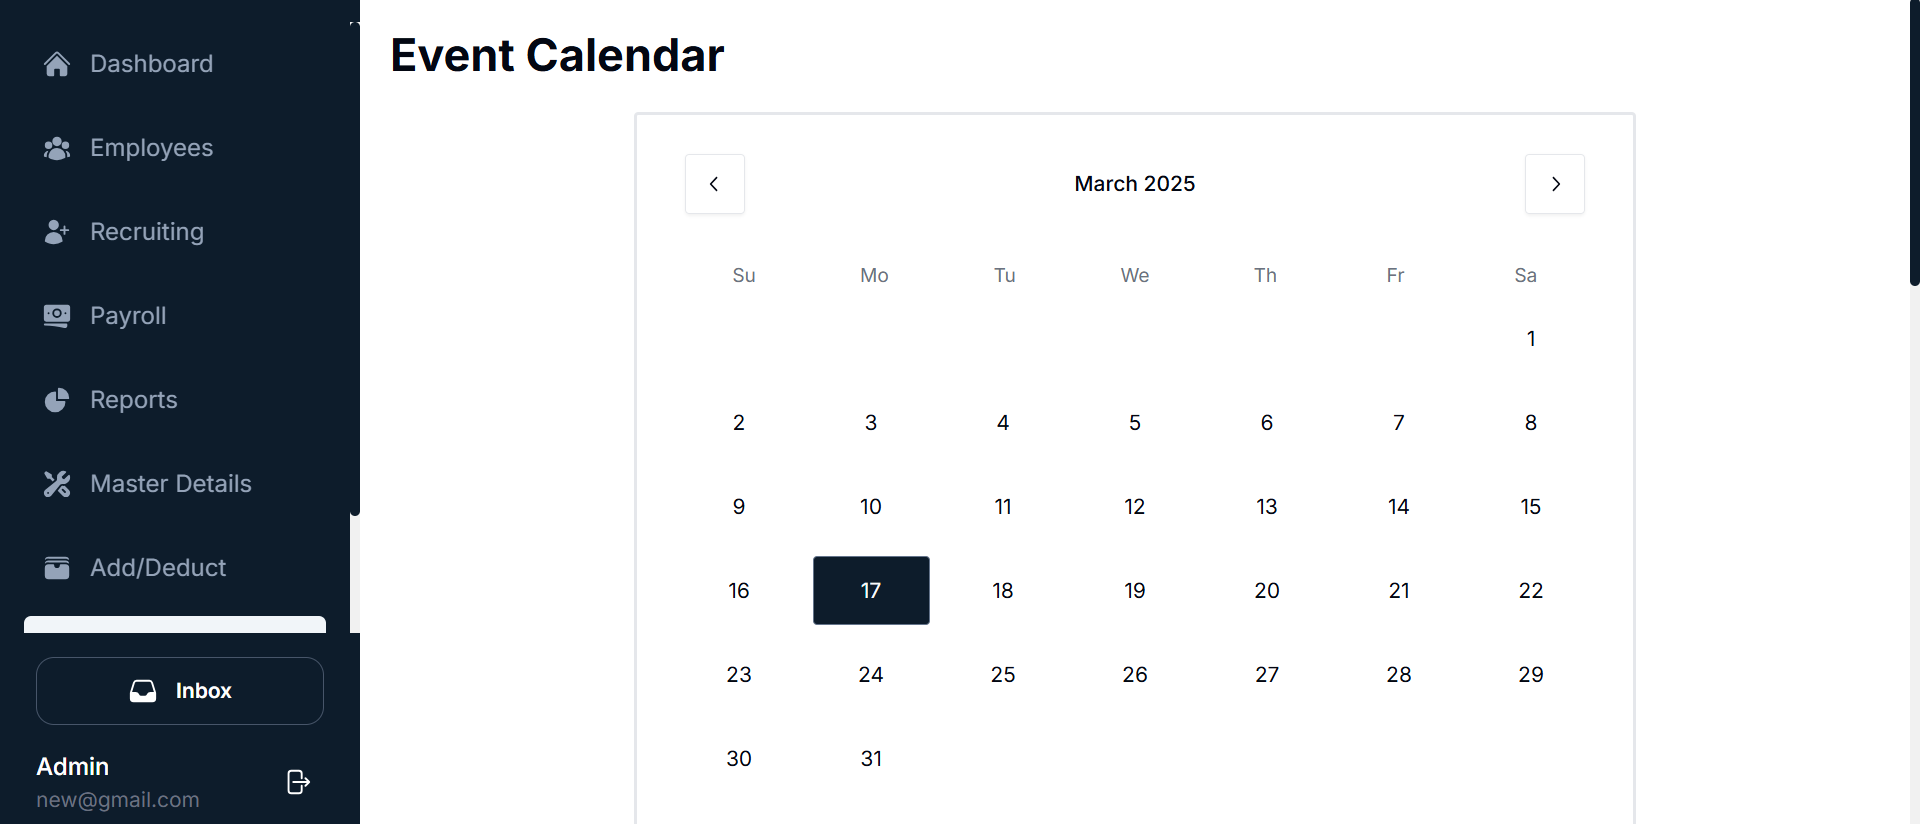
Navigation Sidebar:
- Located on the left side of the screen, the Navigation Sidebar provides access to various sections of the HRIS system, including the Event Calendar.
- Event Calendar: This is the main option where you manage events.
Calendar View:
- The main calendar view displays the current month, with days of the week listed at the top (Sunday to Saturday).
- You can easily navigate through months by using the left and right arrows located at the top of the calendar. The current date is highlighted, and clicking any date will open the event management form.
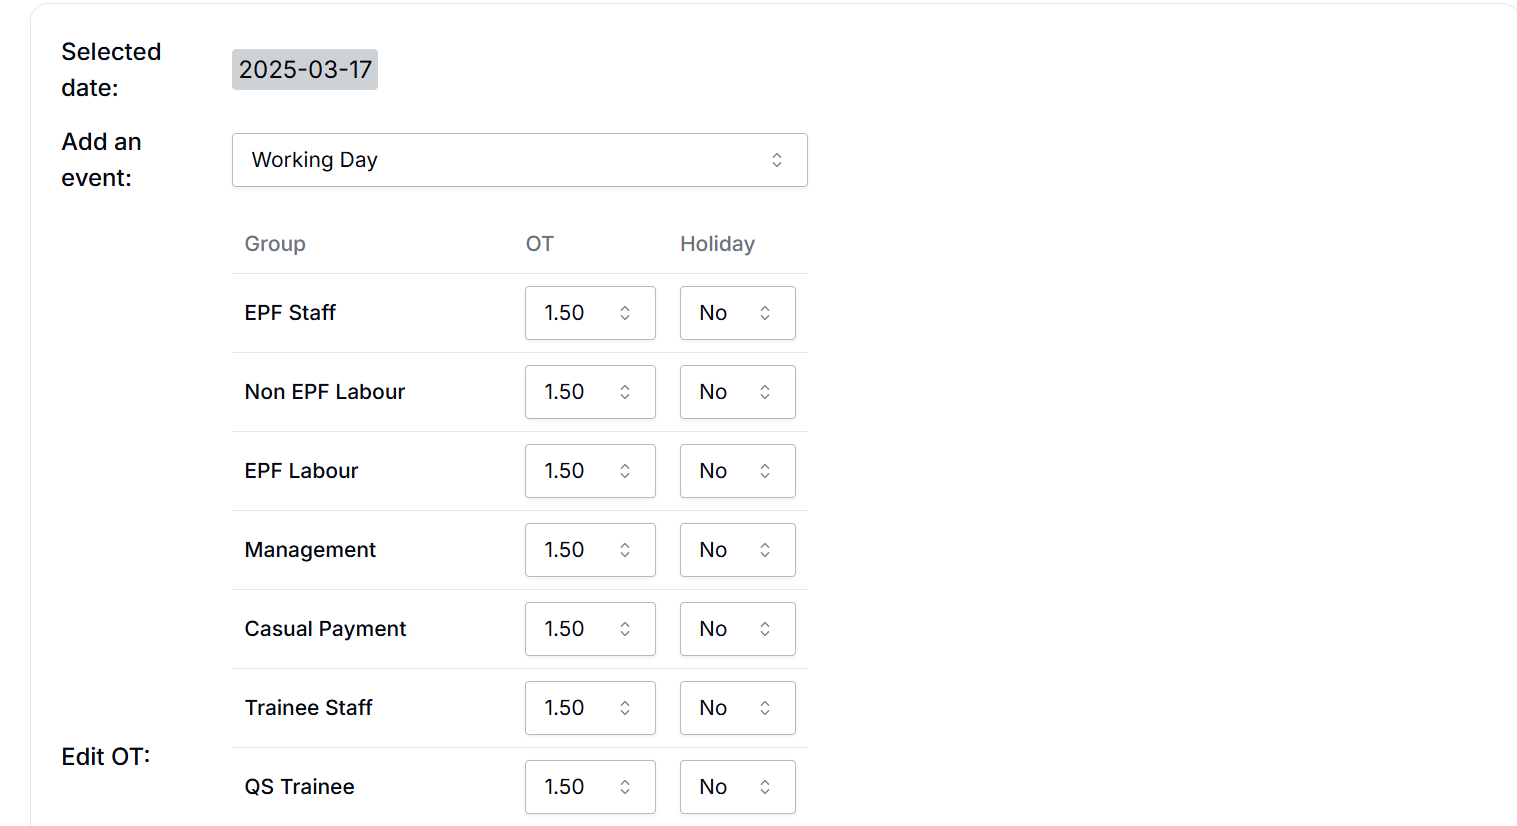
Selected Date and Event Management Form:
- When a date is clicked, the Event Management Form opens on the right side of the page.
- This form allows you to:
- Add new events (e.g., Working Day, Holiday).
- Assign overtime rates (OT) and specify whether the day is a holiday.
- Modify event details, including changing OT rates or holiday status for specific employee groups.
- Action Buttons available in this form:
- + Add New: Opens the event creation form.
- Update: Modifies an existing event.
- Apply: Saves any changes made to the event.
Navigating and Using the Event Calendar
This section covers the steps for using the Event Calendar, including adding, editing, and deleting events, as well as managing overtime and applying events to projects.
Adding a New Event
To add a new event for a specific date, follow these steps:
Select a Date: Click on any date in the calendar (e.g., March 2, 2025) to select the day for which you want to add an event.
Choose Event Type: In the dropdown menu, select the type of event (e.g., "Working Day").
Fill in Event Details:
- Group: Choose the employee group(s) the event applies to (e.g., EPF Staff, Non-EPF Labour, Management).
- Overtime (OT): Enter the overtime rate for each group (e.g., 1.50).
- Holiday: Choose whether the day is a holiday for the selected group (Yes/No).
Click Apply: After filling out the event details, click the Apply button to save the event.
Confirmation: The event will now appear in the calendar for the selected date.
Editing an Existing Event
To update or modify an existing event (e.g., change OT rates or holiday status), follow these steps:
Select the Date: Navigate to the Event Calendar and select the date you wish to edit (e.g., March 4, 2025).
Click the Update Button: Click the Update button next to the event details. The event management form will open.
Modify Event Details:
- Change the Group assignments.
- Adjust the OT rate if necessary.
- Update the Holiday status (Yes/No).
Click Apply: Once the changes are made, click the Apply button to save the updated event.
Confirmation: The updated event will now reflect in the calendar.
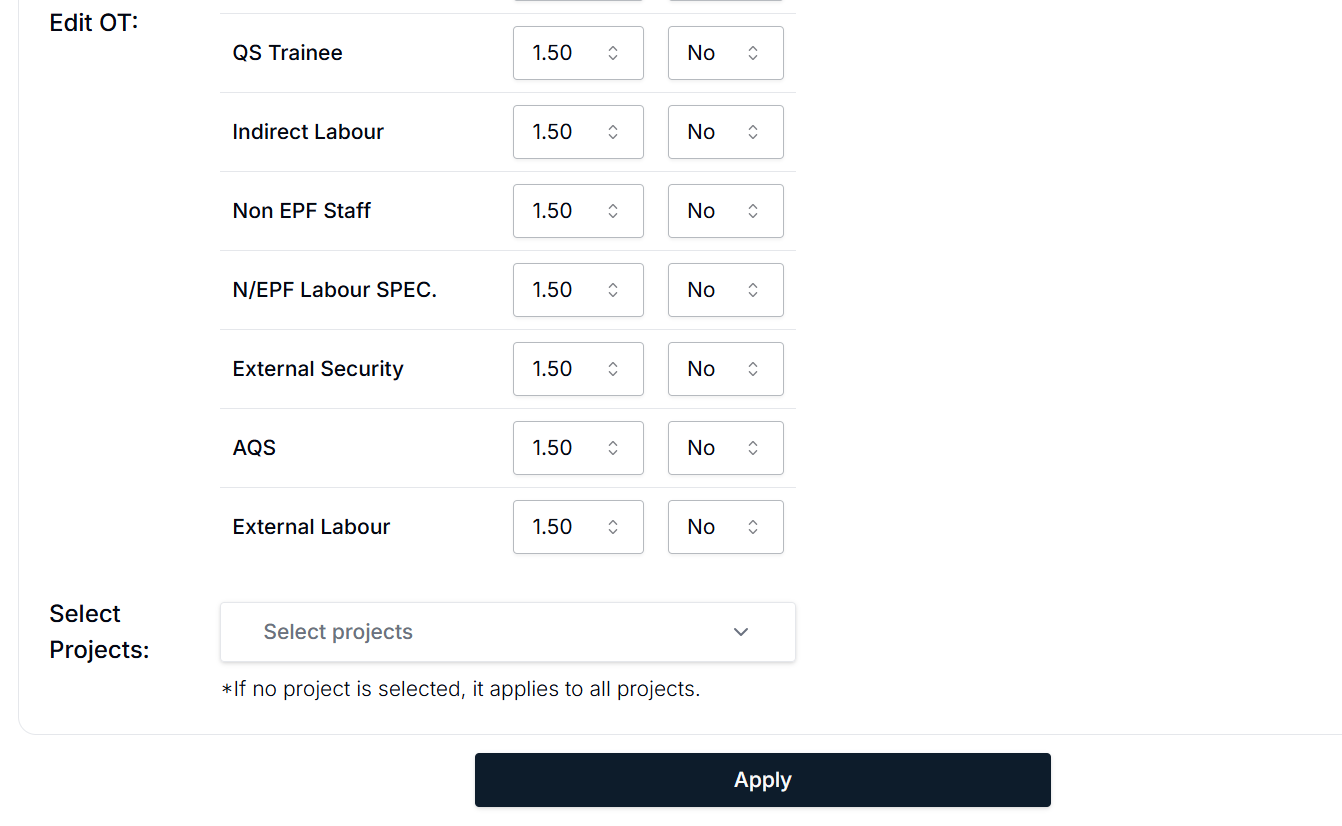
Editing Overtime (OT) for Employee Groups
The system allows you to adjust overtime (OT) rates for different employee groups. To modify OT rates, follow these steps:
Select the Date: Choose the date you want to edit OT rates for.
Edit OT Rates: Adjust the OT rates for relevant employee groups (e.g., EPF Staff, Non-EPF Labour, Management).
Click Apply: After modifying the OT rates, click Apply to save the changes.
Confirmation: The updated OT rates will be applied for the selected date.
Applying Events to Projects
You can apply the event to specific projects, ensuring that the event is reflected across only the relevant projects.

Steps to Apply Events to Projects:
Select Projects: From the Select Projects dropdown, choose the project(s) to which the event should apply. If no project is selected, the event applies to all projects by default.
Click Apply: After selecting the projects, click Apply to save the event for the selected projects.
Summary of Key Features
- Event Calendar: Easily navigate the calendar to view and manage events for any selected day.
- Add New Event: Create new events by selecting a date and entering event details (e.g., Working Day, Holiday).
- Update Events: Modify existing events by updating OT rates, holiday status, and employee group assignments.
- Overtime Management: Edit overtime (OT) rates for specific employee groups.
- Project-Specific Events: Apply events to selected projects or all projects to ensure accurate scheduling across the organization.
Conclusion
The Event Calendar Module is a comprehensive tool for managing and tracking events like working days, holidays, and overtime. By following the steps in this guide, you can effectively navigate the calendar, add and update events, adjust overtime rates, and apply events to specific projects. This module helps streamline the management of employee schedules and ensures accurate payroll processing.