User Guide for Master Details Module
User Guide for Master Details Module
The Master Details module in Cirrus HRIS is a key component for managing essential HR data categories, such as Nationality, Religion, Designation, Holiday Type, and more. This module helps HR professionals easily manage and update these categories for efficient employee data management.

Navigating to Master Details
- Log in to your Cirrus HRIS dashboard.
- From the left-hand sidebar, locate and click on Master Details. This will open the Master Details page.
- In the Master Details module, you will find a list of subcategories, including Nationality, Religion, Designation, Holiday Type, Employment Category, and more.
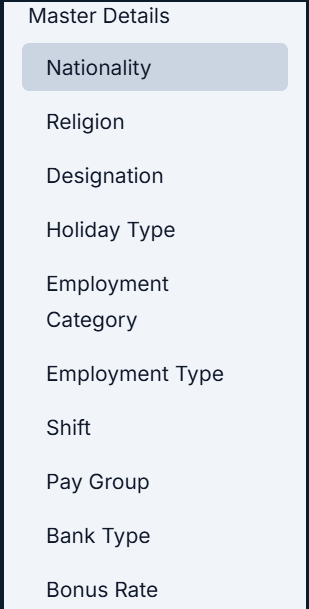
Available Categories in Master Details
- Nationality
- Religion
- Designation
- Holiday Type
- Employment Category
- Employment Type
- Shift
- Pay Group
- Bank Type
- Bonus Rate
- Add/Deduct Type
- Remaining Leave Type
- Minimum Experience
- Assessment Form
Managing Nationality in the Master Details Module
The Nationality Management Module in the HRIS system allows users to efficiently manage and track various nationalities within the organization. This guide will explain the user interface (UI) and how to use the features for adding, updating, and deleting nationalities.
User Interface Overview
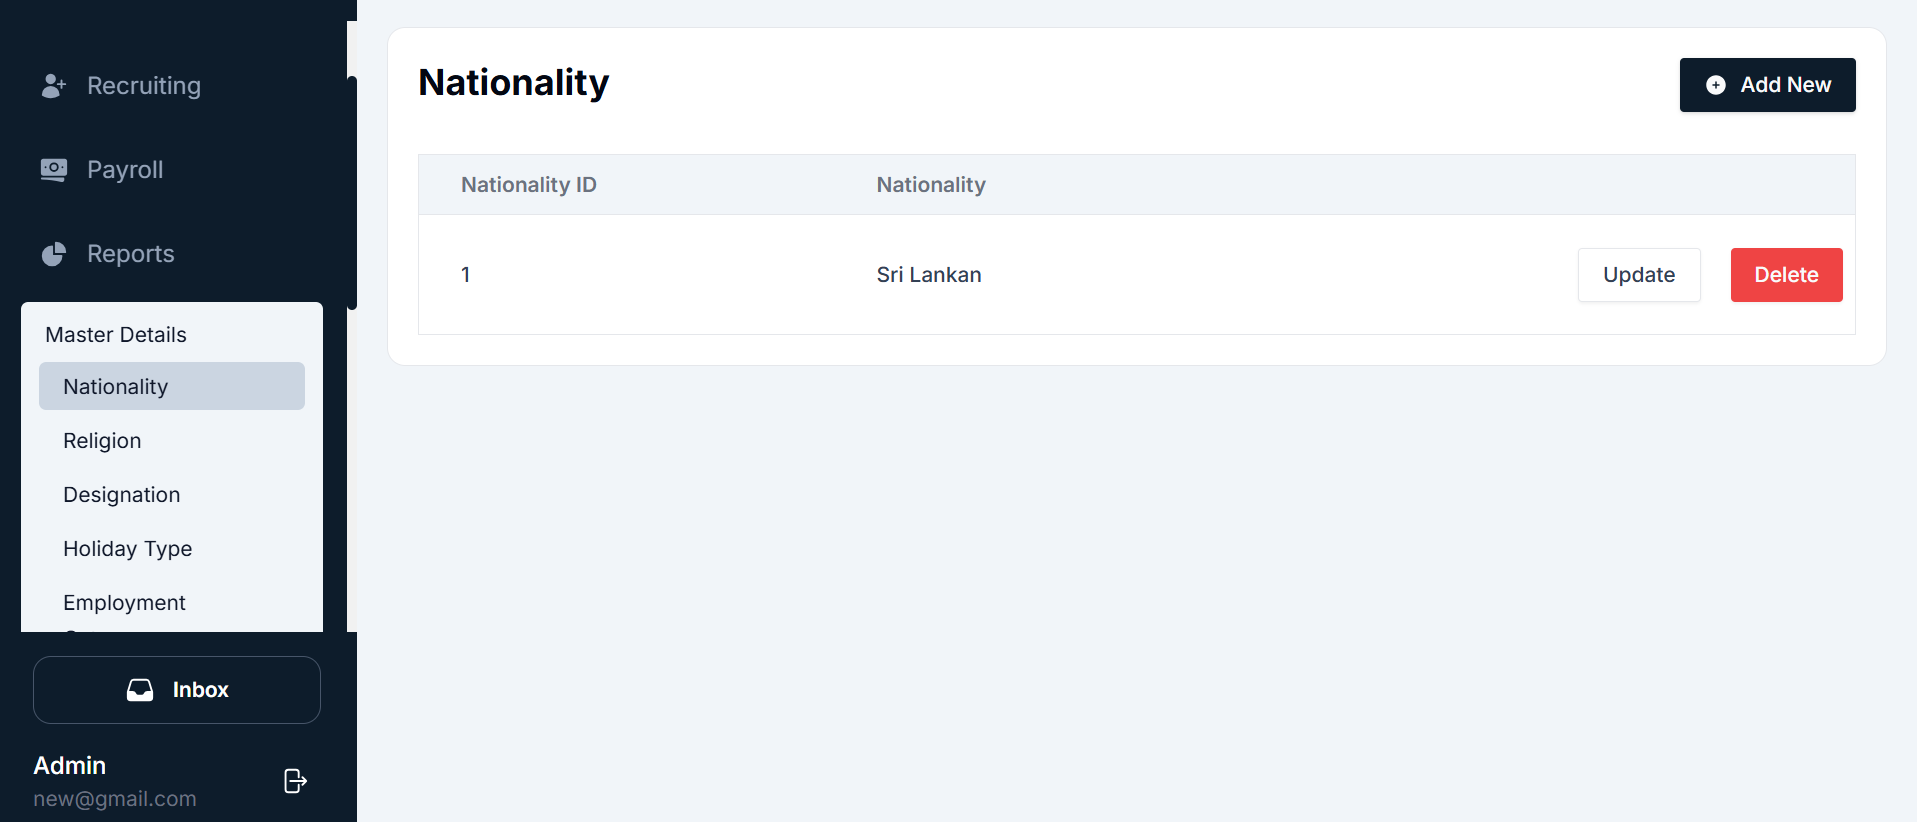
The Nationality page is located under the Master Details section in the HRIS system. This module is essential for recording the nationality of employees. The interface consists of several key components, which are explained below:
Components of the Nationality Interface
- Navigation Sidebar: Located on the left side of the page, the sidebar helps you navigate between different modules of the HRIS system.
- Nationality Table: The main area of the screen displays a list of existing nationalities. It is organized in a table format with the following columns:
- Nationality ID: A unique ID assigned to each nationality.
- Nationality: The name of the nationality (e.g., Sri Lankan, Indian, American).
- Actions: Contains buttons to update or delete a nationality.
- Action Buttons: The main area of the screen displays a list of existing nationalities. It is organized in a table format with the following columns:
- Add New: this button allows you to create a new nationality.
- Update: Each nationality in the list has an Update button, which allows you to modify its details.
- Delete: Each nationality in the list has a Delete button to remove it from the system.
- Top Buttons: The main area of the screen displays a list of existing nationalities. It is organized in a table format with the following columns:
- + Add New: Located at the top-right corner, this button opens the form to create a new nationality.
- Update: Allows users to edit an existing nationality.
- Delete: Clicking Delete will remove the selected nationality.
Adding a New Nationality
To add a new nationality, follow these simple steps:

- Navigate to the Nationality page under the Master Details section from the sidebar.
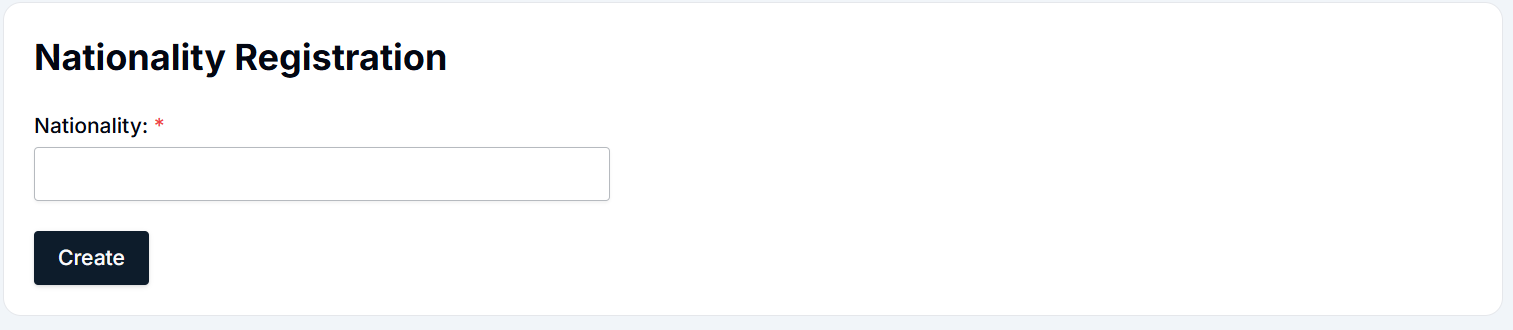
- Click the + Add New button located at the top-right of the screen.
- Fill in the form with the nationality name (e.g., Sri Lankan, American, Canadian).
- Click the Create button to save the new nationality.
Updating an Existing Nationality
To modify an existing nationality, follow these steps:
- Navigate to the Nationality page under Master Details.
- Find the nationality you wish to update (e.g., Sri Lankan).
- Click the Update button next to the nationality you want to modify.
- The Nationality Update form will open with the current details.
- Make necessary changes to the nationality name as needed.
- Click the Update button to save the changes.

Deleting a Nationality
To delete a nationality, follow these steps:
- Navigate to the Nationality page under Master Details.
- Find the nationality you wish to delete.
- Click the Delete button next to the nationality.
- A confirmation pop-up will appear asking you to confirm the deletion.
- Click Yes to permanently delete the nationality, or No to cancel the deletion.
Summary
- Nationality Table: Displays existing nationalities along with action buttons (Update/Delete).
- Add New: To create a new nationality, click the + Add New button, fill out the form, and click Create.
- Update: Modify an existing nationality by clicking the Update button, making changes, and saving.
- Delete: Remove a nationality by clicking the Delete button and confirming the deletion.
By following these steps, HR teams can effectively manage nationalities in the system, ensuring accurate records for all employees.
Religion Management Module - User Guide
The Religion Management Module in the HRIS system allows users to efficiently manage employee religious categories. This guide provides a comprehensive explanation of the user interface (UI) and provides step-by-step instructions on how to add, update, and delete religions within the system.
User Interface Overview
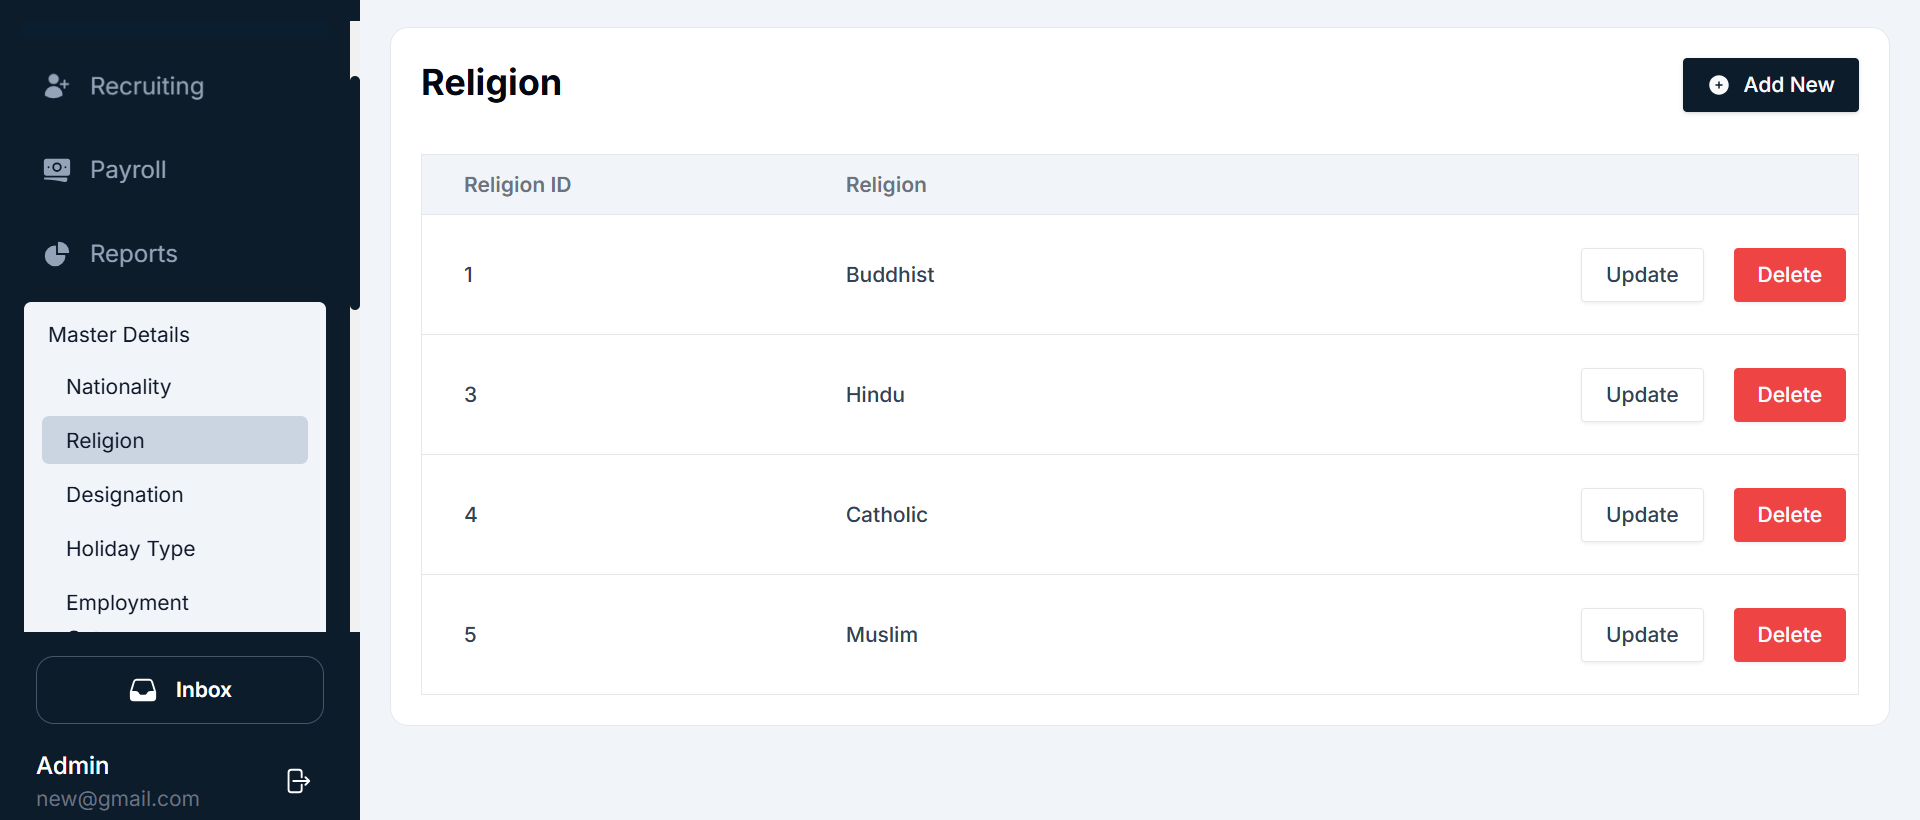
The Religion Management page is located under the Master Details section in the HRIS system. It allows users to manage different religions such as Buddhist, Christian, Hindu, Muslim, and others. The interface consists of several key components, which are explained below:
Components of the Religion Interface
- Navigation Sidebar: Located on the left side of the page, the sidebar provides easy access to various modules within the HRIS system.
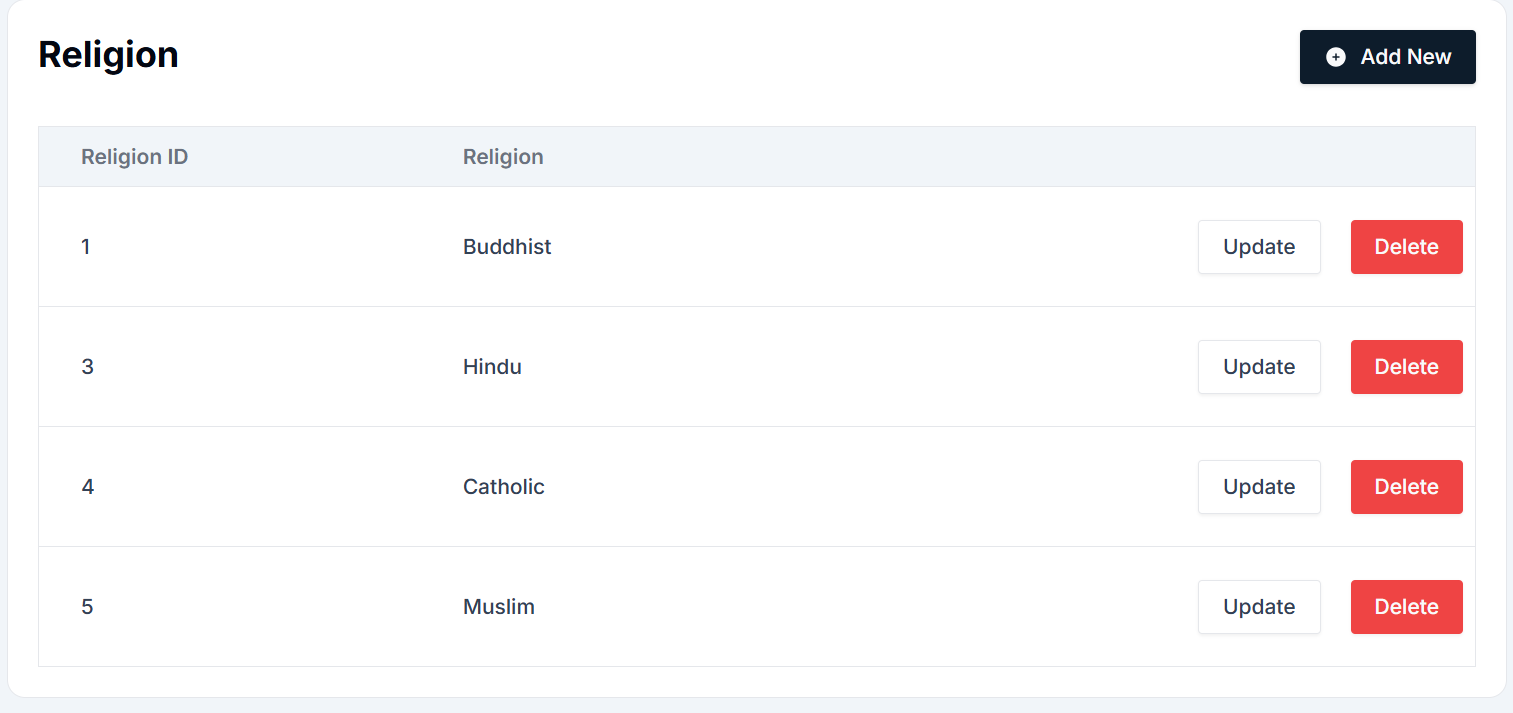
- Religion Table: The main area of the screen displays a list of existing religions. The table consists of the following columns:
- Religion ID: A unique identifier assigned to each religion in the system.
- Religion: The name of the religion (e.g., Buddhist, Hindu, Muslim).
- Actions: Action buttons are located next to each religion, these allow you to manage the details of a religion:
- Update: Modify the details of the religion.
- Delete: Permanently remove the religion from the system.
- Top Buttons:
- + Add New: Located at the top-right corner, this button opens the form to add a new religion.
- Update: Use this button to modify existing religion details.
- Delete: Clicking Delete will permanently remove a selected religion from the system.
Adding a New Religion
To add a new religion, follow these simple steps:
- Navigate to the Religion Management page under the Master Details section from the sidebar.
- Click the + Add New button at the top-right of the screen.
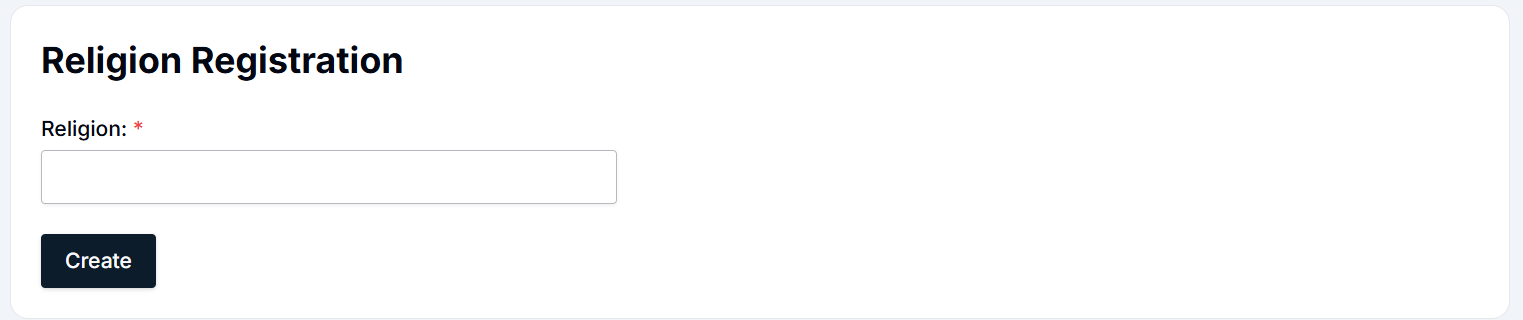
- The Religion Registration Form will open.
- Religion Name: Enter the name of the religion (e.g., Christianity, Buddhism, Islam, etc.).
- Click the Create button to save the new religion. Once created, the new religion will be displayed in the religion list.

Updating an Existing Religion
To modify an existing religion, such as updating the name or correcting any errors, follow these steps:
- Navigate to the Religion page under Master Details.
- Locate the religion you want to update in the table.
- Click the Update button next to the religion name.
- The Religion Update Form will open, showing the current details of the religion.
- Make the necessary changes to the religion name if required.
- Click the Update button to save the changes. The updated religion details will now appear in the religion list.


Deleting a Religion
To remove a religion from the system, follow these steps:
- Navigate to the Religion Management page under Master Details.
- Locate the religion you want to delete in the table.
- Click the Delete button next to the religion.
- A confirmation pop-up will appear asking if you're sure you want to delete the religion.
- Click Yes to confirm the deletion or No to cancel the action.
- Once deleted, the religion will no longer be listed in the table and will be permanently removed from the system.
Summary
- Religion Table: Displays existing religions with options to update or delete.
- Add New Religion: Click the + Add New button, input the religion name, and click Create.
- Update Religion: Modify religion details by clicking Update, making changes, and saving.
- Delete Religion: Remove a religion from the system by clicking Delete and confirming the action.
The Religion Management Module allows HR administrators to maintain and manage religious data within the HRIS system. By following these steps, you can easily add, update, or delete religions in the system.
Designation Management Module - User Guide
The Designation module in the HRIS system allows users to manage and maintain employee designations effectively. This guide provides detailed instructions on how to add, update, and delete designations.
Designation Management Module Overview
The Designation page is located under the Master Details section in the HRIS system. Users can manage various designations, including Skilled Labor, Secretary, Plant Operator, Engineer, and more. The interface allows HR personnel to edit, update, and delete designation details efficiently.
User Interface Overview
The Designation page displays existing designations and provides options to add new designations. Below is an overview of the interface:

Components of the Designation Interface
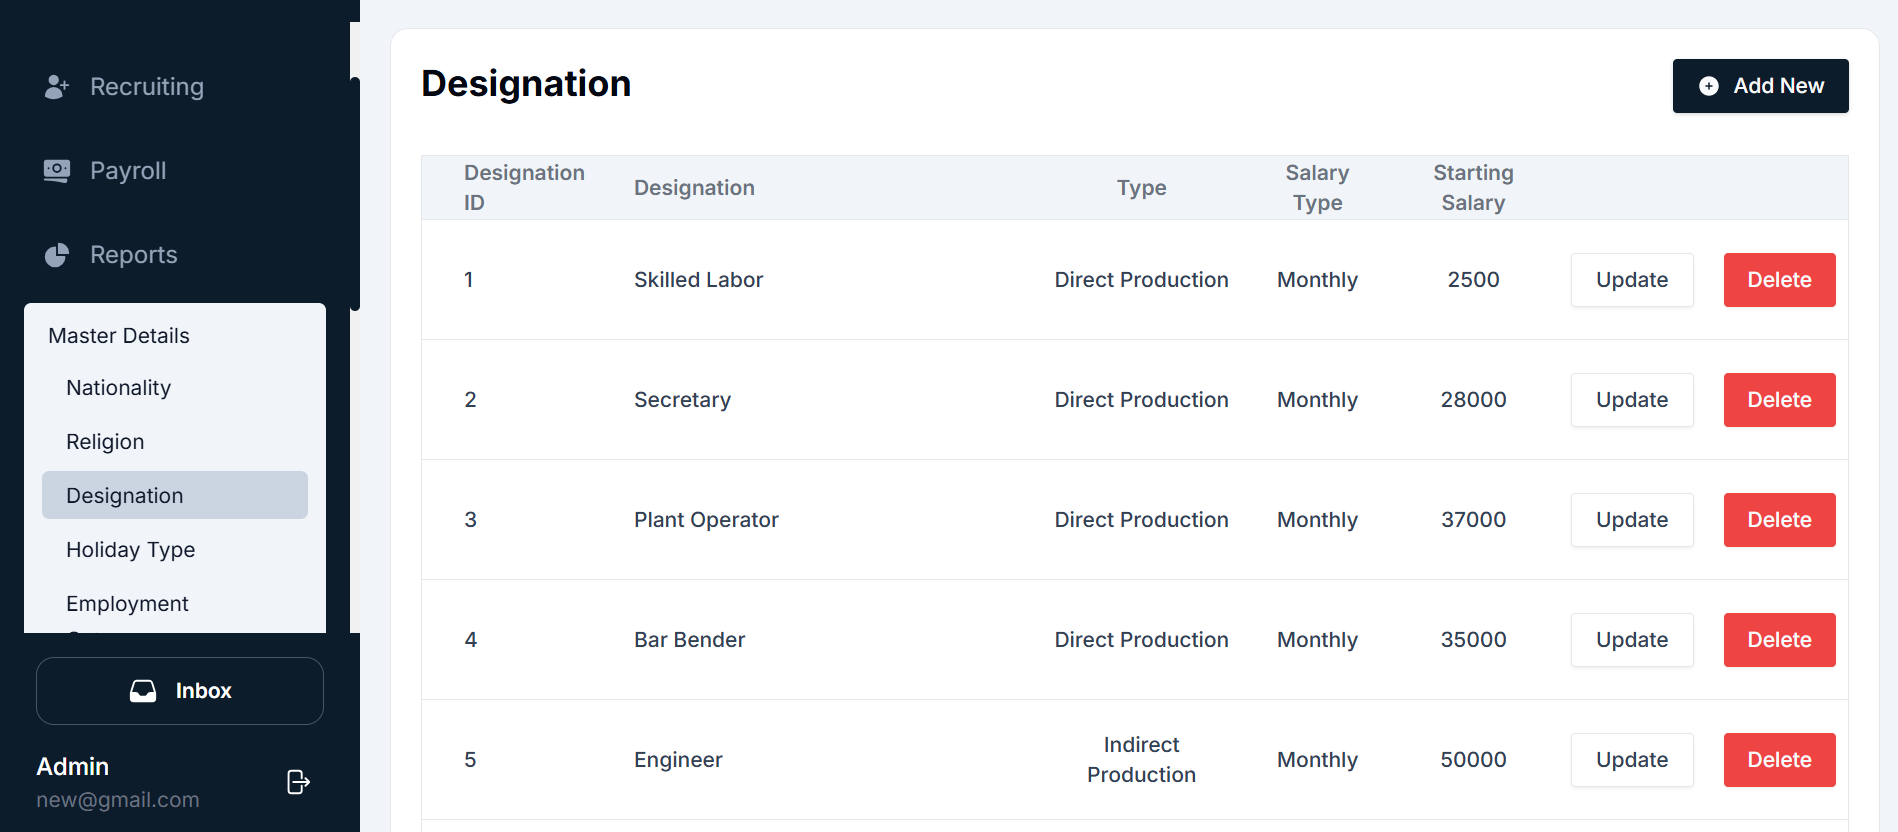
Navigation Sidebar: Located on the left side of the page, it allows navigation between various modules of the HRIS system. To manage designations, go to: Master Details → Designation.
Designation Table: This is the main area that displays a list of existing designations. The table includes the following columns:
- Designation ID: A unique identifier for each designation.
- Designation: The name of the designation (e.g., Skilled Labor, Secretary).
- Type: The type of work (e.g., Direct Production).
- Salary Type: The type of salary (e.g., Monthly).
- Starting Salary: The starting salary for the designation.
Actions: Action buttons are located next to each designation, these allow you to manage the details of a designation:
- Add New: To add a new designation.
- Update: Modify the details of an existing designation.
- Delete: Remove a designation from the list.
Top Buttons:
- + Add New: Located at the top-right of the screen, this button opens a form to add a new designation.
- Update: This button allows users to edit the designation's details.
- Delete: This option removes the selected designation.
Adding a New Designation
To add a new designation, follow these simple steps:
- Navigate to the Designation page under Master Details from the sidebar.
- Click the + Add New button at the top-right corner of the screen.
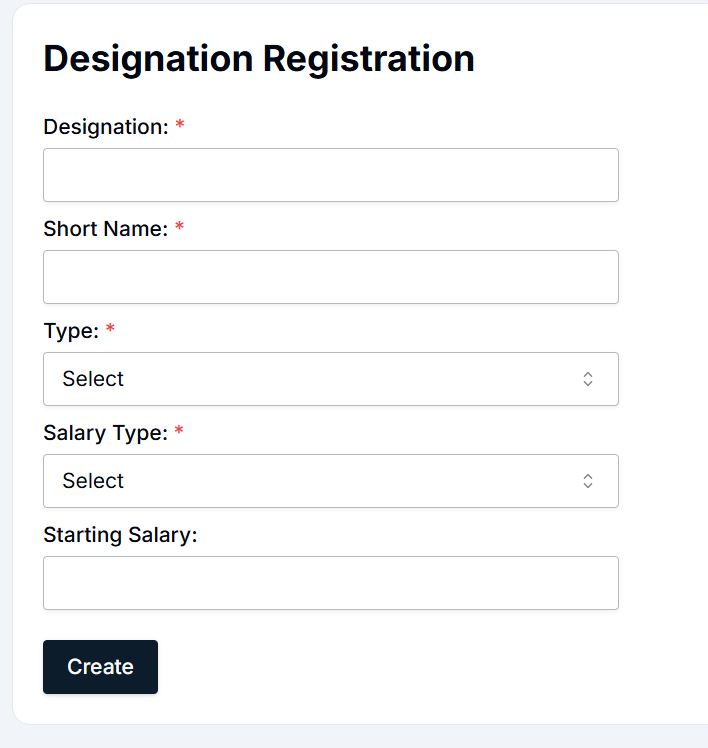
- Fill in the form:
- Designation: Enter the name of the designation (e.g., Skilled Labor, Secretary).
- Short Name: Provide a short name for the designation.
- Type: Select the type (e.g., Direct Production).
- Salary Type: Select the salary type (e.g., Monthly).
- Starting Salary: Enter the starting salary amount.
- Click the Create button to save the new designation. The newly created designation will now appear in the designation list.

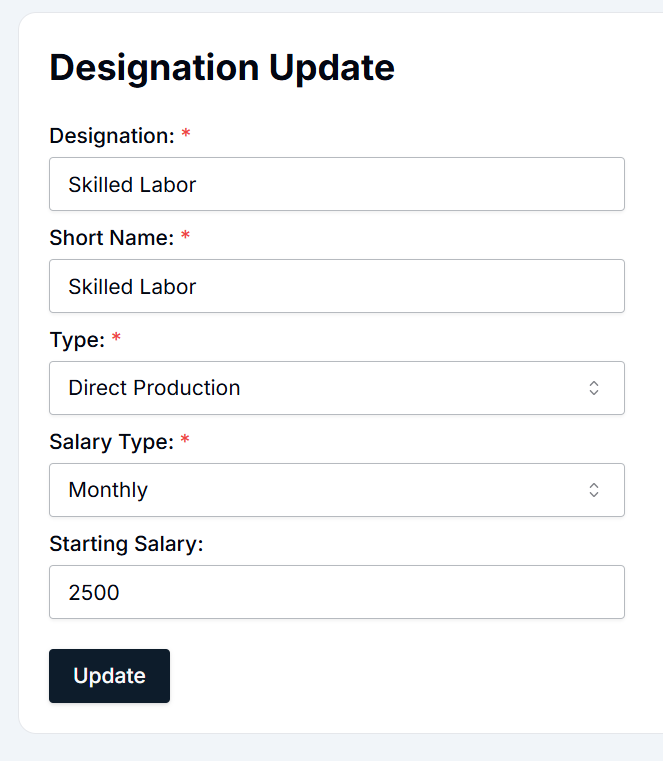
Updating an Existing Designation
To update an existing designation, follow these steps:
- Navigate to the Designation page under Master Details.
- Locate the designation you want to update.
- Click the Update button next to the designation. The Designation Update form will open, displaying the current details.
- Make the necessary changes:
- Designation: Change the designation name if needed.
- Short Name: Edit the short name if necessary.
- Type: Change the work type if required (e.g., Direct Production, Indirect Production).
- Salary Type: Select a different salary type if needed.
- Starting Salary: Update the starting salary for the designation.
- Click the Update button to save the changes. The updated designation details will now appear in the designation list.

Deleting a Designation
To remove a designation from the system, follow these steps:
- Navigate to the Designation page under Master Details.
- Locate the designation you want to delete.
- Click the Delete button next to the designation. A confirmation pop-up will appear.
- Click Yes to confirm the deletion, or No to cancel. Once deleted, the designation will no longer appear in the list.
Summary
- Designation Table: Displays existing designations and their related salary and type details.
- Add New: Click + Add New, fill in the form with designation name, short name, type, salary type, and starting salary, and click Create.
- Update: Modify an existing designation by clicking Update, making necessary changes, and clicking Update to save.
- Delete: Remove any designation by clicking Delete and confirming the action.
By following these steps, HR teams can effectively manage employee designations in the system, ensuring accurate classification and compensation details for all employees.
Holiday Type Management Module - User Guide
The Holiday Type module in the HRIS system allows users to efficiently manage and track various types of holidays in the organization. This guide will explain the user interface (UI) and how to use the features for adding, updating, and deleting holiday types.
User Interface Overview
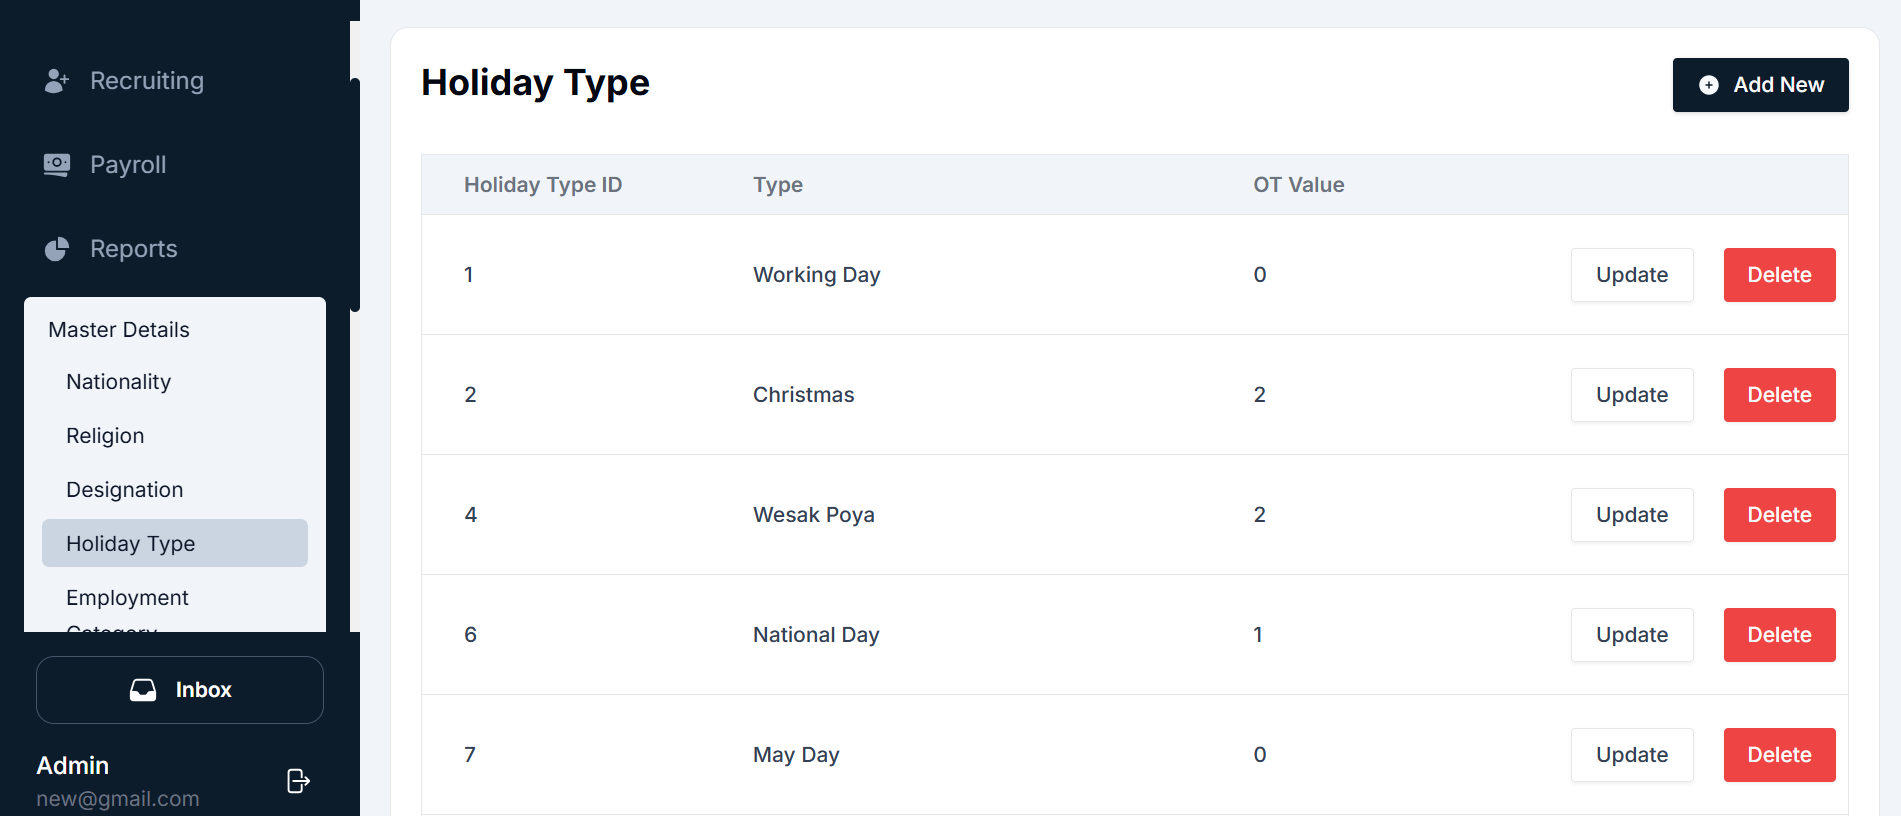
The Holiday Type page is located under the Master Details section in the HRIS system. Here, users can manage different holiday types such as Working Day, Christmas, National Day, and more. The interface consists of several key components, which are explained below:
Components of the Holiday Type Interface
- Navigation Sidebar: Located on the left side of the page, the sidebar helps you navigate between different modules of the HRIS system. To manage holiday types, go to: Master Details → Holiday Type.
- Holiday Type Table: The main area of the screen displays a list of existing holiday types. The table consists of the following columns:
- Holiday Type ID: A unique ID for each holiday type.
- Type: The name of the holiday (e.g., Christmas, National Day, Working Day).
- OT Value: The overtime value associated with the holiday type (e.g., 0 for normal working day, 1 or 2 for holidays with overtime).
- Actions: Contains buttons to update or delete a holiday type.
- Action Buttons:
- Add New: This button allows you to create a new holiday type.
- Update: Each holiday type in the list has an Update button, which allows you to modify its details.
- Delete: Each holiday type in the list has a Delete button to remove it from the system.
- Top Buttons:
- + Add New: Located at the top-right corner, this button opens the form to create a new holiday type.
- Update: For each existing holiday type, the Update button allows users to edit the details.
- Delete: Clicking Delete will remove the selected holiday type.
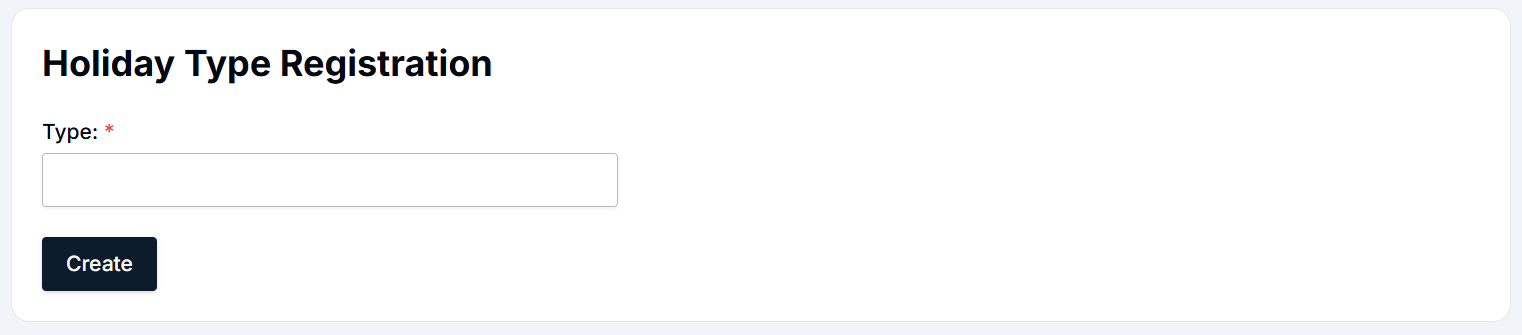
Adding a New Holiday Type
To add a new holiday type, follow these simple steps:
- Navigate to the Holiday Type page under the Master Details section from the sidebar.
- Click the + Add New button located at the top-right of the screen.
- Fill in the form:
- Type: Enter the name of the holiday (e.g., Christmas, National Day, Working Day).
- Overtime (OT) Value: Specify the OT value. For example:
- 0: Normal workday.
- 1: Single overtime pay.
- 2: Double overtime pay (commonly used for holidays).
- Click the Create button to save the new holiday type. The new holiday type will now appear in the holiday type list.

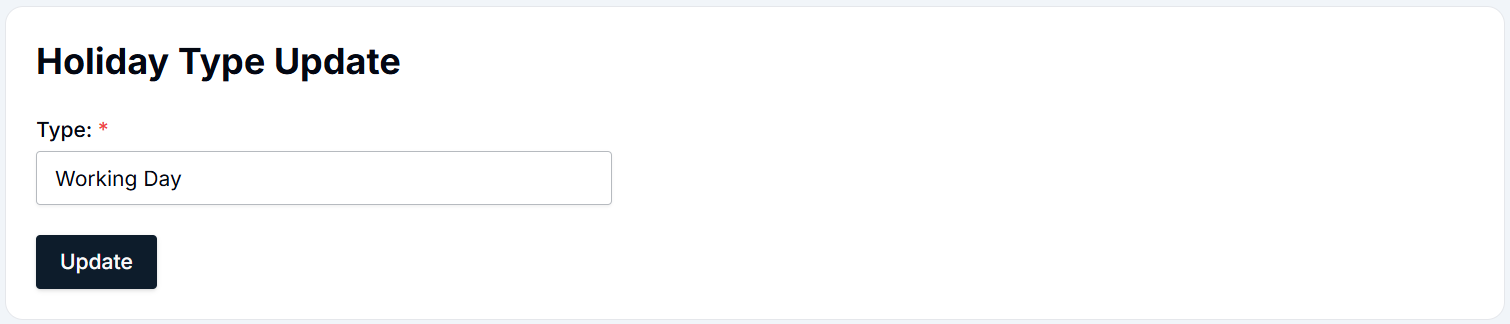
Updating an Existing Holiday Type
To modify an existing holiday type, such as changing the name or OT value, follow these steps:
- Navigate to the Holiday Type page under Master Details.
- Find the holiday type you wish to update (e.g., Christmas).
- Click the Update button next to the holiday type you want to modify.
- The Holiday Type Update form will open with the current details.
- Make necessary changes:
- Type: Update the name of the holiday type (e.g., change Christmas to New Year).
- OT Value: Update the OT value if necessary (e.g., change from 2 to 1).
- Click the Update button to save the changes. The holiday type will be updated with the new details in the list.

Deleting a Holiday Type
To delete a holiday type, follow these steps:
- Navigate to the Holiday Type page under Master Details.
- Find the holiday type you wish to delete (e.g., Wesak Poya).
- Click the Delete button next to the holiday type.
- A confirmation pop-up will appear asking you to confirm the deletion.
- Click Yes to permanently delete the holiday type, or No to cancel the deletion. Once deleted, the holiday type will no longer appear in the list.
Summary
- Holiday Type Table: Displays existing holiday types, OT values, and action buttons (Update/Delete).
- Add New: To create a new holiday type, click the + Add New button, fill out the form, and click Create.
- Update: Modify any existing holiday type by clicking the Update button, making changes, and saving.
- Delete: Remove any holiday type by clicking the Delete button and confirming the deletion.
Employment Category Management Module - User Guide
The Employment Category module in the HRIS system allows users to manage and categorize employees based on their roles and classifications. This guide will explain the user interface (UI) and how to use the features for adding, updating, and deleting employment categories.
User Interface Overview
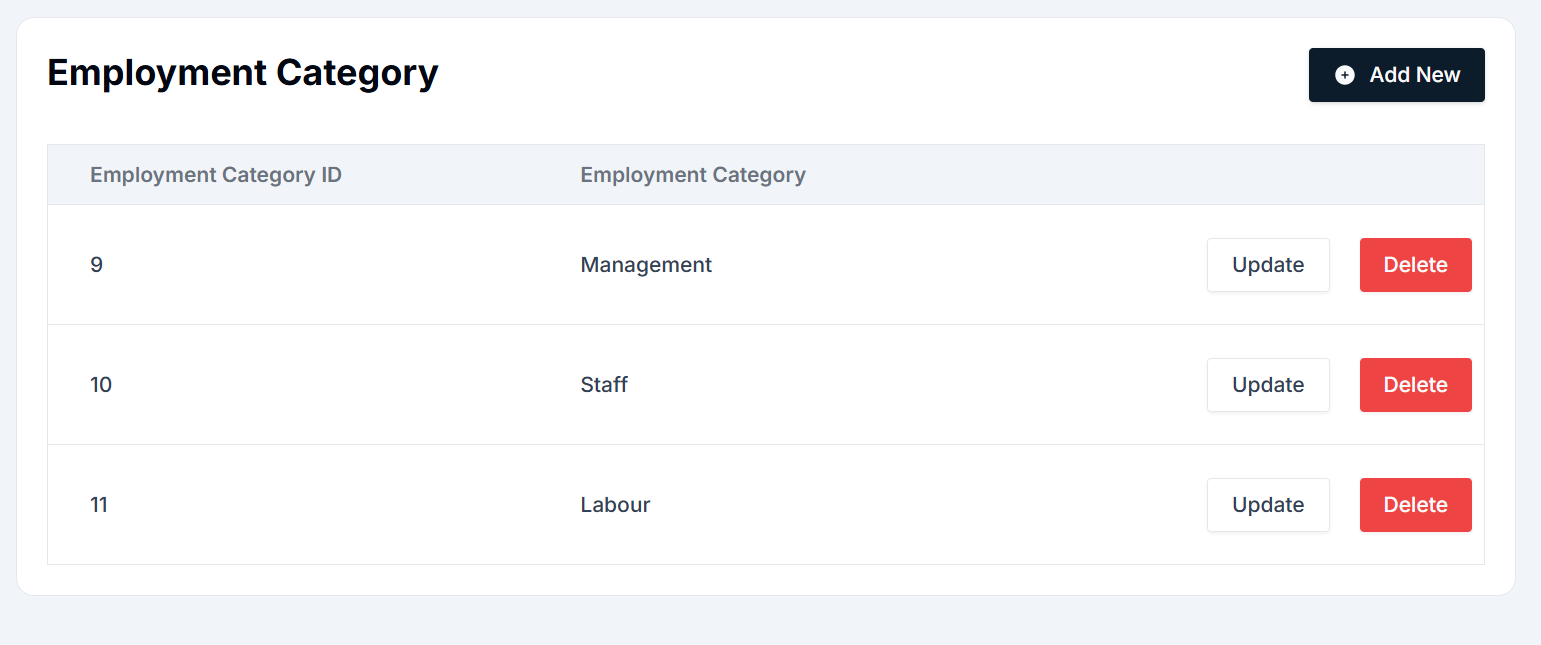
The Employment Category page is located under the Master Details section in the HRIS system. In this section, users can manage different employee categories like Management, Staff, and Labour. The interface consists of several key components, which are explained below:

Components of the Employment Category Interface
- Navigation Sidebar: Located on the left side of the page, the sidebar helps you navigate between different modules of the HRIS system. To manage employee categories, go to: Master Details → Employment Category.
- Employment Category Table: The main area of the screen displays a list of existing employment categories. The table consists of the following columns:
- Employment Category ID: A unique ID for each employment category.
- Employment Category: The name of the category (e.g., Management, Staff, Labour).
- Actions: Contains buttons to update or delete an employment category.
- Action Buttons:
- Add New: This button allows you to create a new employment category.
- Update: Each employment category in the list has an Update button, which allows you to modify its details.
- Delete: Each employment category in the list has a Delete button to remove it from the system.
- Top Buttons:
- + Add New: Located at the top-right of the screen, this button opens the form to create a new employment category.
- Update: For each existing employment category, the Update button allows users to edit the details.
- Delete: Clicking Delete will remove the selected employment category.
Adding a New Employment Category
To add a new employment category, follow these simple steps:
- Navigate to the Employment Category page under the Master Details section from the sidebar.
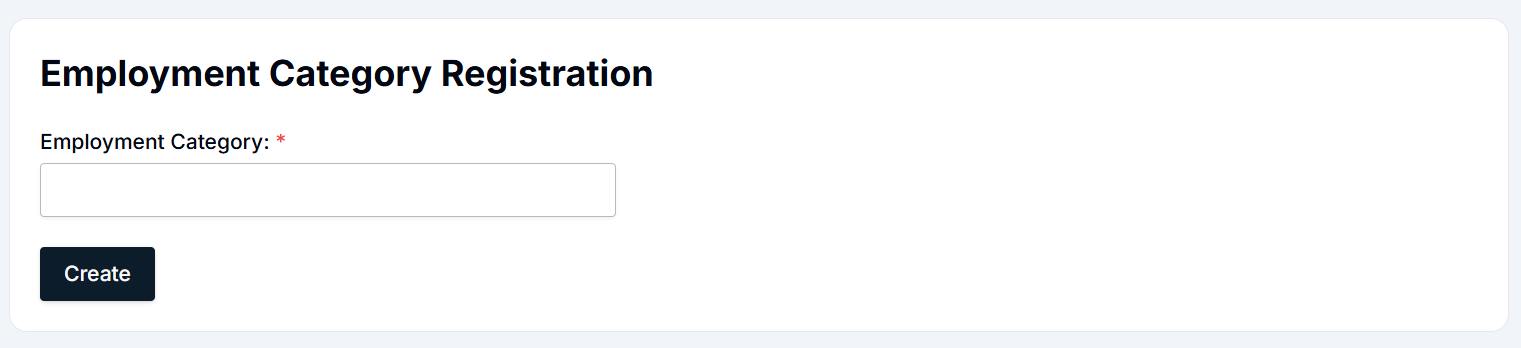
- Click the + Add New button located at the top-right of the screen.
- Fill in the form:
- Employment Category: Enter the name of the category (e.g., Management, Staff, Labour).
- Click the Create button to save the new employment category. The new employment category will now appear in the employment category list.

Updating an Existing Employment Category
To modify an existing employment category, such as changing the category name, follow these steps:
- Navigate to the Employment Category page under Master Details.
- Find the employment category you wish to update (e.g., Management).
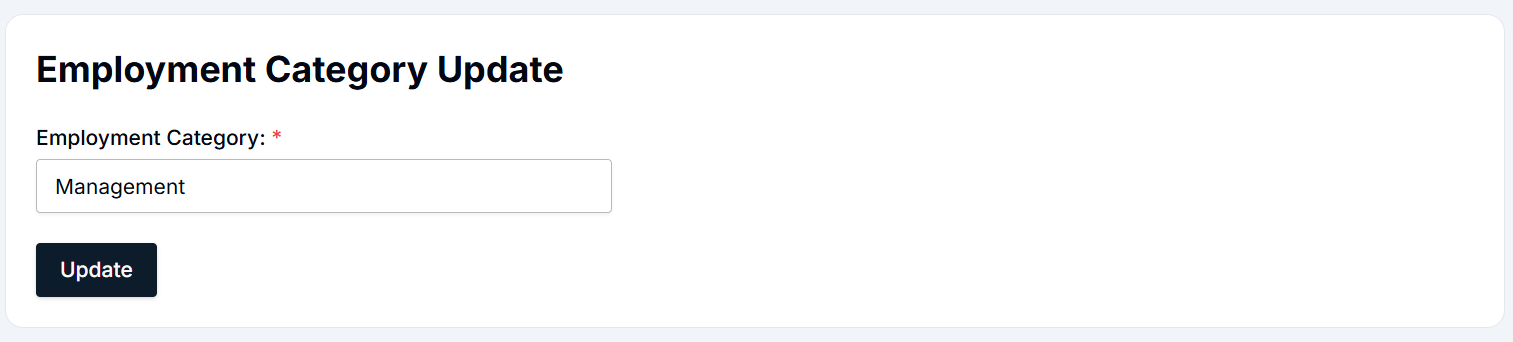
- Click the Update button next to the employment category you want to modify.
- The Employment Category Update form will open with the current details.
- Make necessary changes:
- Employment Category: Update the name of the employment category (e.g., change Management to Senior Management).
- Click the Update button to save the changes. The employment category will be updated with the new details in the list.

Deleting an Employment Category
To delete an employment category, follow these steps:
- Navigate to the Employment Category page under Master Details.
- Find the employment category you wish to delete (e.g., Labour).
- Click the Delete button next to the employment category.
- A confirmation pop-up will appear asking you to confirm the deletion.
- Click Yes to permanently delete the employment category, or No to cancel the deletion. Once deleted, the employment category will no longer appear in the list.
Summary
- Employment Category Table: Displays existing employment categories, IDs, and action buttons (Update/Delete).
- Add New: To create a new employment category, click the + Add New button, fill out the form, and click Create.
- Update: Modify any existing employment category by clicking the Update button, making changes, and saving.
- Delete: Remove any employment category by clicking the Delete button and confirming the deletion.
Employment Type Module - User Guide
The Employment Type module in the HRIS system is designed to help users manage and track various types of employment status within the organization. The module allows HR teams to define and categorize the different employment types, such as Permanent and Contract Basis, that exist within the company. Below is a detailed guide for users on how to navigate the Employment Type module, including how to add, update, and delete employment types.
User Interface Overview
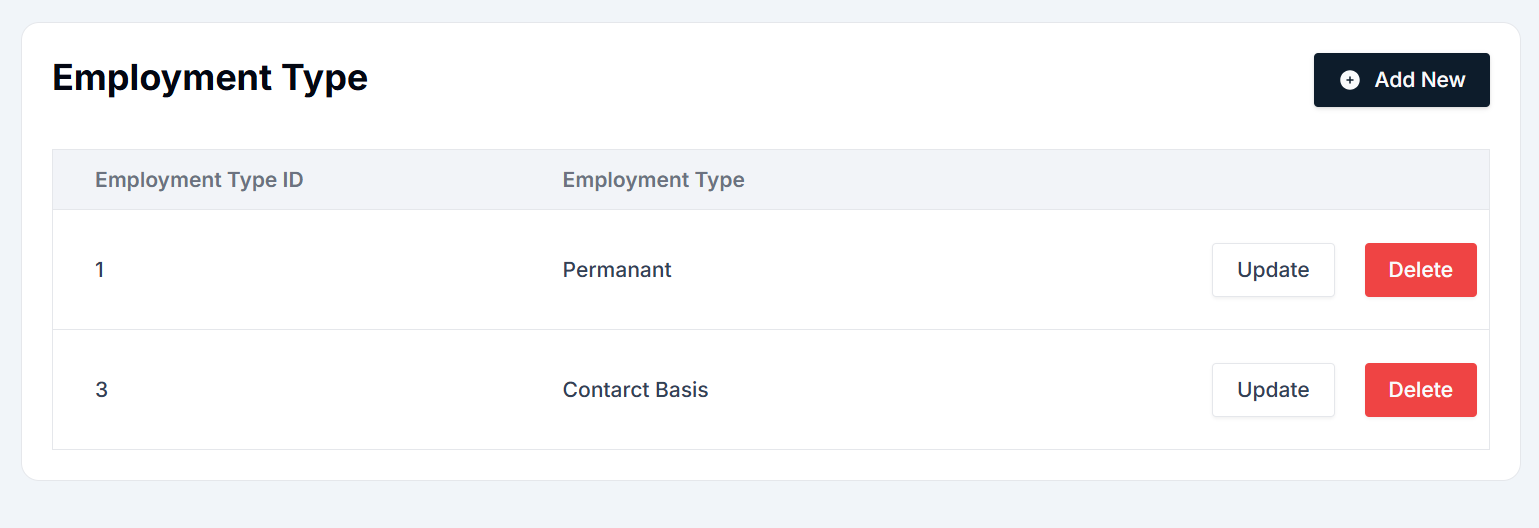
The Employment Type page is located under the Master Details section of the HRIS system. The interface allows users to manage and configure the different employment types used by the company.

Components of the Employment Type Interface
- Navigation Sidebar: The Navigation Sidebar is located on the left side of the page and helps you quickly navigate between various modules of the HRIS system. To manage employment types, go to: Master Details → Employment Type.
- Employment Type Table: The main area of the screen displays a list of existing employment types. This table is organized with the following columns:
- Employment Type ID: A unique identifier for each employment type.
- Employment Type: The name of the employment type, such as Permanent or Contract Basis.
- Actions: Includes buttons for updating or deleting an employment type.
- Action Buttons:
- Add New: This button opens a form that allows you to create a new employment type.
- Update: Each employment type listed has an Update button that lets you modify its details.
- Delete: The Delete button removes the selected employment type from the system.
- Top Buttons:
- + Add New: This button is located at the top-right of the Employment Type table. Clicking this opens the form to add a new employment type.
- Update: This button appears for each existing employment type and allows you to edit it.
- Delete: This button lets you delete an employment type after selecting the one to be removed.
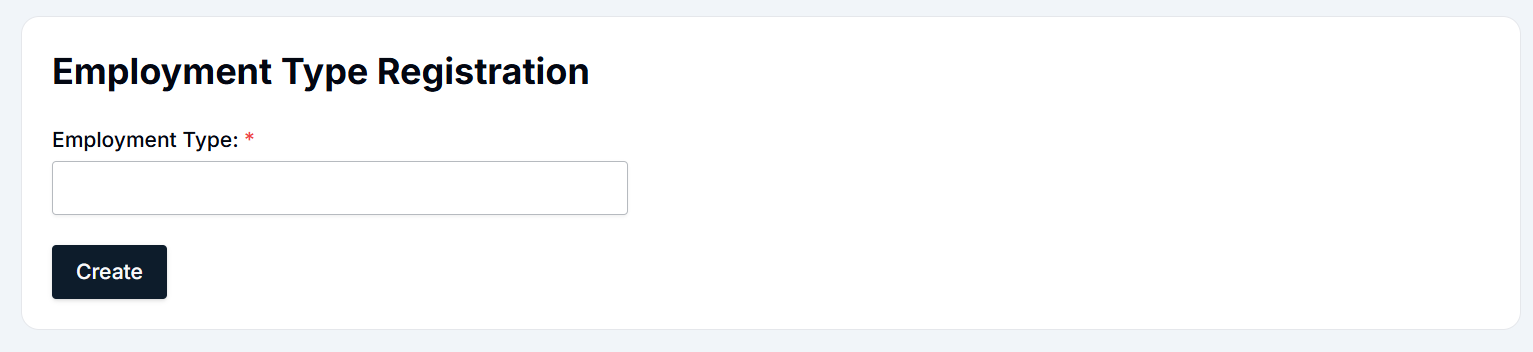
Adding a New Employment Type
To add a new employment type (e.g., adding a new type like "Intern"), follow these steps:
Navigate to the Employment Type page under the Master Details section in the sidebar.
Click the + Add New button located at the top-right of the screen.
Fill in the form:
- Employment Type: Enter the name of the employment type (e.g., Permanent, Contract Basis).
Click the Create button to save the new employment type. The newly added employment type will now appear in the list with its respective ID and name.

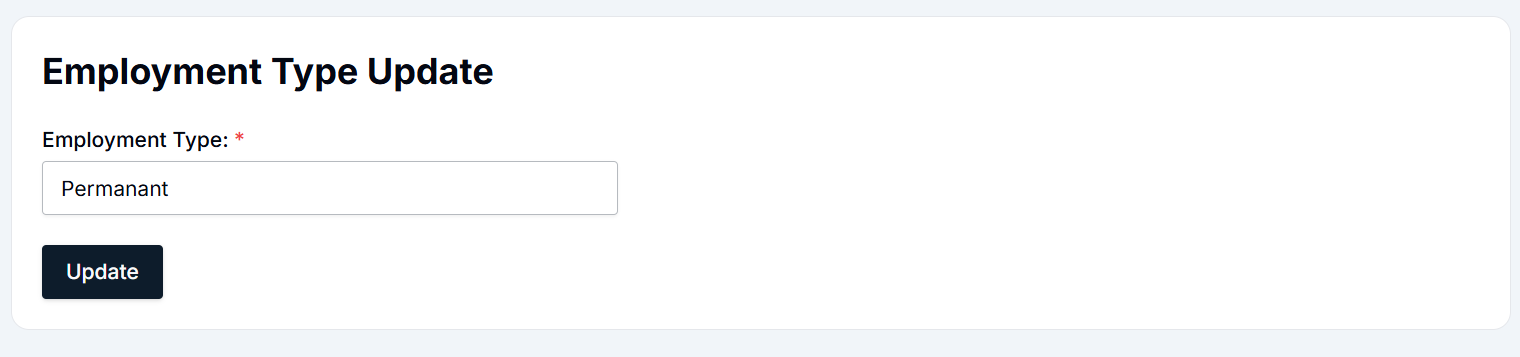
Updating an Existing Employment Type
To update an existing employment type (e.g., changing "Contract Basis" to "Freelance"), follow these steps:
Navigate to the Employment Type page under Master Details.
Find the employment type you wish to update (e.g., "Contract Basis").
Click the Update button next to the employment type you want to modify.
The Employment Type Update form will open with the current details.
Make the necessary changes:
- Employment Type: Modify the name of the employment type (e.g., change "Contract Basis" to "Freelance").
Click Update to save the changes. The employment type will be updated in the list with the new details.

Deleting an Employment Type
To delete an employment type, follow these steps:
- Navigate to the Employment Type page under Master Details.
- Find the employment type you wish to delete (e.g., "Contract Basis").
- Click the Delete button next to the employment type.
- A confirmation pop-up will appear asking you to confirm the deletion.
- Click Yes to permanently delete the employment type, or No to cancel the deletion. Once deleted, the employment type will no longer appear in the list.
Summary
- Employment Type Table: Displays existing employment types, with options to update or delete.
- Add New: To create a new employment type, click the + Add New button, fill out the form, and click Create.
- Update: To modify an existing employment type, click Update, make the necessary changes, and save them.
- Delete: To remove an employment type, click Delete and confirm the action.
By following these steps, HR teams can effectively manage employment types within the system, ensuring proper categorization and classification of employees.
Shift Management Module - User Guide
The Shift module in the HRIS system helps users manage work shifts for employees. The module allows users to create, update, and delete shift schedules, providing flexibility in assigning work hours and creating shift patterns.
User Interface Overview
The Shift page is part of the Master Details section in the HRIS system. The UI provides an easy-to-use platform to manage various shifts such as "08:30-16:30," "Site Labour," etc. Below are the main components of the interface:
Components of the Shift Interface
- Navigation Sidebar: Located on the left, the sidebar helps you navigate to different sections of the HRIS system. Master Details → Shift: This is where you manage shifts for employees.
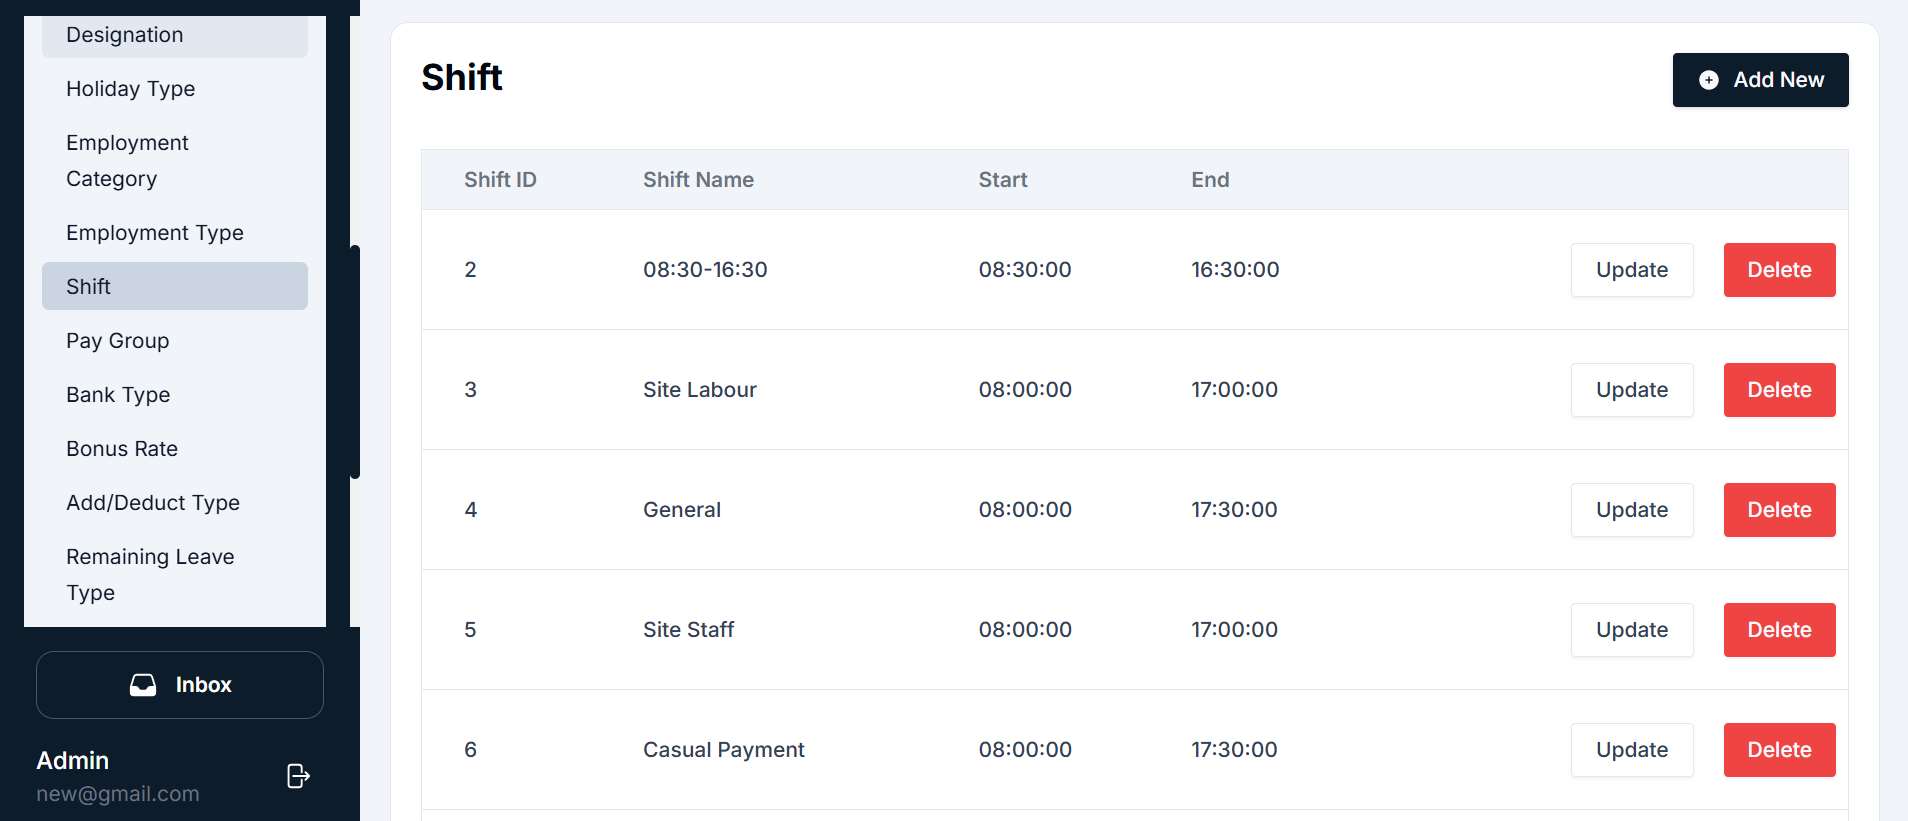
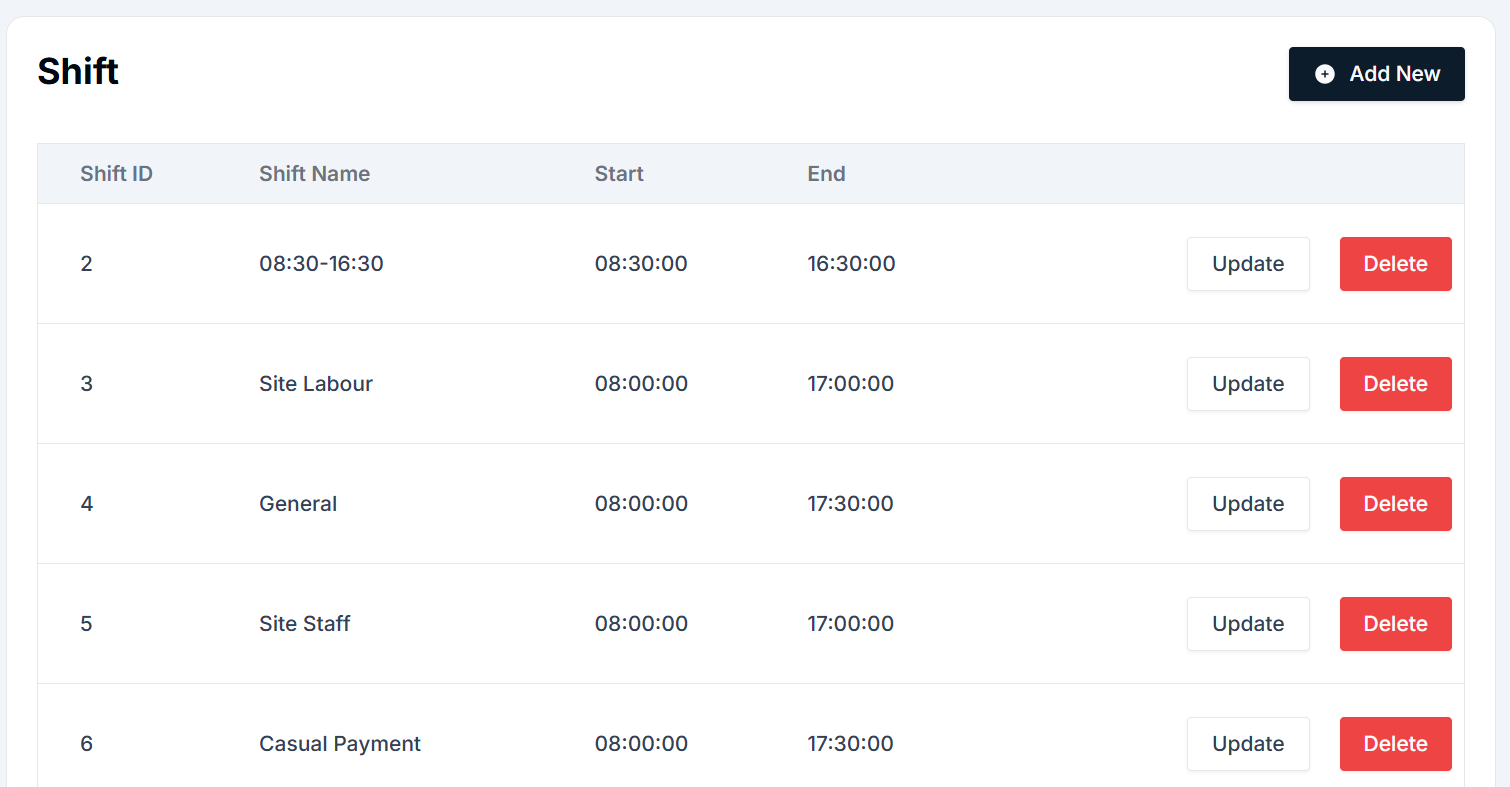
- Shift Table: The main area displays a list of existing shifts in a tabular format with the following columns:
- Shift ID: Unique identifier for each shift.
- Shift Name: The name of the shift (e.g., "08:30-16:30," "Site Labour").
- Start: Start time for the shift.
- End: End time for the shift.
- Actions: Contains the buttons for updating or deleting a shift.
- Action Buttons:
- Add New: This button allows users to create a new shift schedule.
- Update: Each existing shift in the list has an Update button to modify shift details.
- Delete: This button allows users to delete a shift from the system.
- Action Buttons:
- + Add New: This button is located at the top-right of the Employment Type table. Clicking this opens the form to create a new shift.
- Update/Delete: These buttons allow you to edit or remove existing shifts from the system.
Adding a New Shift
To add a new shift, follow these simple steps:
- Navigate to the Shift page under Master Details from the sidebar.
- Click the + Add New button located at the top-right of the screen.
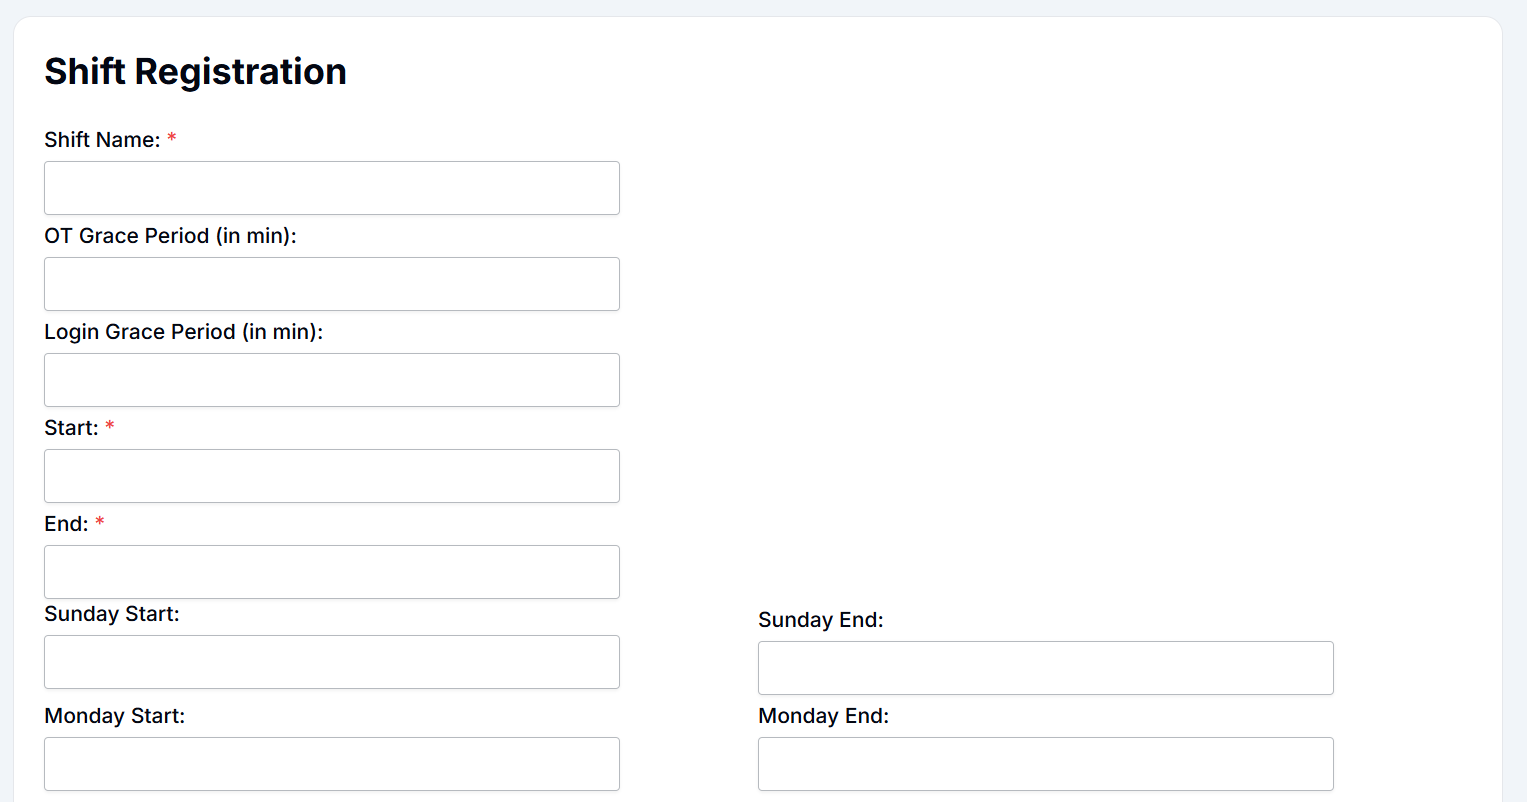
- In the Shift Registration form, fill in the necessary details:
- Shift Name: Enter the name of the shift (e.g., "08:30-16:30").
- OT Grace Period (in minutes): Enter the grace period for overtime if applicable.
- Login Grace Period (in minutes): Enter the time grace period allowed for logging in.
- Start: Set the start time for the shift.
- End: Set the end time for the shift.
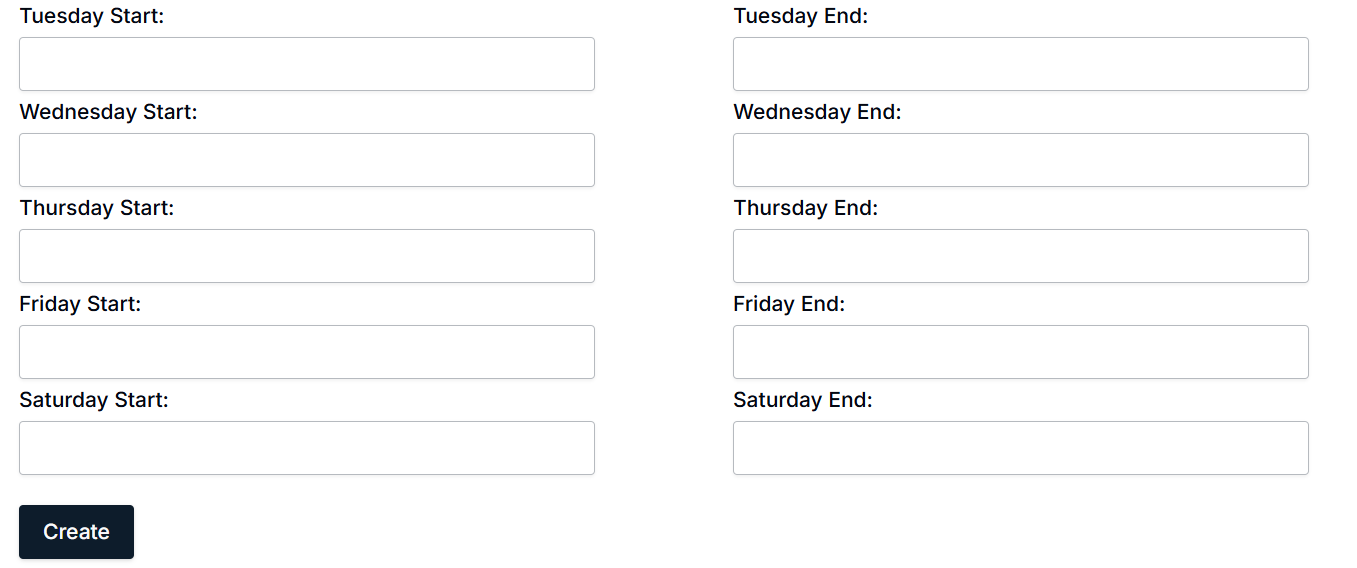
- Additional days (Sunday to Saturday): Configure start and end times for each day of the week if the shift has specific timings for each day.
- Click Create to save the new shift. The newly created shift will now appear in the shift list, ready for use.

Updating an Existing Shift
To update the details of an existing shift, follow these steps:
- Navigate to the Shift page under Master Details.
- Locate the shift you wish to update (e.g., "08:30-16:30").
- Click the Update button next to the shift you want to modify.
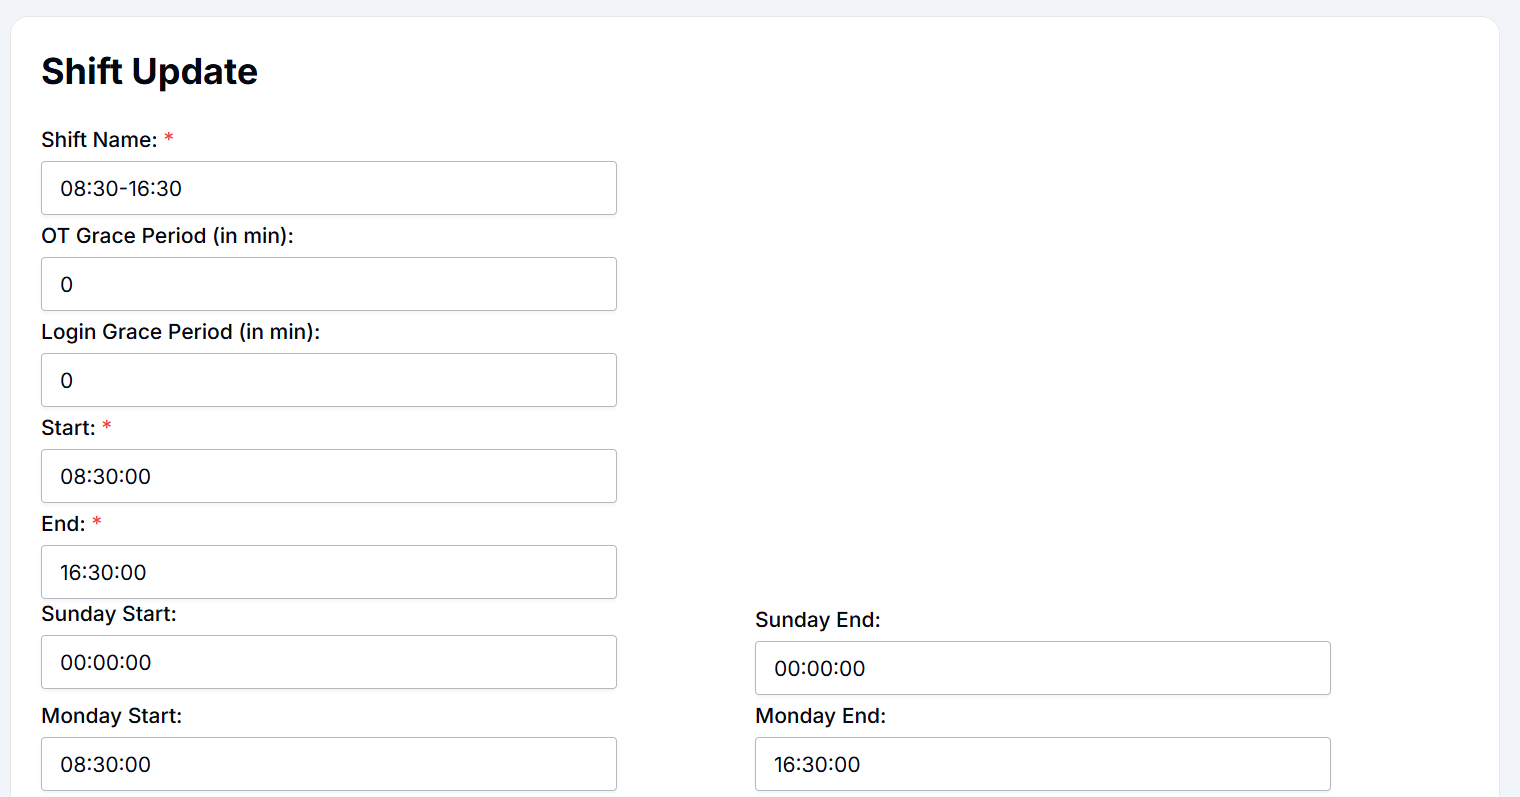
- The Shift Update form will open with the current shift details.
- Make necessary changes:
- Shift Name: Update the name if required.
- OT Grace Period: Modify the overtime grace period if necessary.
- Login Grace Period: Update the login grace period.
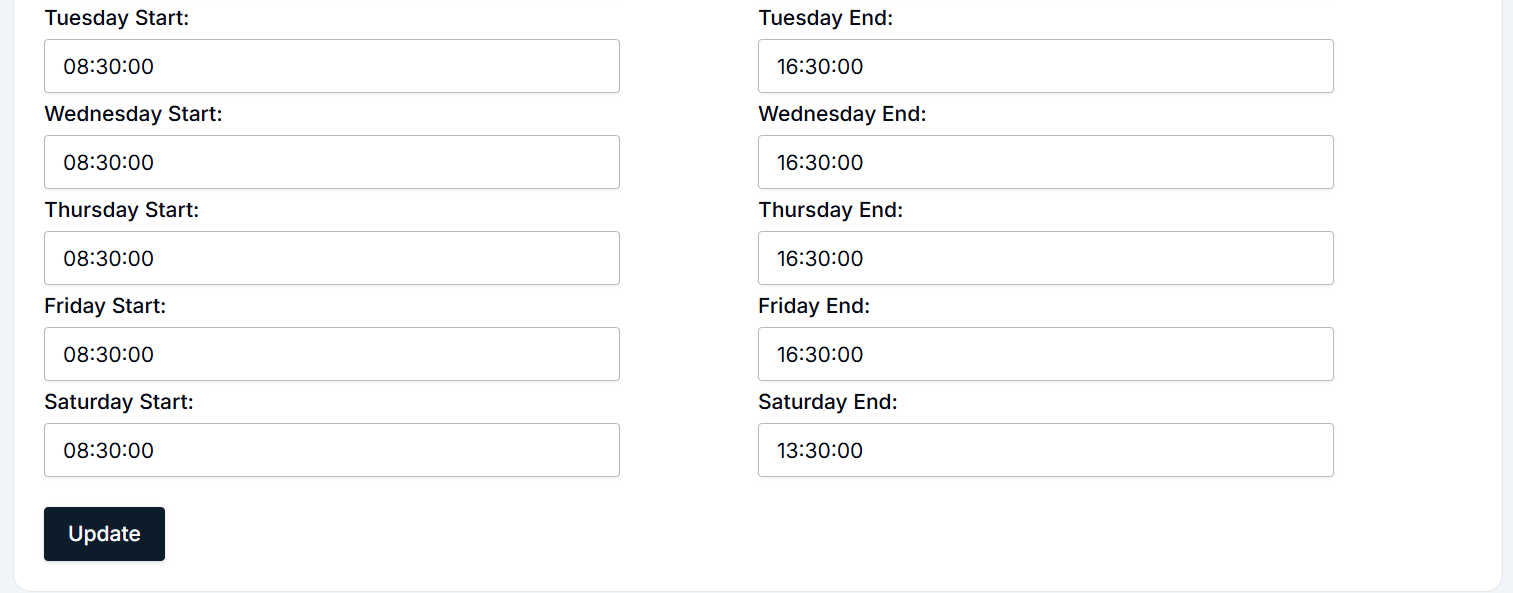
- Start and End: Change the timing as needed for the shift.
- Click Update to save the changes. The updated shift will now appear in the list with the new details.

Deleting a Shift
To delete a shift, follow these steps:
- Navigate to the Shift page under Master Details.
- Find the shift you want to delete (e.g., "Site Labour").
- Click the Delete button next to the shift.
- A confirmation pop-up will appear asking you to confirm the deletion.
- Click Yes to permanently delete the shift, or No to cancel the deletion. Once deleted, the shift will no longer appear in the list.
Summary
- Shift Table: Displays all existing shifts, their start and end times, and action buttons (Update/Delete).
- Add New: To create a new shift, click + Add New, fill out the form, and click Create.
- Update: Modify any existing shift by clicking Update, making changes, and saving.
- Delete: Remove a shift by clicking Delete and confirming the action.
By following these steps, HR teams can easily manage shift schedules for employees, ensuring proper work hours and maintaining accurate records.
Pay Group Management Module - User Guide
The Pay Group module in the HRIS system allows users to efficiently manage employee pay groups. This guide explains the user interface (UI) and provides detailed instructions on how to add, update, and delete pay groups.
User Interface Overview
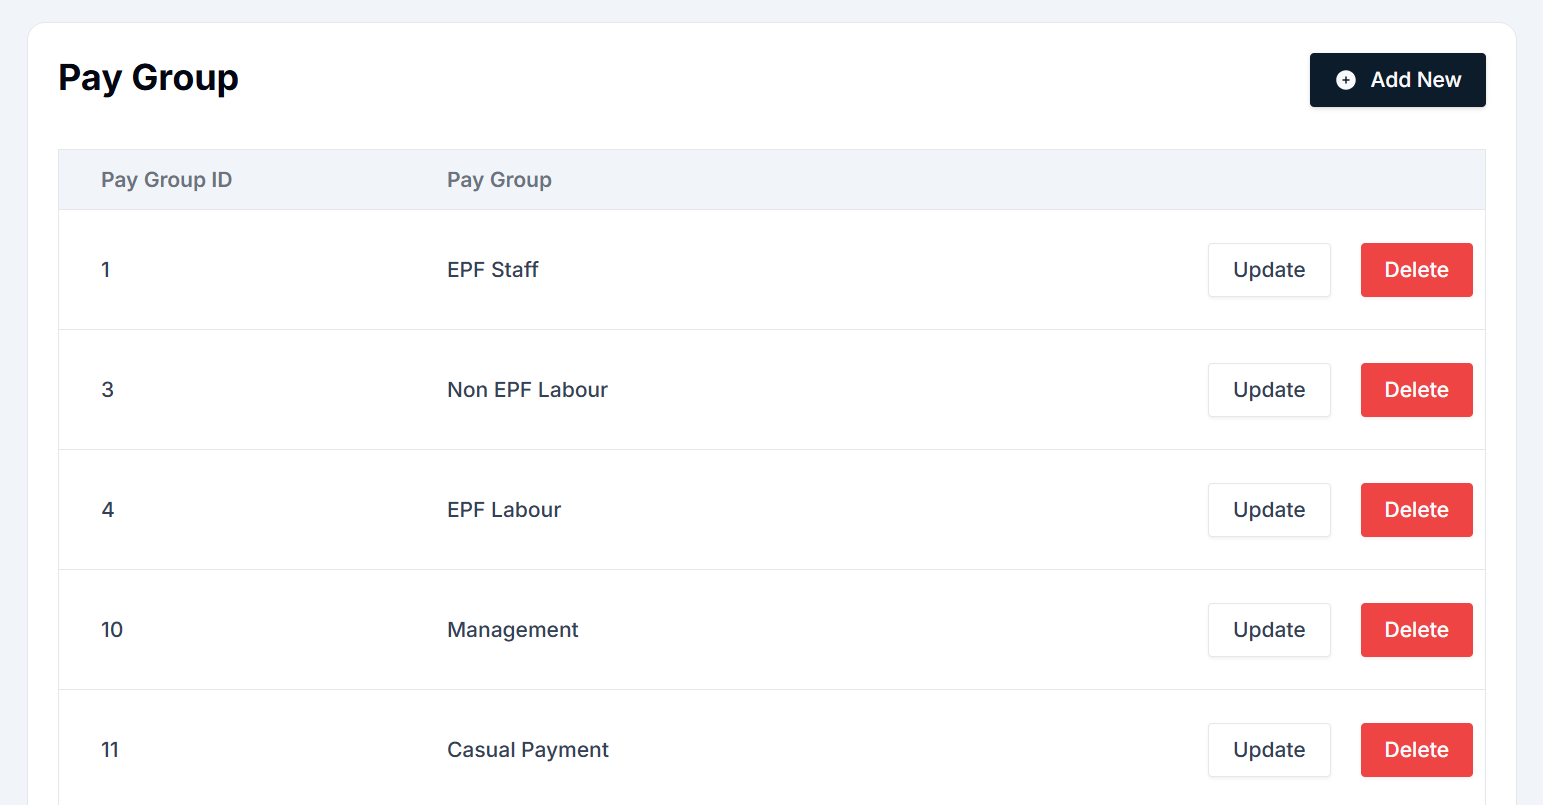
The Pay Group page is located under the Master Details section in the HRIS system. Users can manage different pay groups such as EPF Staff, Non-EPF Labour, Casual Payment, and more. The interface consists of several key components, explained below:

Components of the Pay Group Interface
- Navigation Sidebar: Located on the left side of the page, the sidebar allows navigation between different modules of the HRIS system.
- Pay Group Table: Displays a list of existing pay groups with the following columns:
- Pay Group ID: A unique identifier for each pay group.
- Pay Group: The name of the pay group (e.g., EPF Staff, Non-EPF Labour).
- Actions: Buttons for updating or deleting a pay group.
- Action Buttons:
- Add New: Allows users to create a new pay group.
- Update: Lets users modify a pay group.
- Delete: Removes the selected pay group from the system.
- Action Buttons:
- + Add New: Opens the form to create a new pay group.
- Update/Delete: Lets users edit or remove an existing pay group.
Adding a New Pay Group
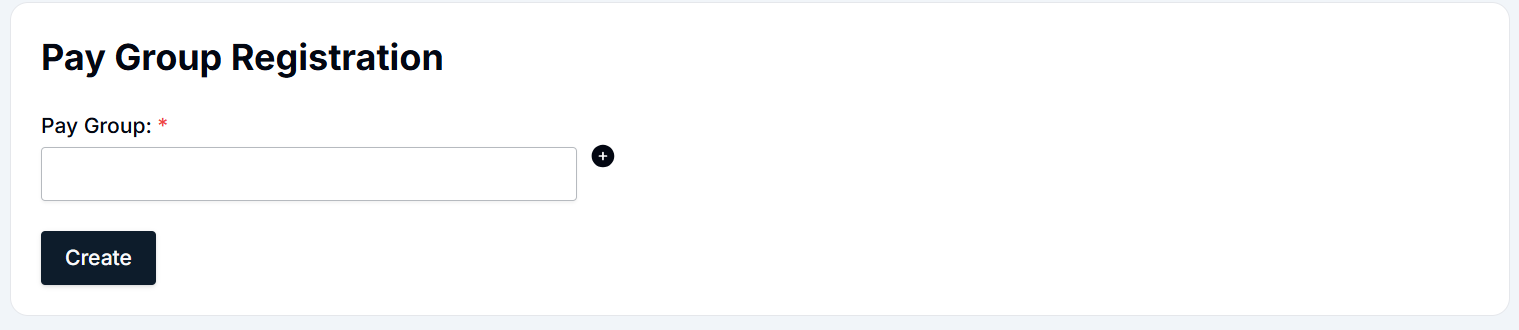
To add a new pay group, follow these simple steps:
- Navigate to the Pay Group page under Master Details.
- Click the + Add New button located at the top-right of the screen.
- Fill in the form with the pay group name (e.g., "EPF Staff" or "Non-EPF Labour").
- Click Create to save the new pay group.

Updating an Existing Pay Group
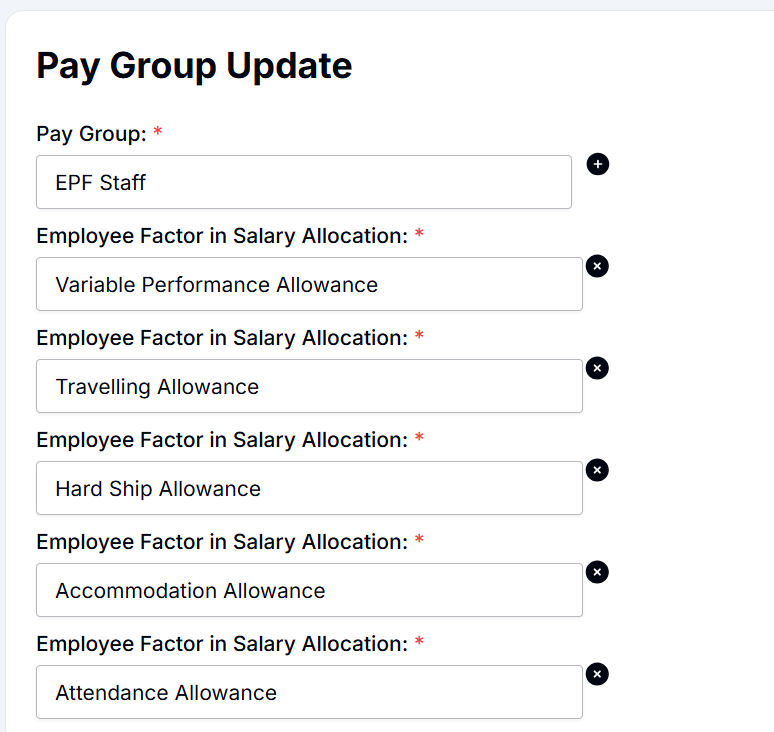
To modify an existing pay group, such as changing the name or salary allocation details, follow these steps:
- Navigate to the Pay Group page under Master Details.
- Locate the pay group you want to update.
- Click the Update button next to the pay group.
- The Pay Group Update form will open with the current details.
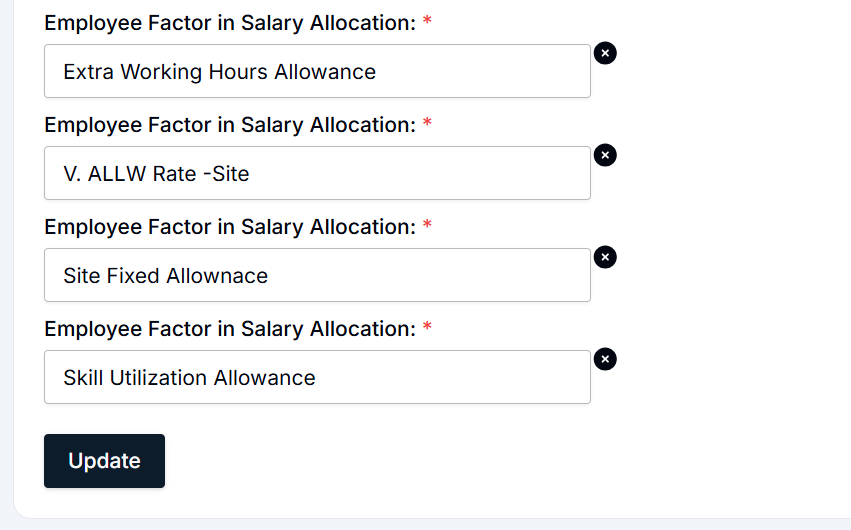
- Make the necessary changes:
- Pay Group: Update the name if necessary.
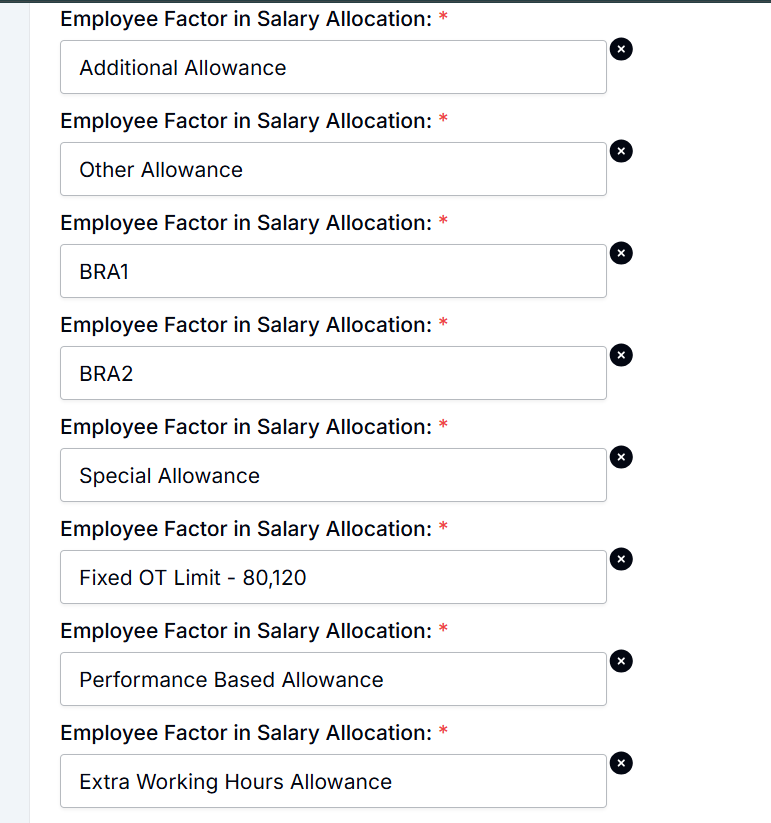
- Employee Factor in Salary Allocation: Add or remove allowances such as:
- Variable Performance Allowance
- Travelling Allowance
- Hardship Allowance
- Accommodation Allowance
- Special Task Allowance
- Performance-Based Allowance
- Extra Working Hours Allowance
- Click the Update button to save the changes.

Deleting a Pay Group
To remove a pay group from the system, follow these steps:
- Navigate to the Pay Group page under Master Details.
- Locate the pay group you want to delete.
- Click the Delete button next to the pay group.
- A confirmation pop-up will appear.
- Click Yes to confirm the deletion or No to cancel.
- Once deleted, the pay group will no longer appear in the list.
Summary
- Pay Group Table: Displays existing pay groups and associated employee salary allocations.
- Add New: Click + Add New, enter the pay group name, and click Create.
- Update: Modify an existing pay group by clicking Update, making changes, and saving.
- Delete: Remove any pay group by clicking Delete and confirming the action.
By following these steps, HR teams can effectively manage employee pay groups in the system, ensuring accurate salary allocation and payroll classification.
Bank Type Management Module - User Guide
The Bank Type module in the HRIS system allows users to efficiently manage the types of banks available for employees' salary disbursements. This guide explains the user interface (UI) and provides detailed instructions on how to add, update, and delete bank types.
User Interface Overview
The Bank Type page is located under the Master Details section in the HRIS system. Users can manage the different bank types such as Sampath Bank, HNB, BOC, Commercial Bank, and more. The interface consists of several key components, explained below:

Components of the Bank Type Interface
- Navigation Sidebar: Located on the left side of the page, the sidebar allows users to navigate between different modules of the HRIS system.
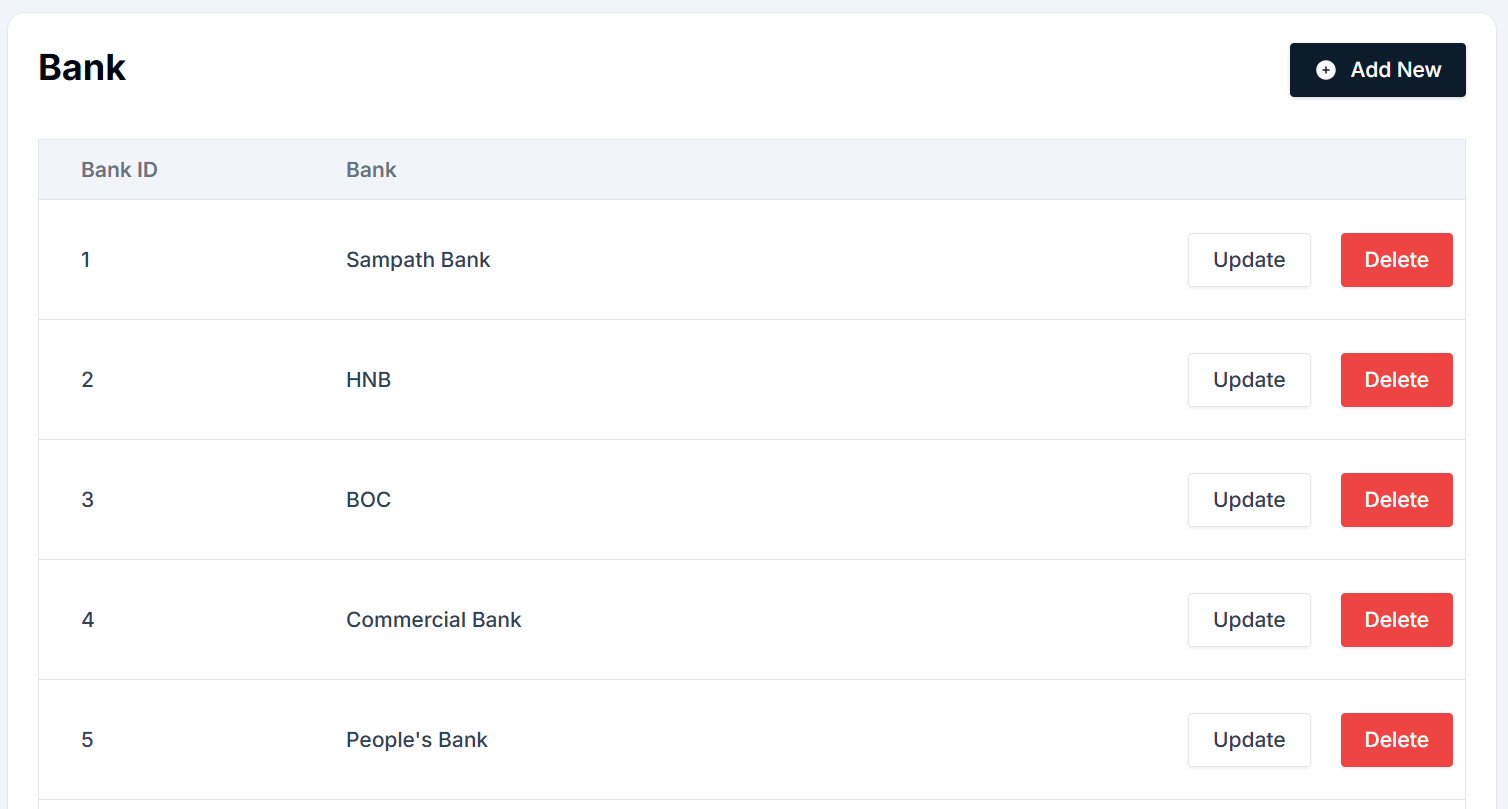
- Bank Type Table: Displays a list of existing bank types. It includes:
- Bank ID: A unique identifier for each bank.
- Bank: The name of the bank (e.g., Sampath Bank, HNB).
- Actions: Buttons for updating or deleting a bank type.
- Actions Button:
- Add New: Allows users to create a new bank type.
- Update: Lets users modify a bank type.
- Delete: Removes the selected bank type.
- Top Button:
- + Add New: Opens the form to create a new bank type.
- Update/Delete: Lets users edit or remove an existing bank type.
Adding a New Bank Type
To add a new bank type, follow these simple steps:
- Navigate to the Bank Type page under Master Details.
- Click the + Add New button at the top-right of the screen.
- Fill in the form with the bank name (e.g., Sampath Bank, HNB).
- Click Create to save the new bank type.


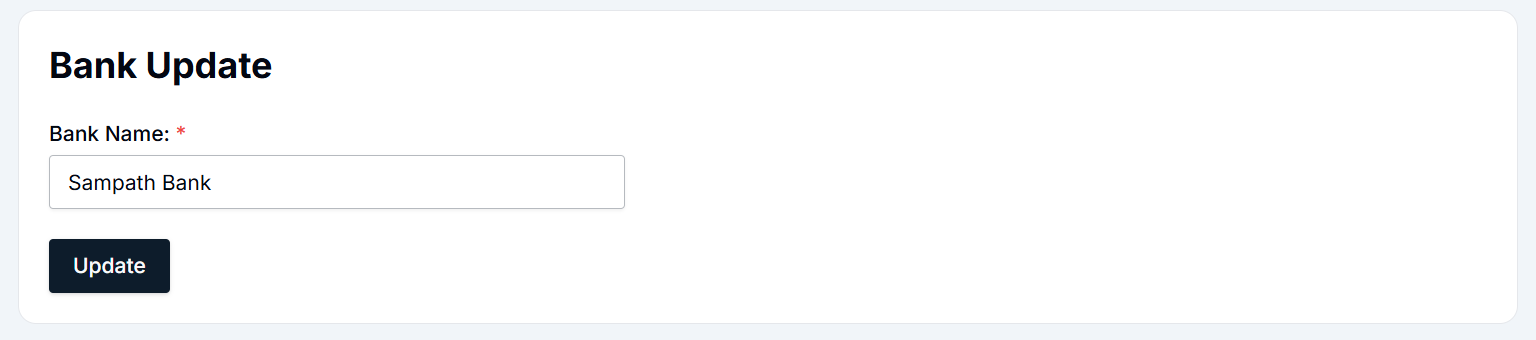
Updating an Existing Bank Type
- Navigate to the Bank Type page under Master Details.
- Locate the bank type you want to update.
- Click the Update button next to the bank type.
- Modify the bank name as needed and click Update to save changes.

Deleting a Bank Type
- Navigate to the Bank Type page under Master Details.
- Locate the bank type you want to delete.
- Click the Delete button next to the bank type.
- A confirmation pop-up will appear. Click Yes to delete, or No to cancel.
Summary
- Bank Type Table: Displays existing bank types.
- Add New: Click + Add New, enter the bank name, and click Create.
- Update: Modify an existing bank type by clicking Update, making changes, and saving.
- Delete: Remove any bank type by clicking Delete and confirming the action.
By following these steps, HR teams can effectively manage bank types for employee salary disbursements in the system, ensuring accurate payroll processing.
Expense Type Management Module - User Guide
The Expense Type Management Module allows HR administrators to manage and categorize various expense types. This module is critical for tracking employee reimbursements and deductions. It provides the ability to add new expense types, update existing ones, and delete those that are no longer needed.
User Interface Overview
The Expense Type page is located under the Master Details section in the HRIS system. It enables users to categorize expenses such as travel allowances, telephone deductions, or other expense categories. The interface consists of several key components explained below:
Components of the Expense Type Interface
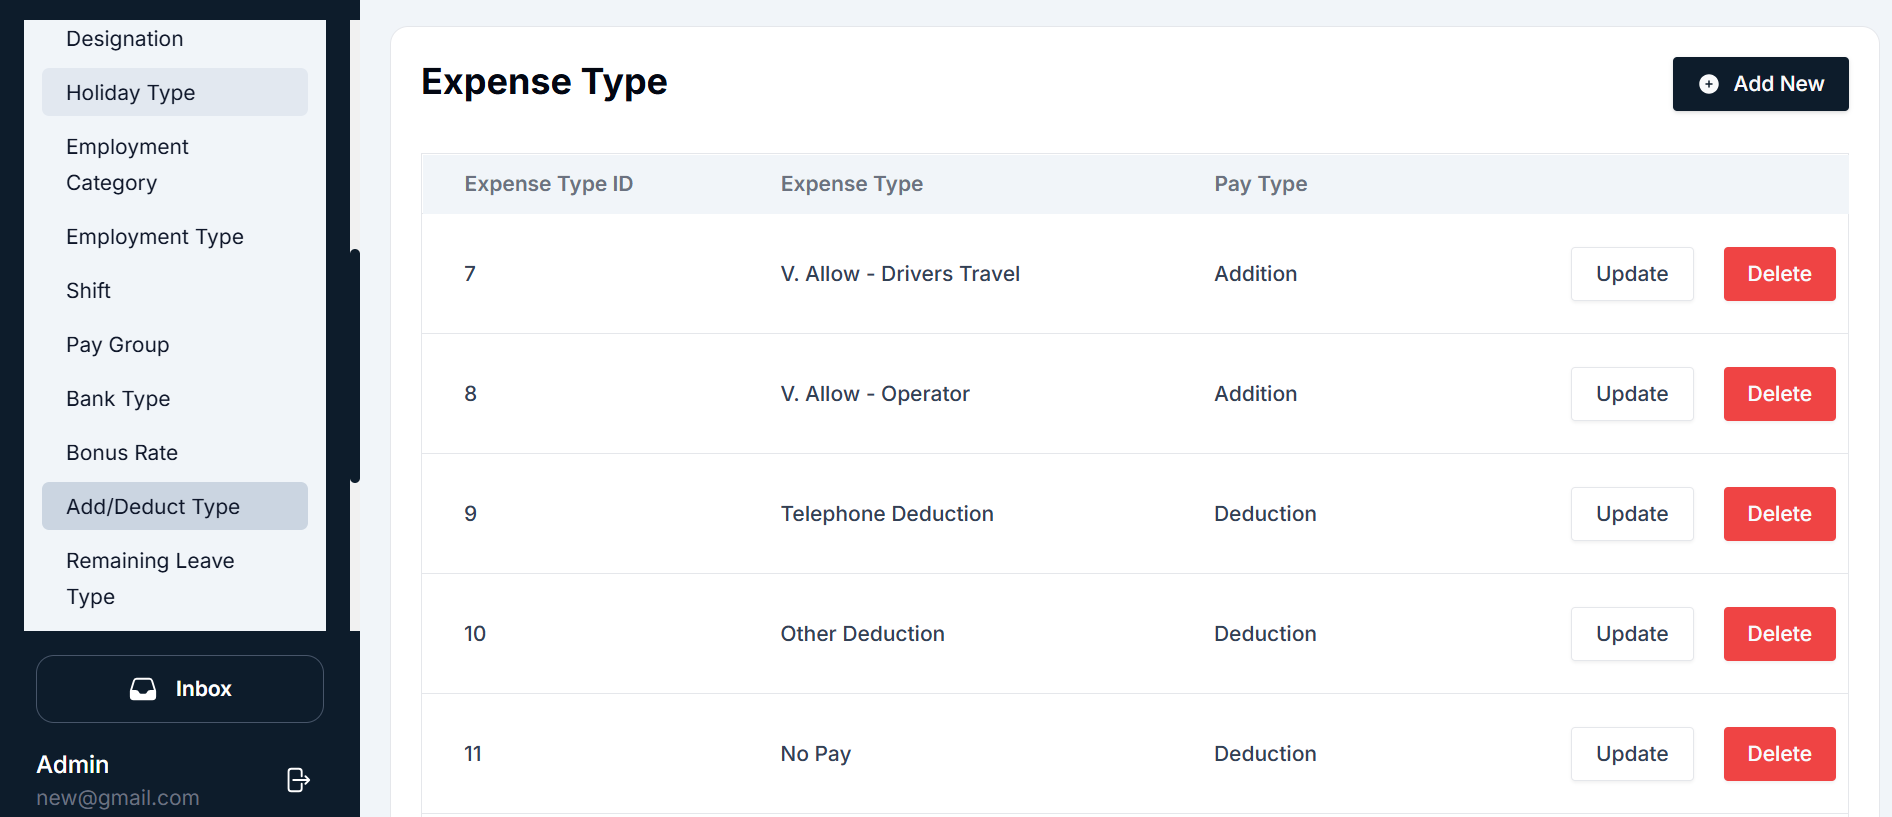
- Navigation Sidebar: Located on the left side of the page, the sidebar provides easy navigation between different modules of the HRIS system.
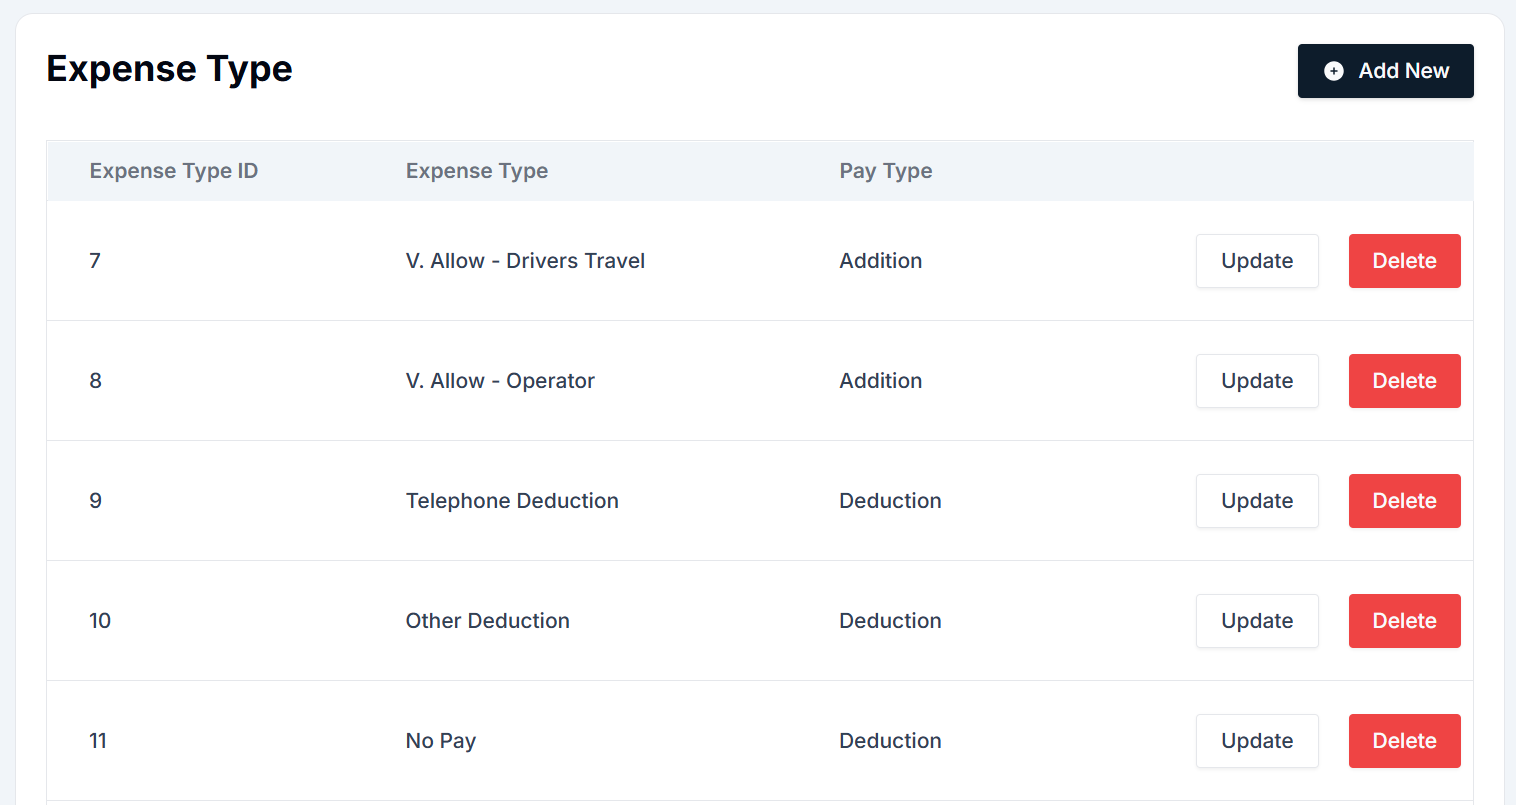
- Expense Type Table: Displays a list of existing expense types, with columns such as Expense Type ID, Expense Type, Pay Type, and Actions.
- Action Buttons:
- Add New: Opens the form to create a new expense type.
- Update: Lets users modify an existing expense type.
- Delete: Removes an expense type from the system.
Adding a New Expense Type
To add a new expense type, follow these steps:
- Navigate to the Expense Type page under Master Details.
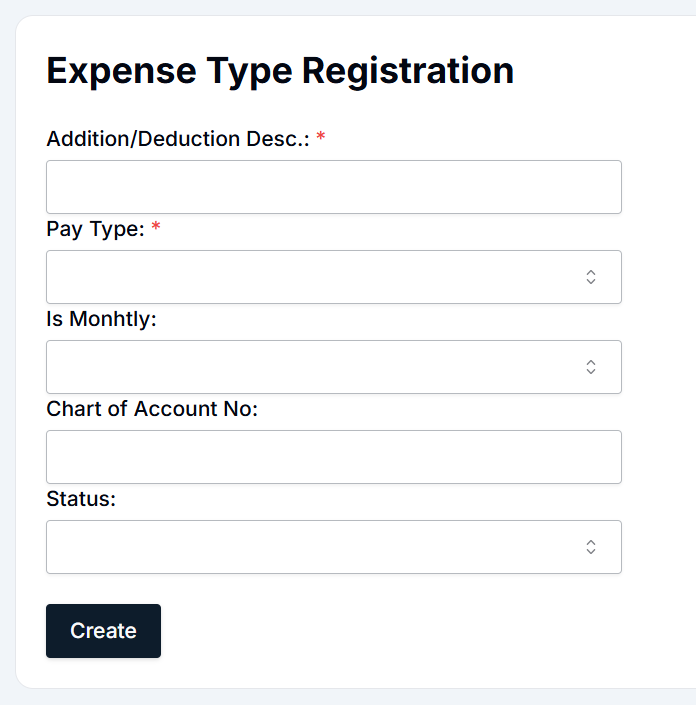
- Click the + Add New button located at the top-right corner of the screen.
- Fill in the form with the necessary details and click Create.

Updating an Existing Expense Type
- Navigate to the Expense Type page under Master Details.
- Locate the expense type you wish to update.
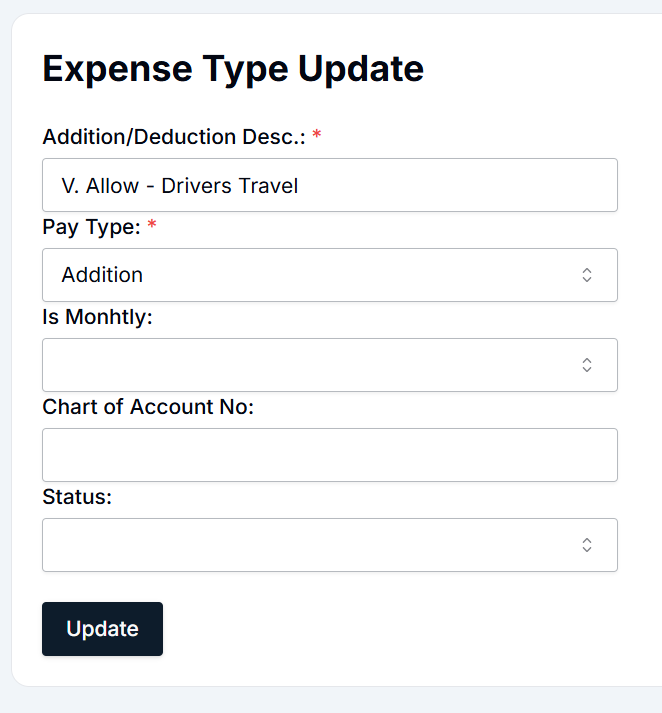
- Click the Update button next to the expense type.
- Modify the details as necessary and click Update to save the changes.

Deleting an Expense Type
- Navigate to the Expense Type page under Master Details.
- Locate the expense type you wish to delete.
- Click the Delete button next to the expense type.
- Confirm the deletion by clicking Yes.
Summary
- Expense Type Table: Displays existing expense types, including their descriptions and associated pay types (addition or deduction).
- Add New: Click + Add New, enter the expense type description, select the pay type, and click Create.
- Update: Modify an existing expense type by clicking Update, making changes, and saving.
- Delete: Remove any expense type by clicking Delete and confirming the action.
By following these steps, HR teams can efficiently manage the different expense types in the system, ensuring accurate record-keeping and financial processing for employee reimbursements and deductions.
Remaining Leave Type Management Module - User Guide
The Remaining Leave Type Management module is used to manage and track various types of leave in the HRIS system. It allows users to add, update, and delete different leave types, such as Annual, Casual, Short Leave, and more. This guide provides detailed instructions on how to manage these leave types efficiently.
User Interface Overview
The Remaining Leave Type module can be found under the Master Details section in the HRIS system. The interface contains several key components that allow for easy interaction with the system.
Components of the Remaining Leave Type Interface
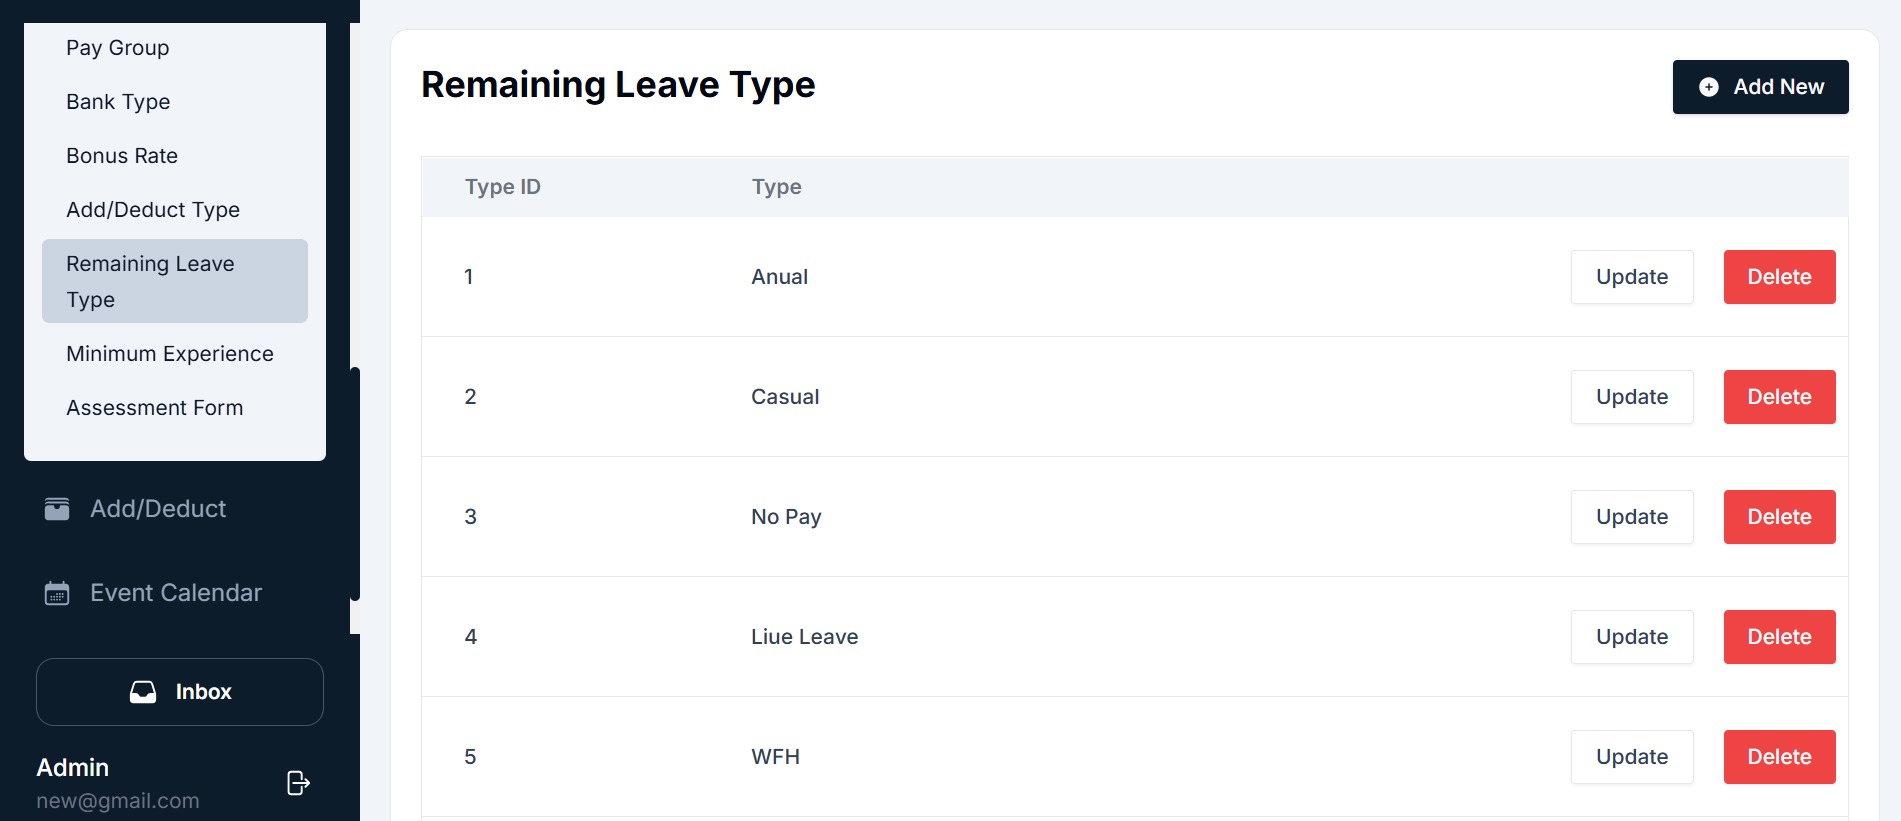
- Navigation Sidebar: Located on the left side of the page, this sidebar provides quick access to different modules of the HRIS system. To manage Remaining Leave Types, navigate to Master Details → Remaining Leave Type.
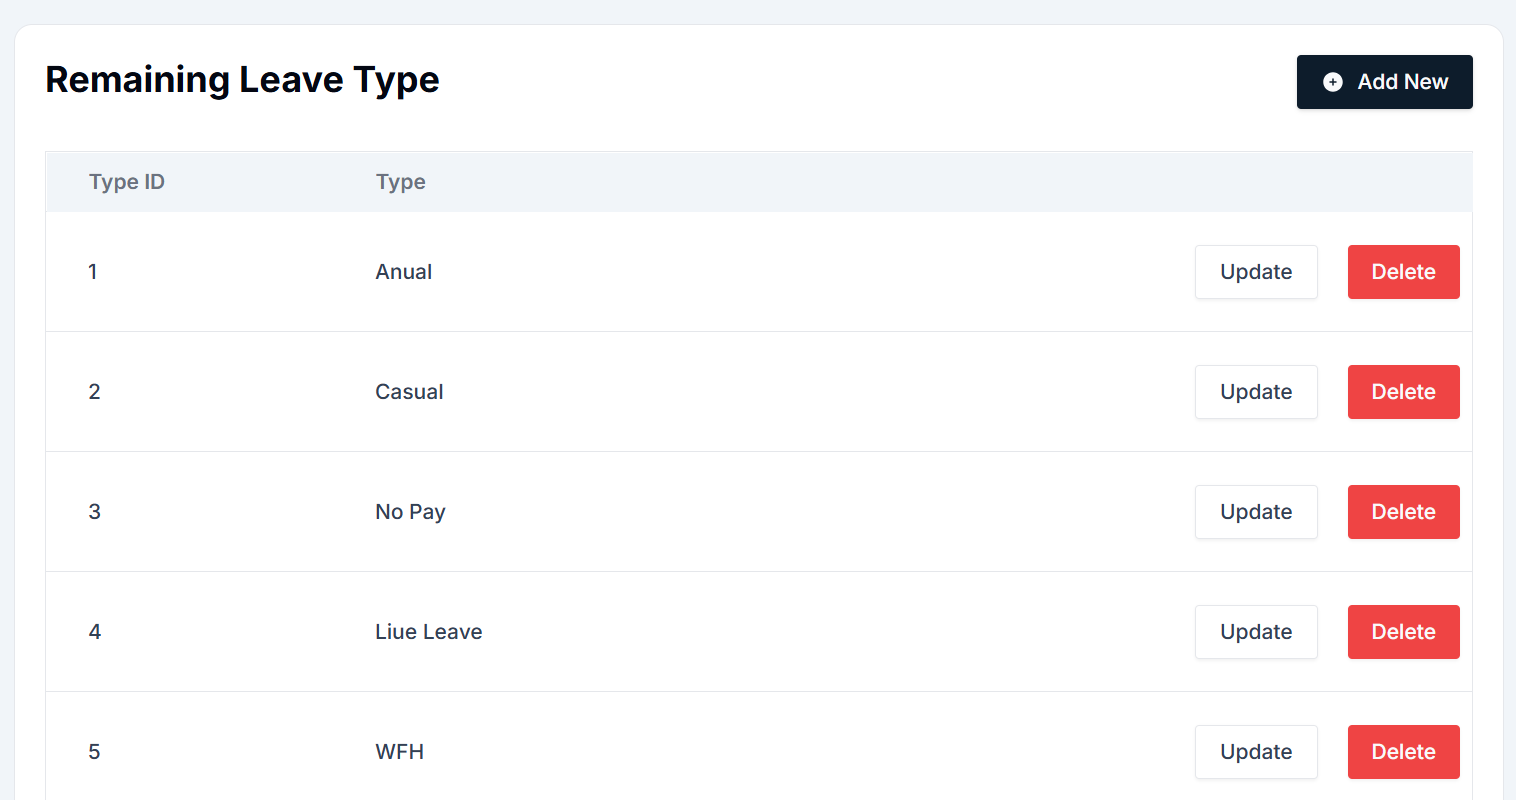
- Leave Type Table: The main area of the screen displays a list of existing leave types. The table consists of the following columns:
- Type ID: A unique identifier for each leave type.
- Type: The name of the leave type (e.g., Annual, Casual).
- Actions: Buttons for updating or deleting a leave type.
- Actions Button:
- Add New: Opens a form to add a new leave type.
- Update: Each leave type in the list has an Update button to modify its details.
- Delete: Each leave type has a Delete button to remove it from the system.
Adding a New Leave Type
To add a new leave type to the system, follow the steps below:

- Navigate to the Remaining Leave Type page under the Master Details section from the sidebar.
- Click the + Add New button located at the top-right corner of the screen.
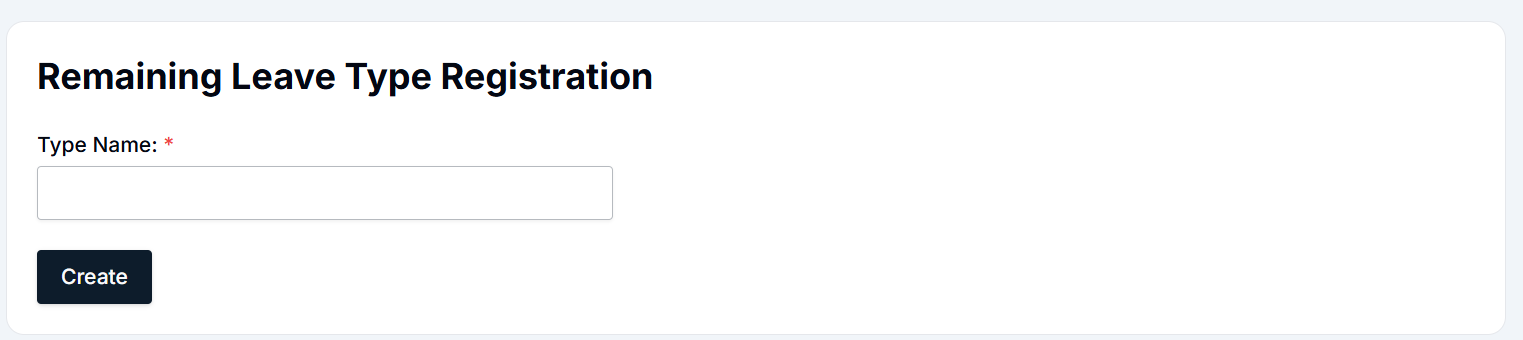
- Complete the Leave Type Registration form:
- Type Name: Enter the name of the leave type (e.g., "Annual", "Casual", "No Pay").
- Click the Create button to save the new leave type.
- The new leave type will appear in the list of leave types on the Remaining Leave Type page.
Updating an Existing Leave Type
To update an existing leave type (e.g., changing the name or other details), follow these steps:

- Navigate to the Remaining Leave Type page under Master Details.
- Find the leave type you want to update.
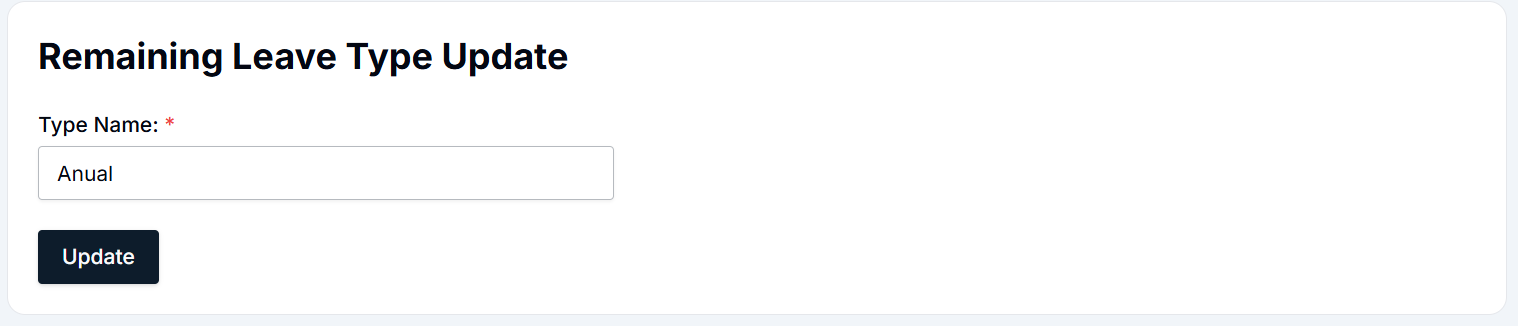
- Click the Update button next to the leave type.
- The Leave Type Update form will appear with the current details.
- Modify the necessary fields (e.g., Type Name).
- Click the Update button to save the changes.
- The updated leave type details will now appear in the leave type list.
Deleting a Leave Type
To remove a leave type from the system, follow these steps:
- Navigate to the Remaining Leave Type page under Master Details.
- Find the leave type you want to delete.
- Click the Delete button next to the leave type.
- A confirmation pop-up will appear asking you to confirm the deletion.
- Click Yes to confirm the deletion or No to cancel.
- Once deleted, the leave type will no longer appear in the list.
Summary
- Remaining Leave Type Table: Displays the existing leave types and their associated actions.
- Add New: Click the + Add New button, fill in the Type Name, and click Create to add a new leave type.
- Update: Modify an existing leave type by clicking Update, making the necessary changes, and saving.
- Delete: Remove any leave type by clicking Delete and confirming the deletion.
By following these steps, HR teams can effectively manage leave types in the system, ensuring proper tracking and organization of different types of leave available to employees.
Minimum Experience Management Module - User Guide
The Minimum Experience module in the HRIS system allows users to efficiently manage the experience levels required for various roles. This guide explains the user interface (UI) and provides detailed instructions on how to add, update, and delete experience levels.
User Interface Overview
The Minimum Experience page is located under the Master Details section in the HRIS system. Users can manage different levels of experience required for employees. The interface consists of several key components, explained below:
Components of the Minimum Experience Interface
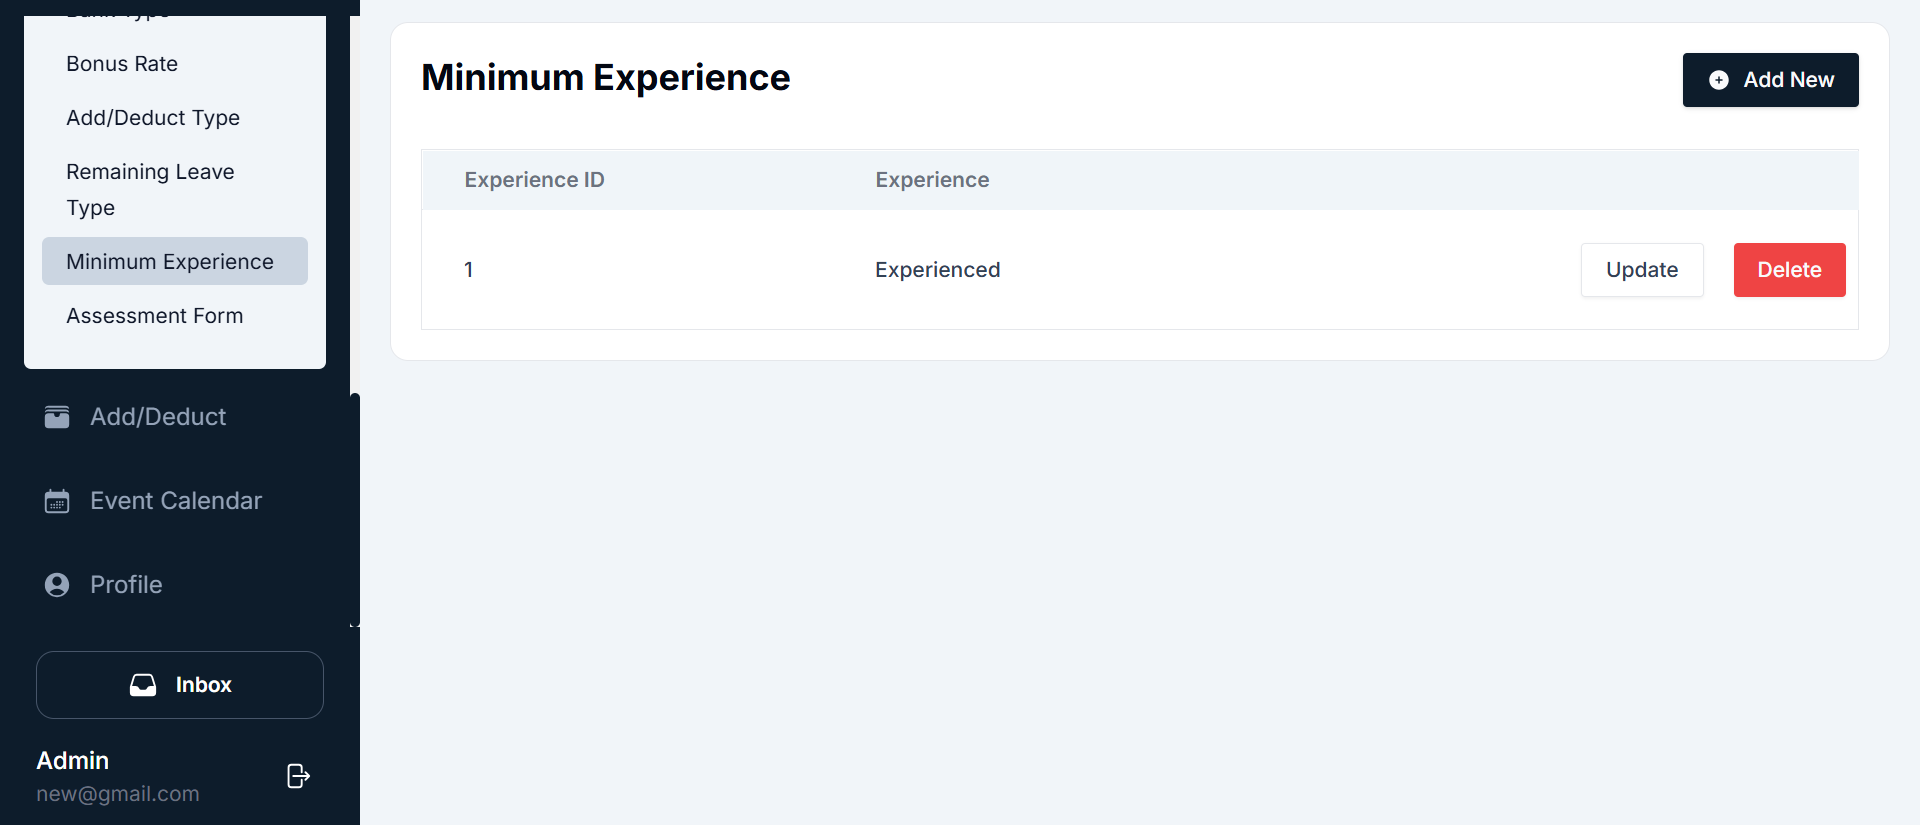
- Navigation Sidebar: Located on the left side of the page, this sidebar allows navigation between different modules of the HRIS system. To manage Minimum Experience levels, go to: Master Details → Minimum Experience.
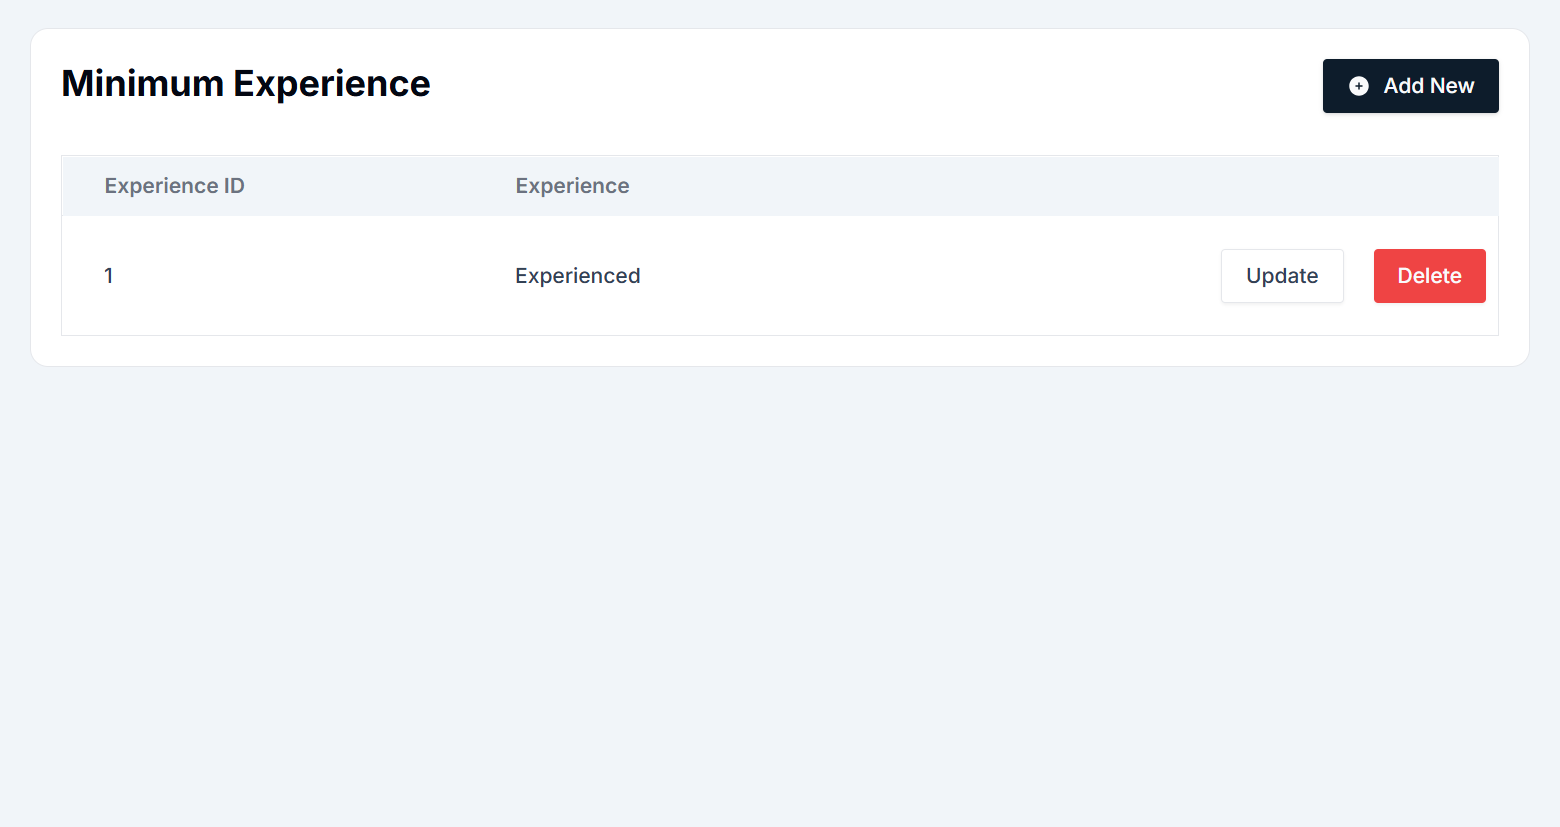
- Minimum Experience Table: The main area of the screen displays a list of existing minimum experience levels. The table consists of the following columns:
- Experience ID: A unique identifier for each experience level.
- Experience: The name or category of the experience (e.g., "Experienced", "Beginner", "Intermediate").
- Actions: Buttons for updating or deleting an experience level.
- Actions Button:
- Add New: Allows users to create a new minimum experience level.
- Update: Each experience level in the list has an Update button to modify its details.
- Delete: Each experience level has a Delete button to remove it from the system.
Adding a New Minimum Experience Level
To add a new experience level, follow these steps:

- Navigate to the Minimum Experience page under the Master Details section from the sidebar.
- Click the + Add New button at the top-right of the screen.
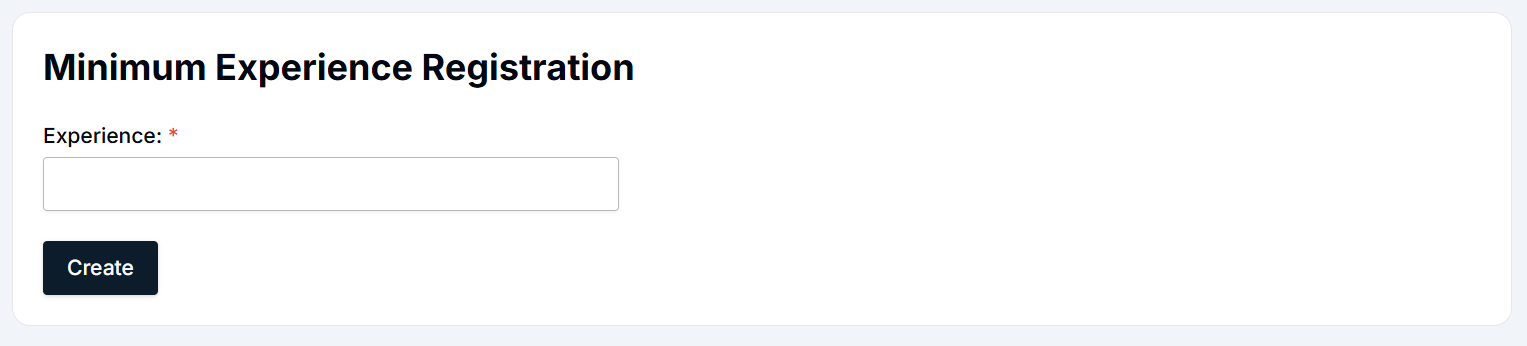
- Complete the form:
- Experience: Enter the name or category of the experience (e.g., "Experienced", "Beginner", "Intermediate").
- Click the Create button to save the new experience level.
- Once created, the new experience level will appear in the experience table.
Updating an Existing Minimum Experience Level
To modify an existing experience level, follow these steps:


- Navigate to the Minimum Experience page under Master Details.
- Locate the experience level you want to update.
- Click the Update button next to the experience level.
- The Minimum Experience Update form will open with the current details.
- Make the necessary changes (e.g., Experience).
- Click the Update button to save the changes.
- The updated experience level details will now reflect in the experience table.
Deleting a Minimum Experience Level
To remove a minimum experience level from the system, follow these steps:
- Navigate to the Minimum Experience page under Master Details.
- Locate the experience level you want to delete.
- Click the Delete button next to the experience level.
- A confirmation pop-up will appear.
- Click Yes to confirm the deletion or No to cancel.
- Once deleted, the experience level will no longer appear in the list.
Summary
- Minimum Experience Table: Displays existing experience levels and their details.
- Add New: Click + Add New, enter the experience level, and click Create.
- Update: Modify an existing experience level by clicking Update, making changes, and saving.
- Delete: Remove any experience level by clicking Delete and confirming the action.
By following these steps, HR teams can efficiently manage Minimum Experience levels in the system, ensuring accurate experience classification and role assignments.
Interview Assessment Form Management Module - User Guide
The Interview Assessment Form module in the HRIS system allows users to create and manage assessment forms for interview evaluations. This guide explains the interface and provides step-by-step instructions on adding, updating, and managing interview questions.
User Interface Overview
The Interview Assessment Form page is accessible under the Master Details section in the HRIS system. Users can create new assessment forms by adding multiple questions. The interface consists of the following key components:
Components of the Interview Assessment Form Interface
- Navigation Sidebar: The left-side navigation menu allows users to navigate between different modules of the HRIS system. To access the Interview Assessment Form, go to: Master Details → Assessment Form.
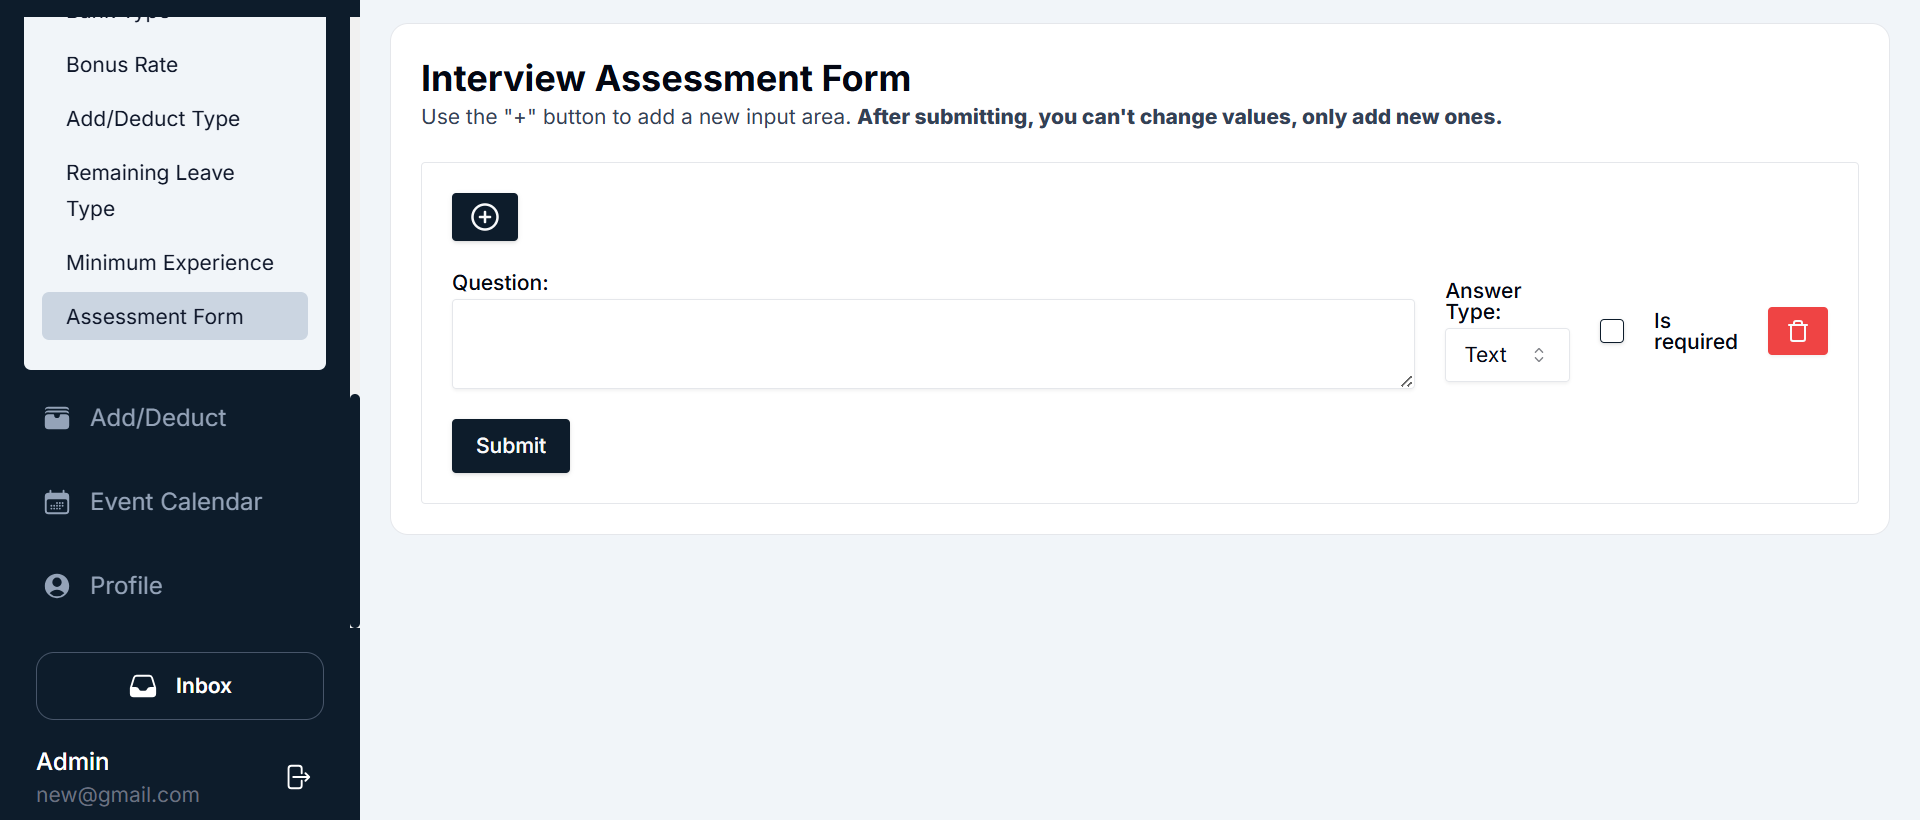
- Assessment Form Creation Panel: The main area of the screen displays the assessment form creation panel. Users can add multiple questions to the form, specify answer types, and mark required fields.
- Form Fields: Each question field consists of:
- Question: Text area to enter the interview question.
- Answer Type: Dropdown menu to choose the response type (e.g., Text, Multiple Choice, Numeric).
- Is Required: Checkbox to mark whether the question is mandatory.
- Delete Button: Red trash icon to remove the question before submission.
- Action Button:
- (+) Add New Question: Adds a new question field to the form.
- Submit: Saves and submits the assessment form.
Adding a New Interview Assessment Form
Users can create a new interview assessment form by adding multiple questions. Follow these steps:
Navigate to Master Details → Assessment Form from the sidebar.
Click the "+" button to add a new question.
Fill in the fields:
- Question: Type the interview question.
- Answer Type: Select the answer format (e.g., text, multiple choice).
- Is Required: Check this box if the question is mandatory.
Repeat steps 2-3 to add multiple questions.
Click the Submit button to save the form.
After submitting, you cannot edit the existing questions. You can only add new ones.
To remove a question before submission, click the Delete button (red trash icon).
Updating an Assessment Form
Once an assessment form is submitted, it cannot be modified. However, users can add new questions if needed.
- Navigate to Master Details → Assessment Form.
- Click the "+" button to add a new question.
- Fill in the new question details.
- Click Submit to save the updated form.
Deleting Questions from an Assessment Form
Before submitting the form, users can delete unnecessary questions.
- Navigate to Master Details → Assessment Form.
- Locate the question you want to delete.
- Click the Delete button (red trash icon).
- Confirm the deletion if prompted.
- You can only delete questions before submission.
- Once submitted, questions cannot be removed.
Summary
- Assessment Form Table: Displays existing assessment forms.
- Add Questions: Use the "+" button to add questions.
- Submit: Finalizes the form.
- Modify Questions: Once submitted, only new questions can be added, but existing ones cannot be modified or deleted.
By following these steps, HR teams can create structured interview assessment forms that streamline candidate evaluations.